

Vector Feathering requires the Rive Renderer. Runtimes or packages that draw with another renderer, such as the web runtime’s Canvas2D packages, don’t support it. See Choosing a Renderer.
Adding a feather
You can feather any fill or stroke.1
Select the shape.
2
In the Inspector, click the feather icon on the fill or stroke you want to soften. You can also turn on Feather in the fill or stroke options.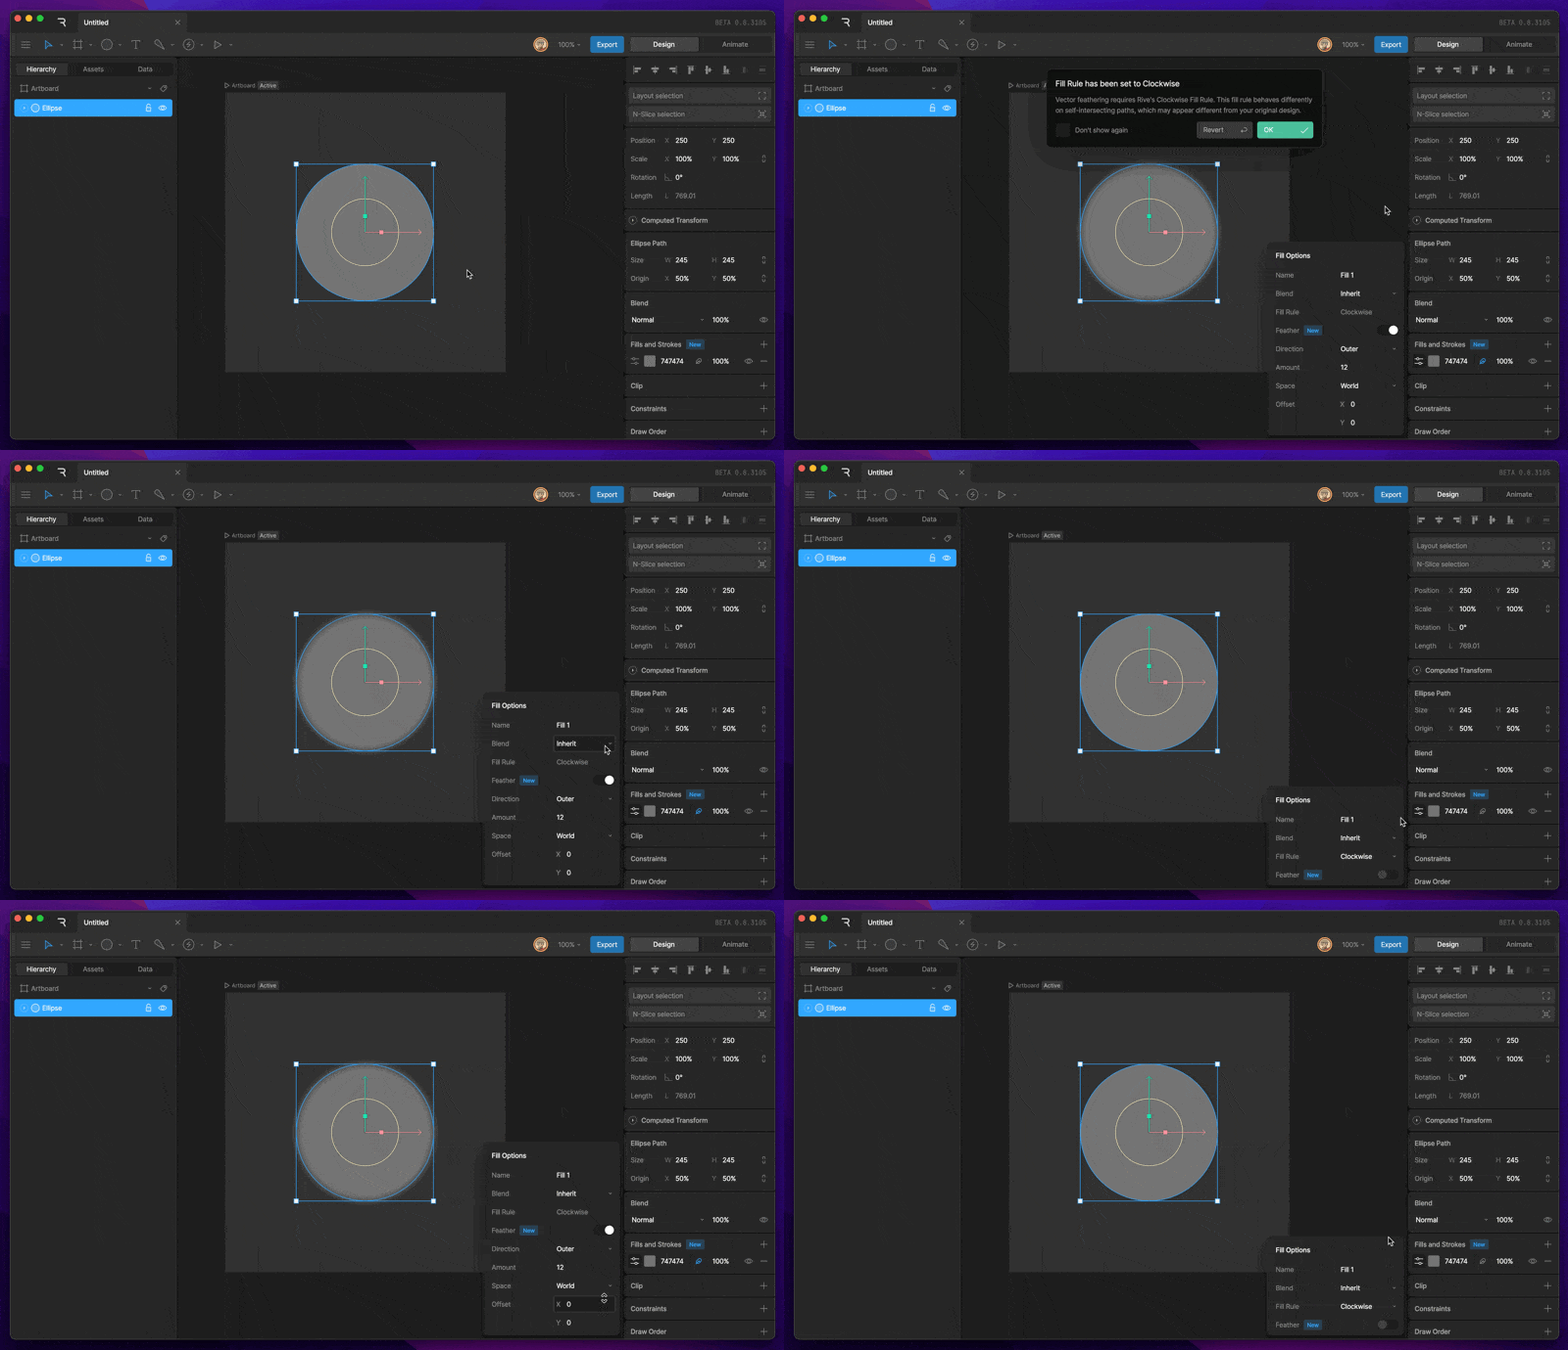
3
Open the fill or stroke options to adjust the feather.
Feather options
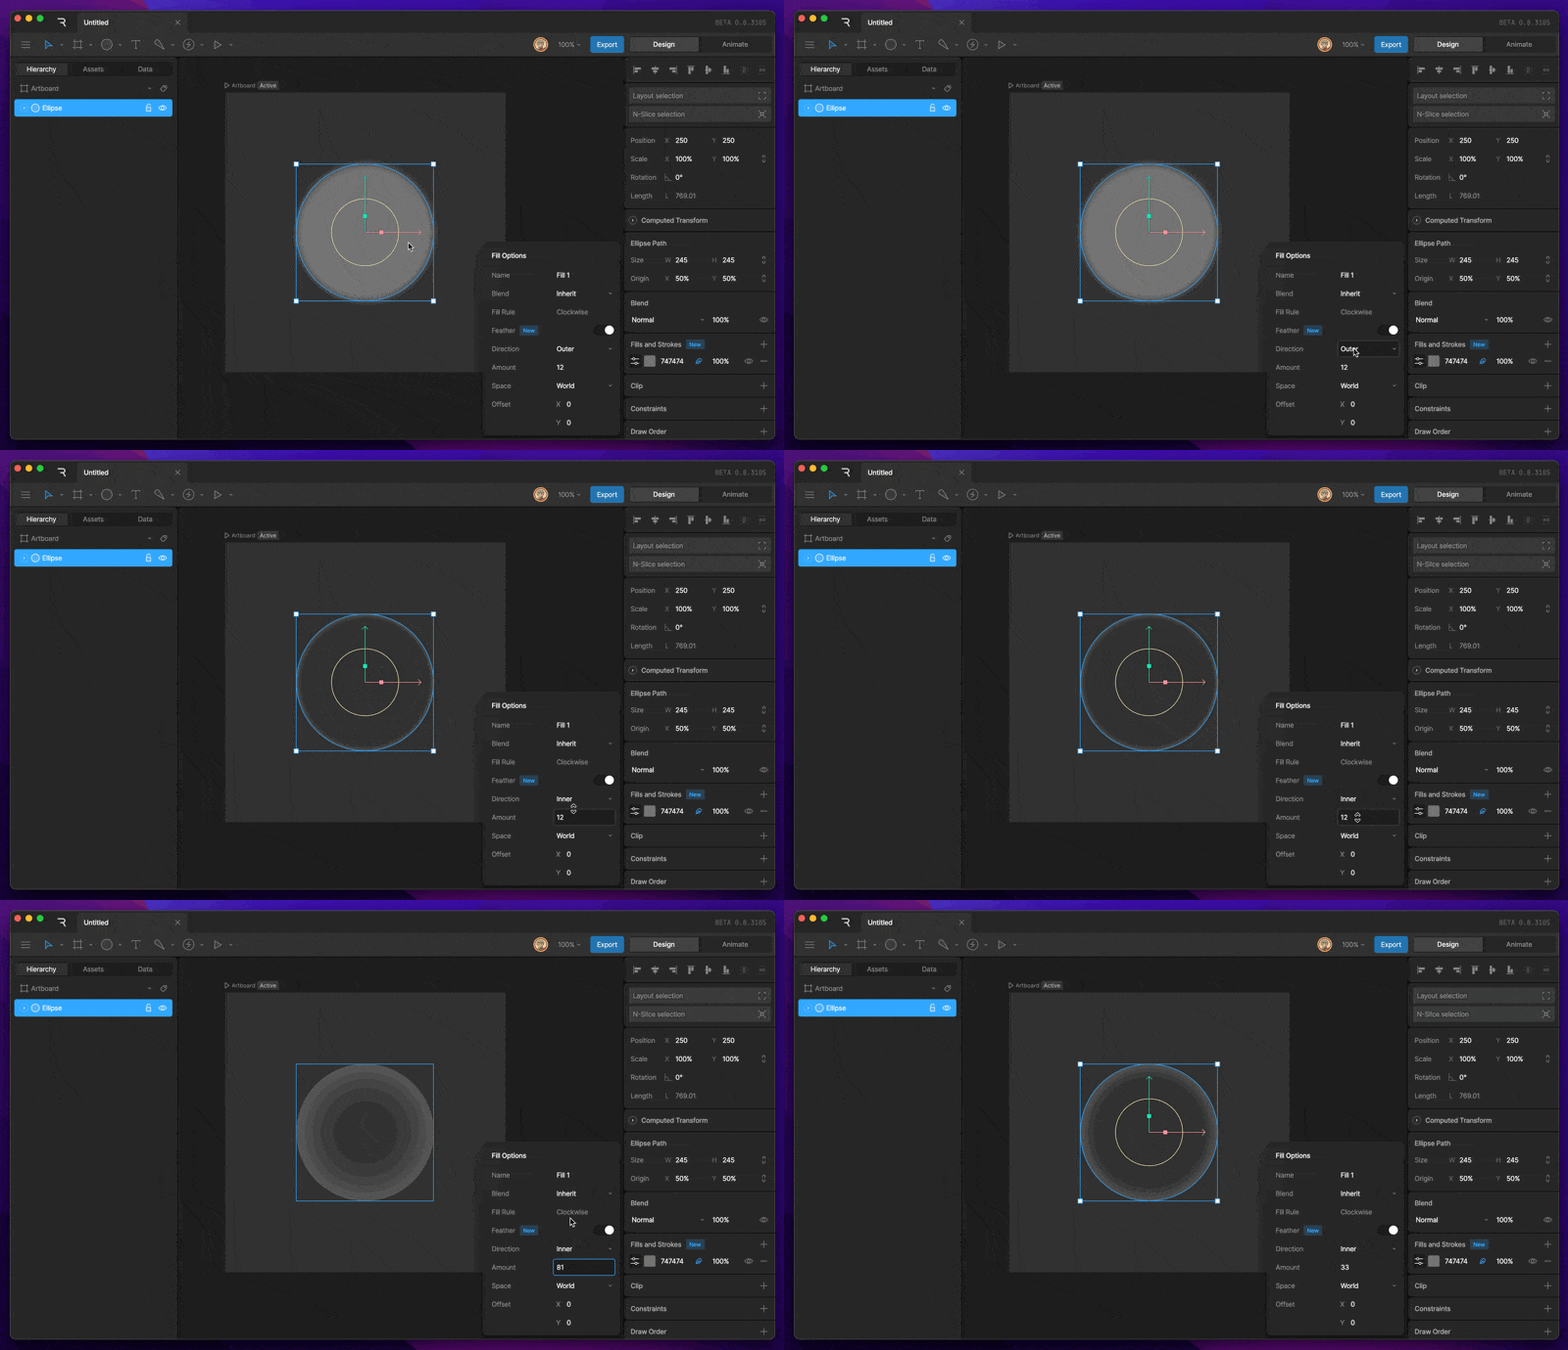
Direction
Only fills have a direction.- Outer feathers outward from the edge of the path, like a glow or a shadow. This is the default.
- Inner feathers inward from the edge, like an inner shadow or a vignette.
Amount
How soft the edge is. Higher values spread the feather over a wider area. The default is 12.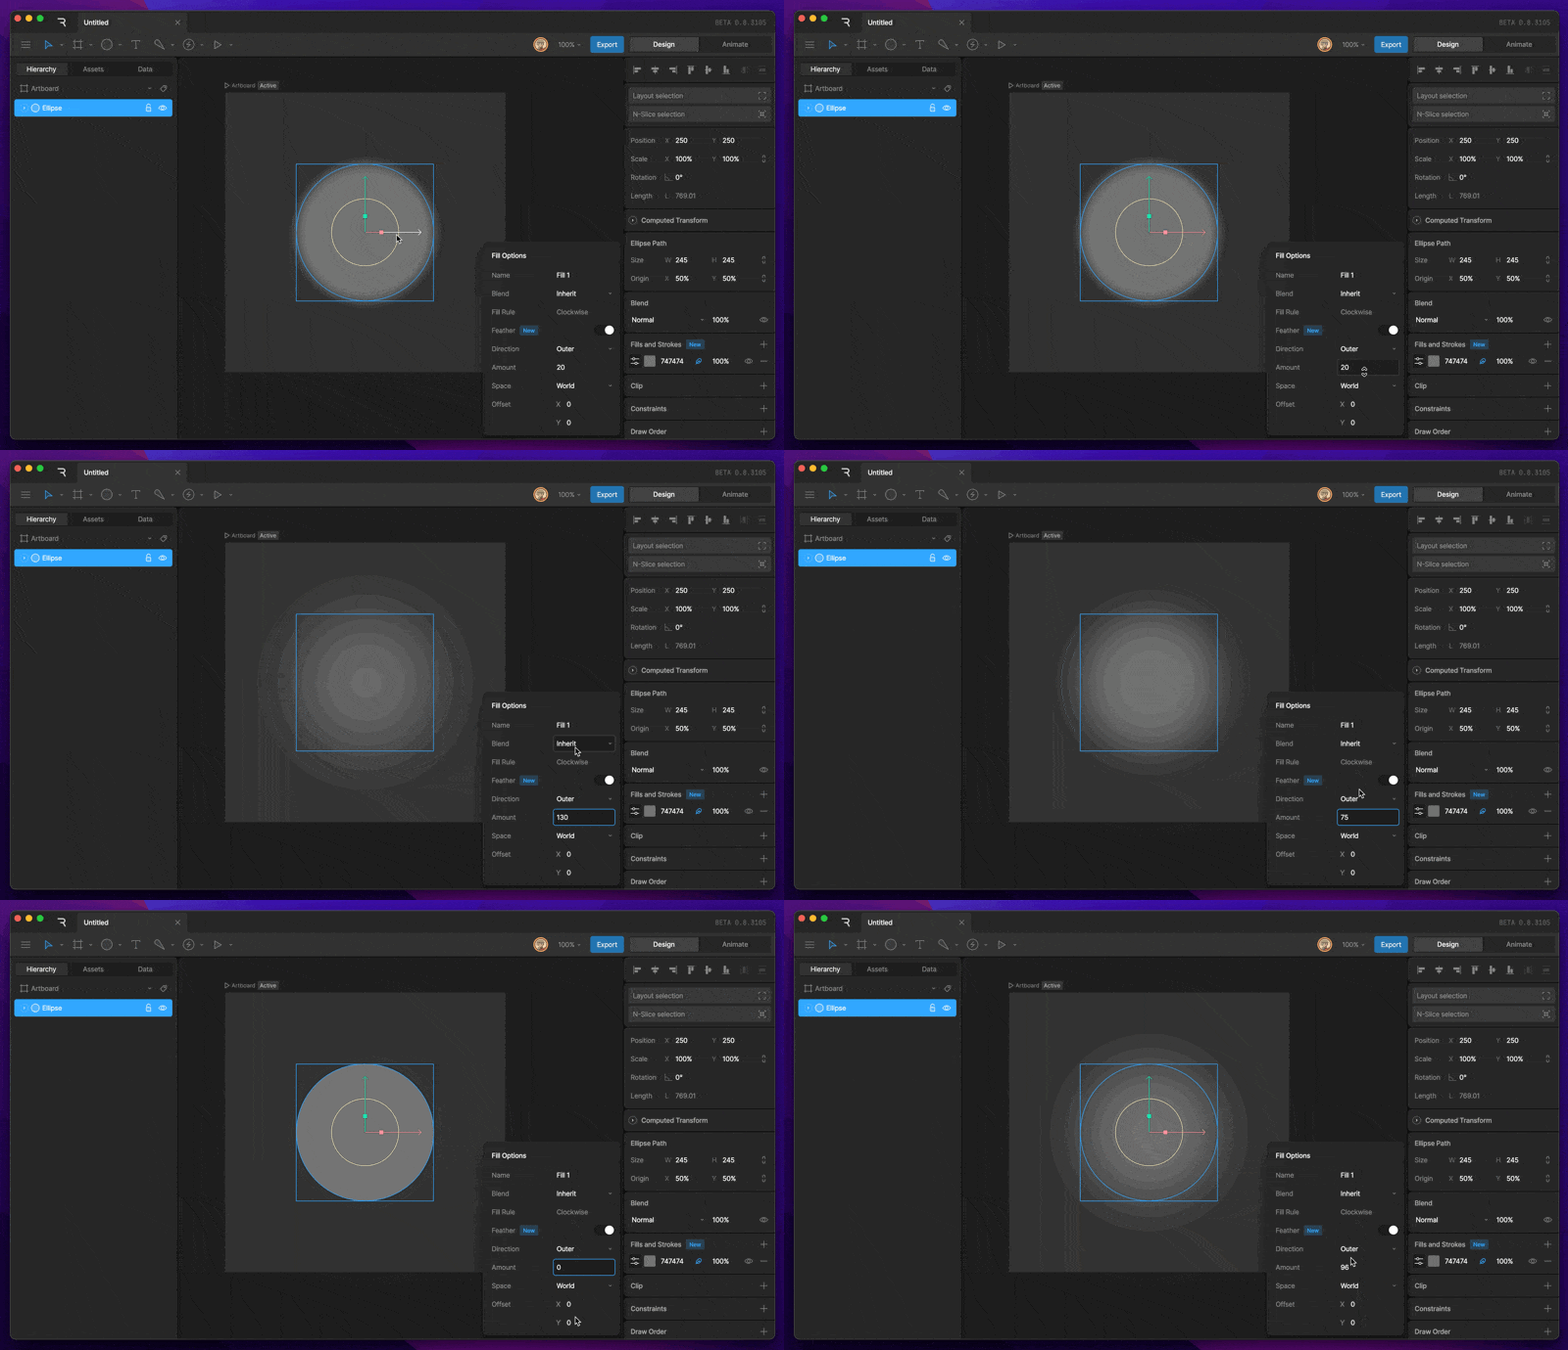
Offset
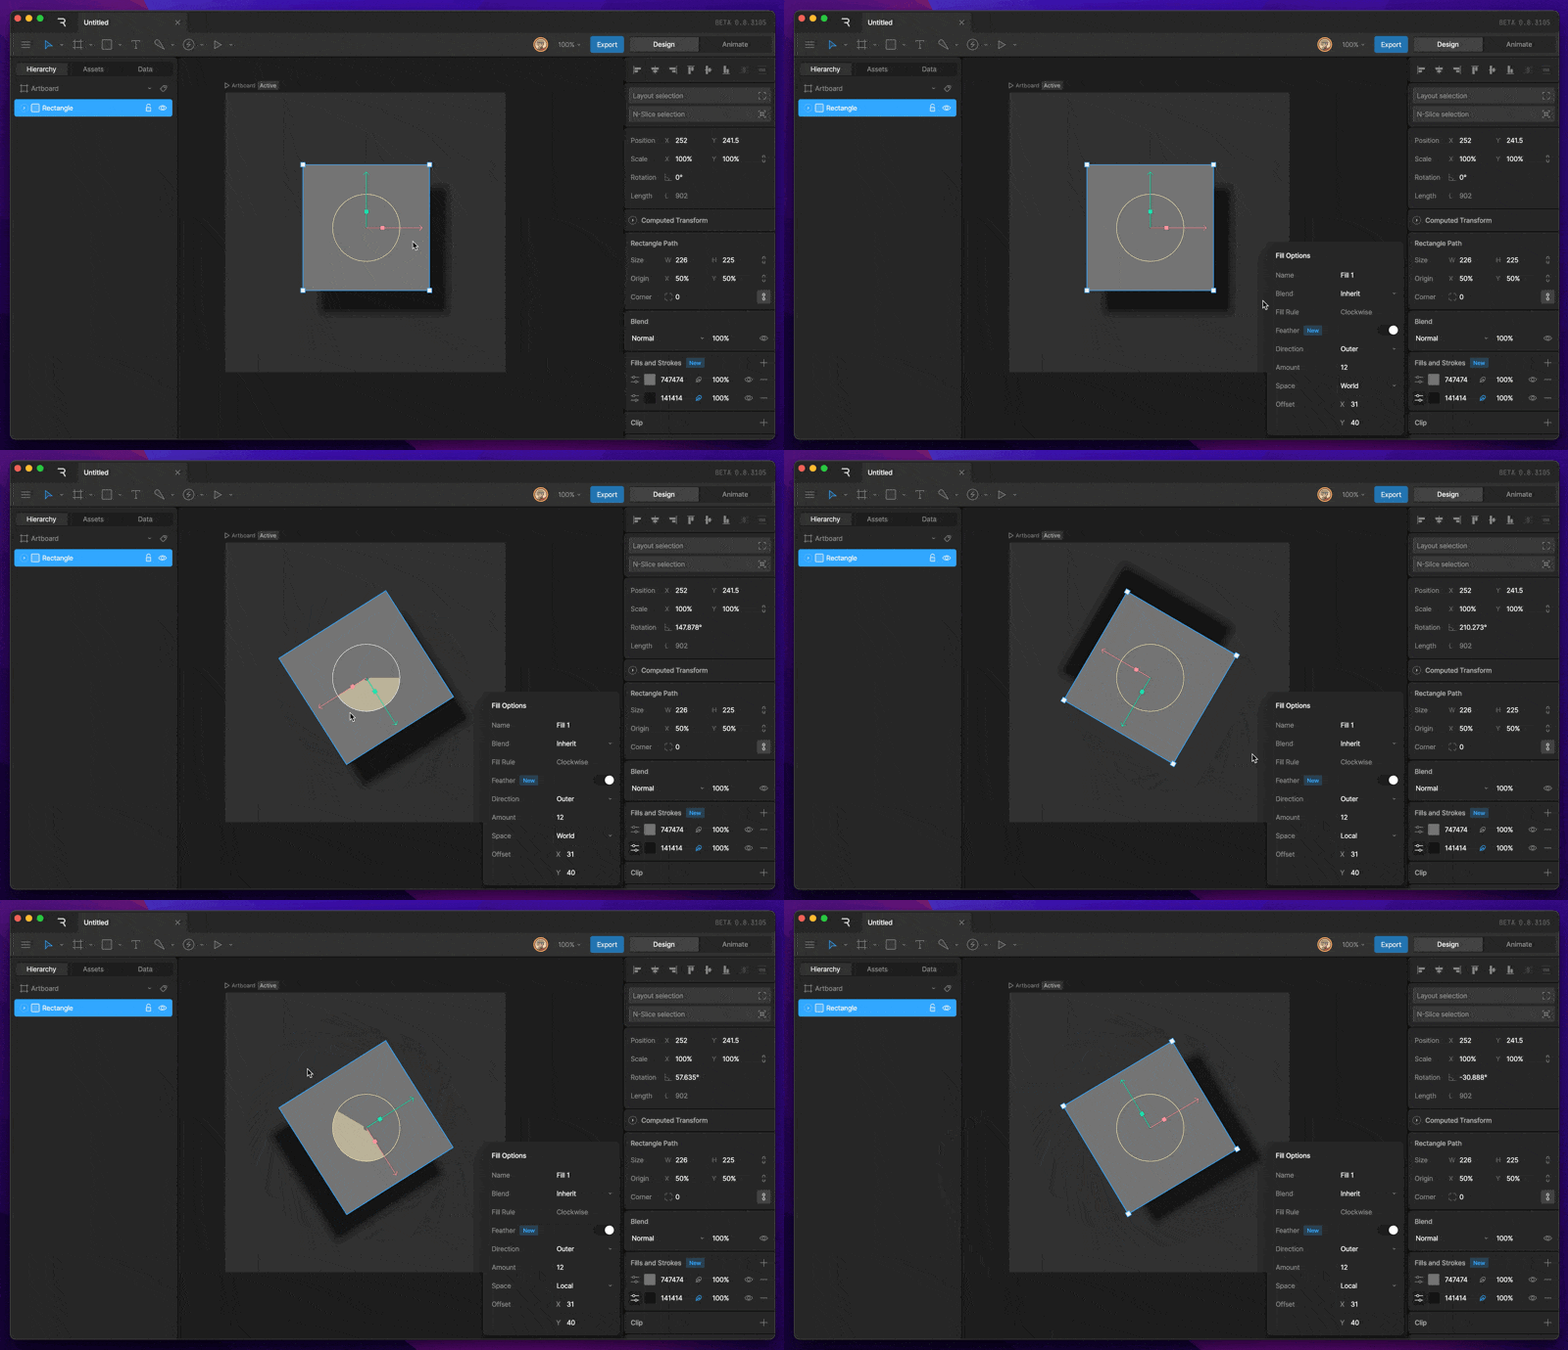
Moves the feather away from the path by an X and Y distance. Use it to cast a shadow below or to the side of a shape.Space
Sets which transform the offset follows.- World keeps the offset pointing the same way, even if the shape or its parents rotate or scale. Use it for drop shadows that should stay consistent with a single light source. This is the default.
- Local moves the offset with the shape, so it rotates and scales along with it.
Examples
Glow
1
Add a second fill or stroke to the shape and give it a bright color.
2
Move it behind the original fill or stroke.
3
Turn on its feather and raise the Amount until the glow is as wide as you want.
Drop shadow
1
Add a second fill to the shape, give it a dark, semi-transparent color, and move it behind the original fill.
2
Turn on its feather and set an Amount.
3
Set the Offset to move the shadow, for example a few units down and to the right.
4
Keep Space set to World so the shadow stays in the same direction as the shape rotates.