

To hide everything outside an artboard’s bounds, you don’t need a clip source. Turn on the artboard’s Clip option instead. This is mostly useful for artboards used as components, since content outside a top-level artboard isn’t rendered at runtime.
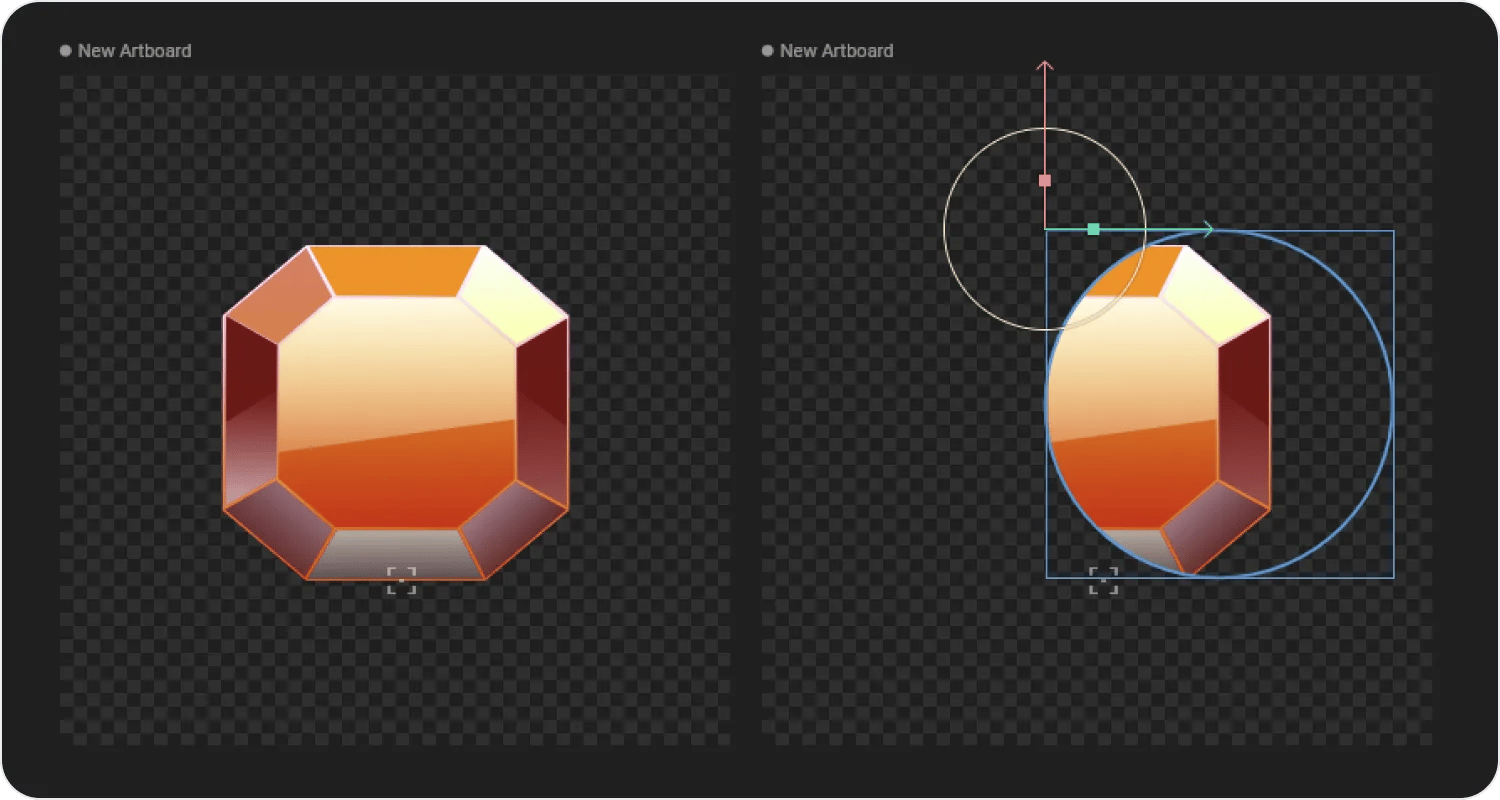
Adding a clip
1
Select the object you want to clip.
2
In the Clip section of the Inspector, click +. A blue border appears around the stage while Rive waits for you to pick a clip source.
3
Click the shape or group you want to clip with, on the stage or in the Hierarchy.
4
Hide the clip source by clicking its eye icon in the Hierarchy, so it doesn’t cover the graphics it’s clipping. The clip still works while the source is hidden.
What can be a clip source
A clip source can be a shape or a group, but not an artboard. When the source is a group, every shape inside it is combined into one clip. The clip follows the filled area of each shape, including any path effects such as a trim, and ignores strokes. A shape with only a stroke doesn’t clip anything.Using more than one clip
You can add as many clips to an object as you want. Only the parts of the object that fall inside every clip are drawn.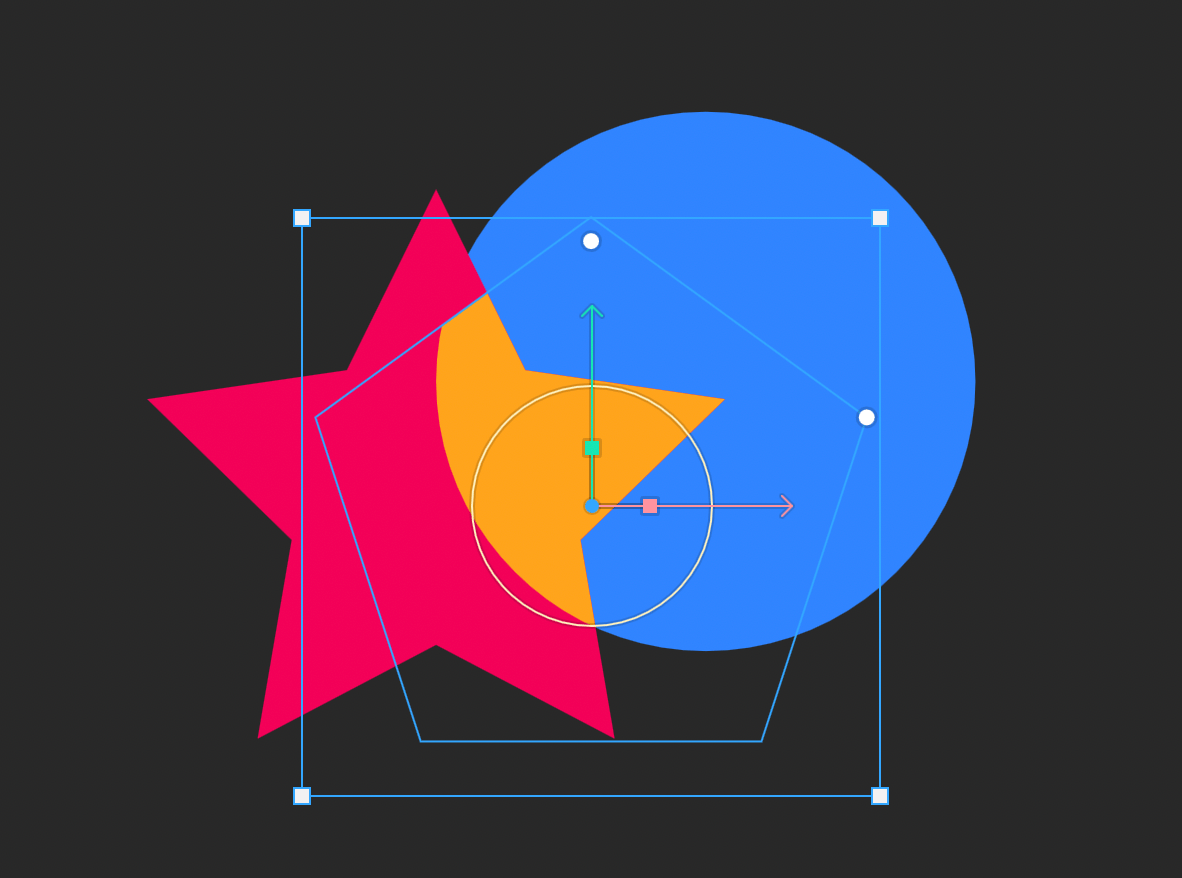
Turning a clip on and off
Click the eye icon on a clip in the Inspector to turn the clip off without removing it. You can key this toggle on a timeline or bind it to data to switch clipping on and off while your graphic runs.Fill rule and path direction
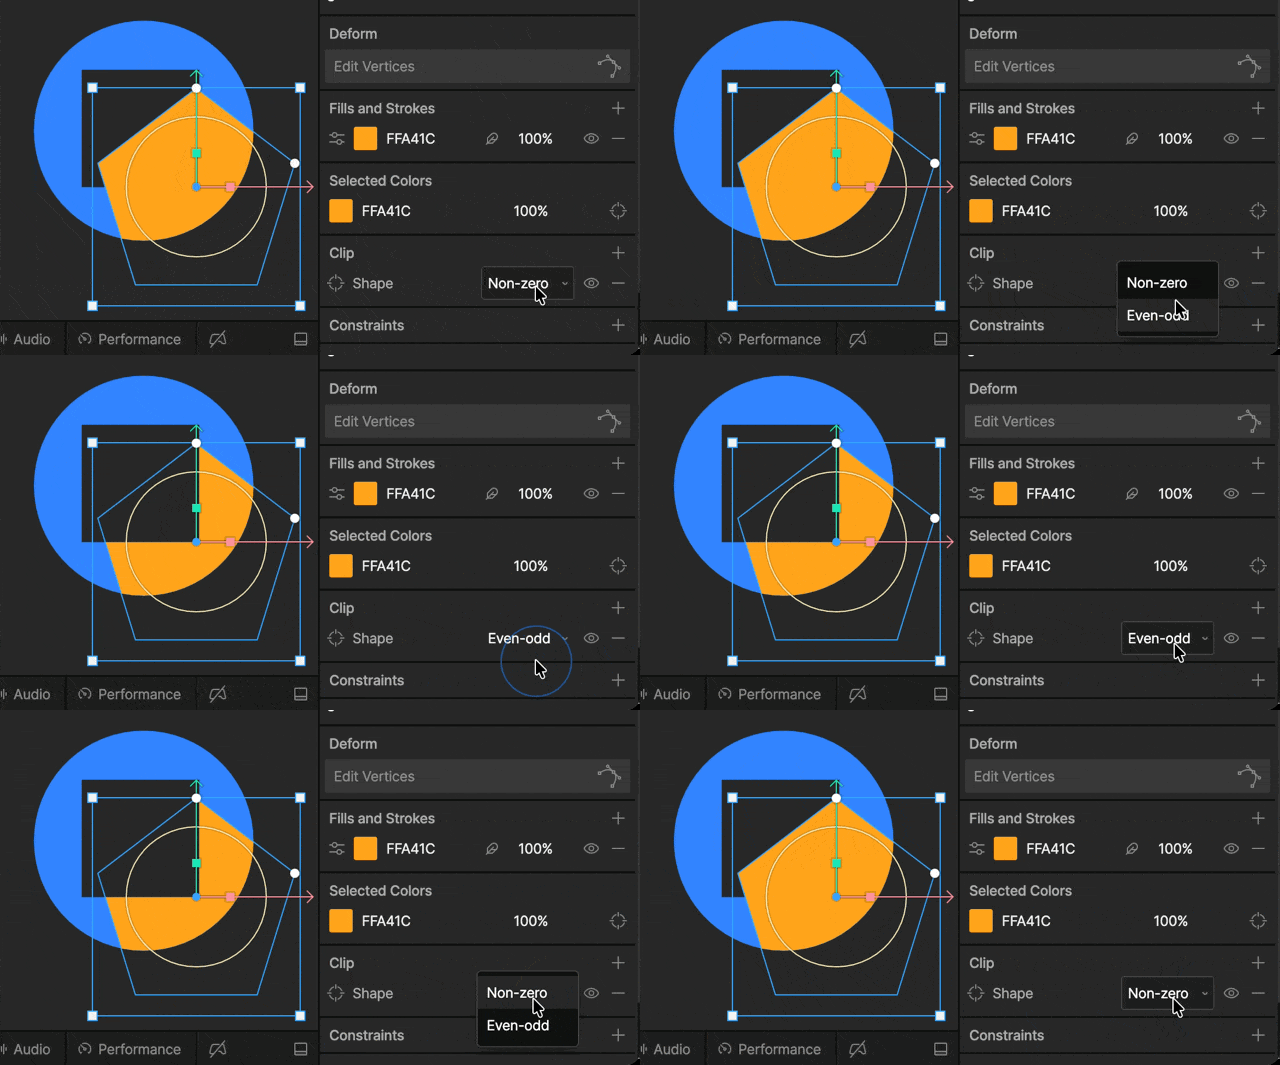
Each clip has a fill rule, set from the dropdown on the clip in the Inspector. It decides which areas count as inside when the source has overlapping paths, or paths inside other paths. It works like a fill’s fill rule, but it’s set separately: the source shape’s own fill rule doesn’t affect the clip.- Non-zero is the default. Whether an overlapping area is inside depends on the direction each path is drawn in.
- Even-odd alternates: an area inside one path is inside the clip, an area inside two is outside, and so on. Use it to cut holes. See Inverse clipping.
Inverse clipping
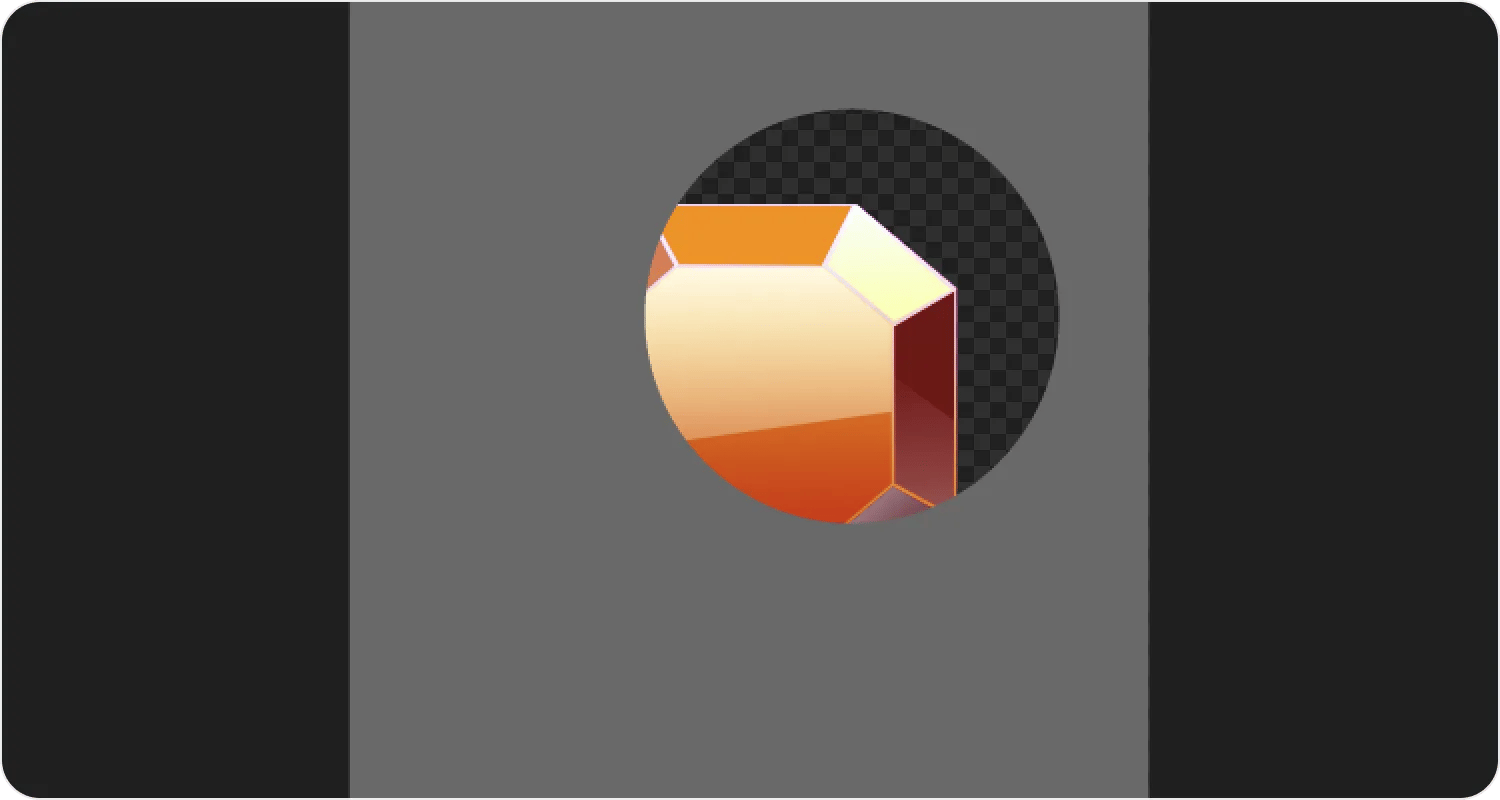
Inverse clipping does the opposite of a normal clip: it hides the graphics inside a shape and shows everything outside it.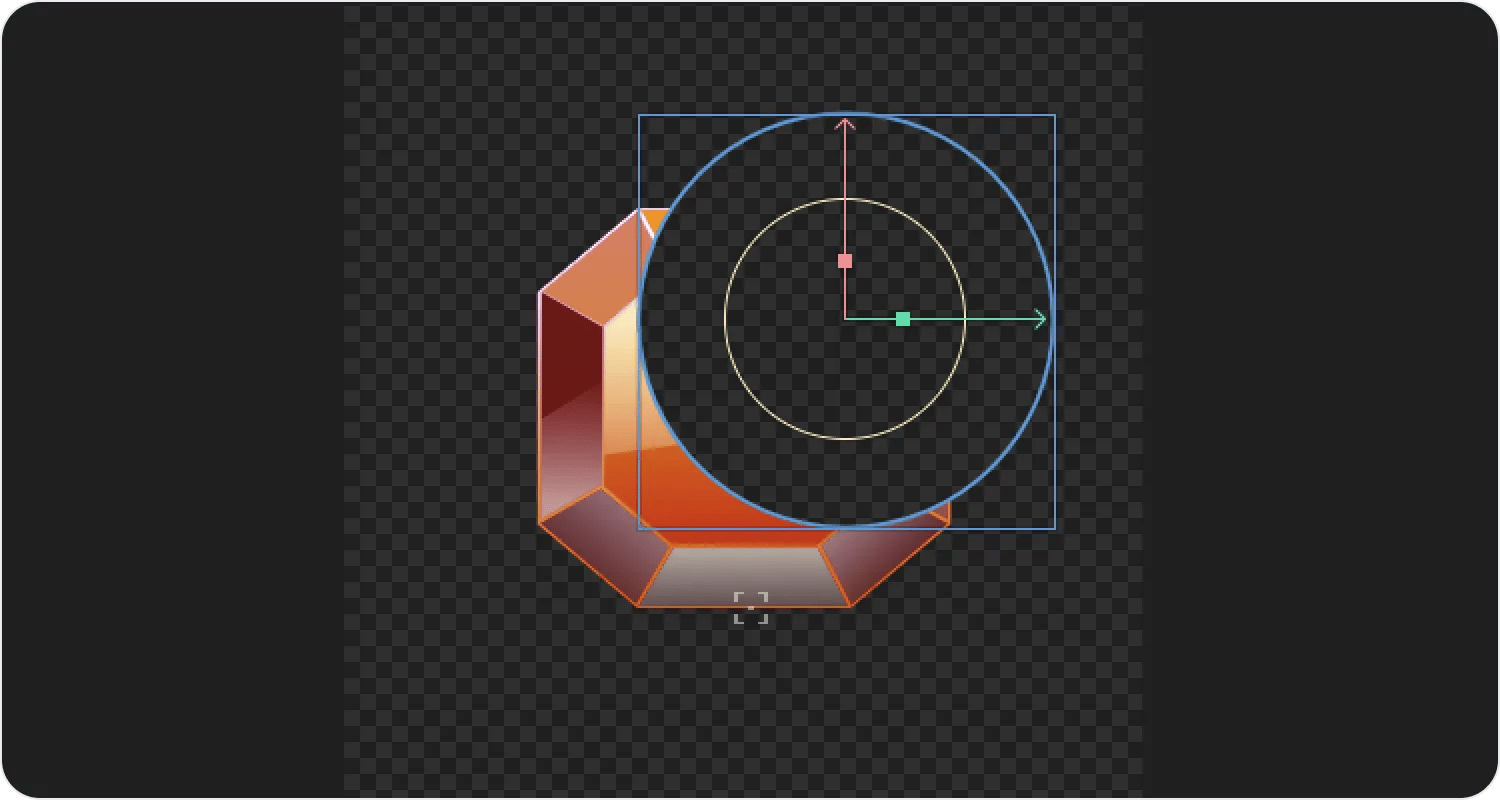
1
Draw a rectangle that covers the area you want to keep, such as the whole artboard.
2
Draw the shape of the hole, such as an ellipse. In the Hierarchy, move its path into the same shape as the rectangle’s path.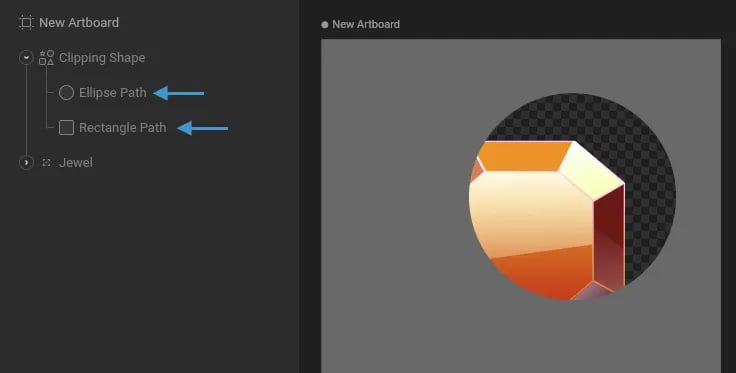
3
Select the object you want to clip, add a clip, and pick the shape you just made as its source.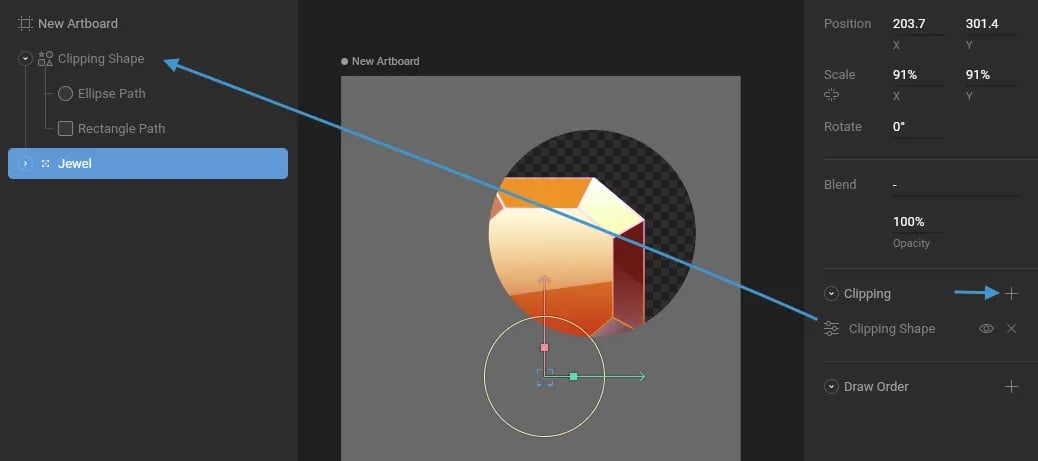
4
Set the clip’s fill rule to Even-odd, so the area inside both paths is cut out.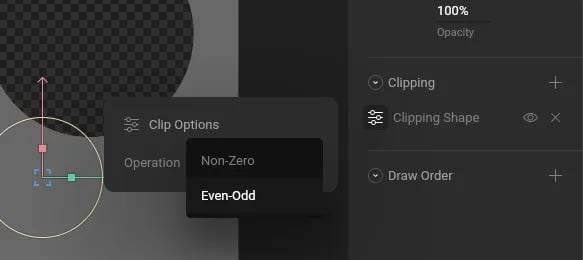
5
Hide the clip source so it doesn’t cover your graphics.
The shape’s own fill doesn’t affect the clip, but it can help you see what you’re building. To show the hole on the stage while you work, set the shape’s fill rule to Even-Odd in its fill options.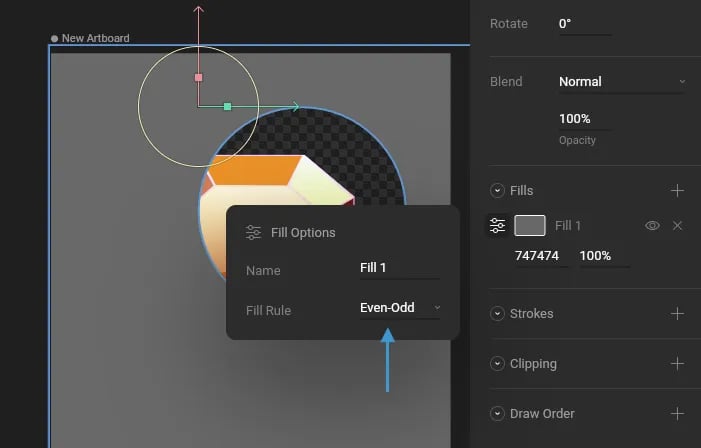
Performance
Clipping adds rendering work. Rive first draws the clip source, then checks every pixel of every clipped object against it. The more objects a clip covers, and the more area they fill, the more work it adds.- Use a fill rule instead of a clip when you can. To cut a hole in a single shape, put the hole’s path inside the shape and set the shape’s fill rule to Even-Odd, or reverse the hole’s path direction. This costs nothing extra. Save inverse clipping for when the hole needs to cut through other objects.
- Clip only what needs it. A clip on one small group costs less than a clip that covers everything in the artboard.
- Share one clip. Clipping a group once is cheaper than giving each object inside it its own clip.
- Rectangles are cheaper. Clipping to a rectangle that isn’t rotated, such as an artboard’s bounds or a Layout without rounded corners, takes a faster path than clipping to an ellipse, a star, or any other shape.