

- Scroll makes the content of a Layout scrollable when it overflows its parent.
- Scroll Bar Thumb turns a Layout into a draggable scroll bar thumb that stays in sync with a scrolling Layout.
Making content scrollable
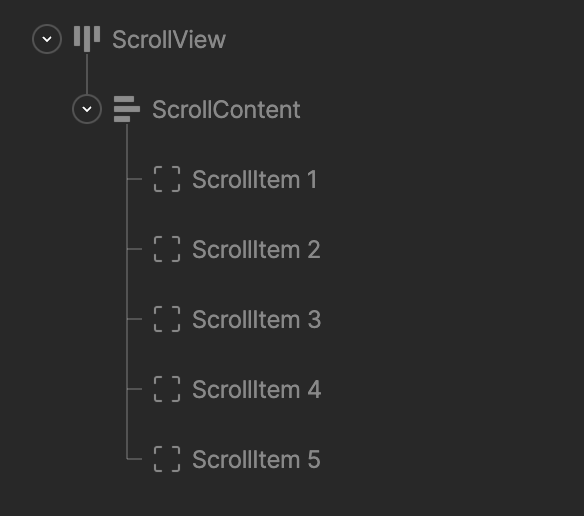
A scroll region needs three levels of Layouts:- Scroll view: The Layout that defines the visible scroll area.
- Scroll content: A Layout inside the scroll view that holds everything that scrolls. Add the Scroll constraint to this Layout. Its size sets how far the content can scroll, so set it to hug its contents or to a fixed size larger than the scroll view.
- Scroll items: The Layouts inside the scroll content.
1
Select the scroll content Layout.
2
In the Constraints section of the Inspector, click + and select Scroll.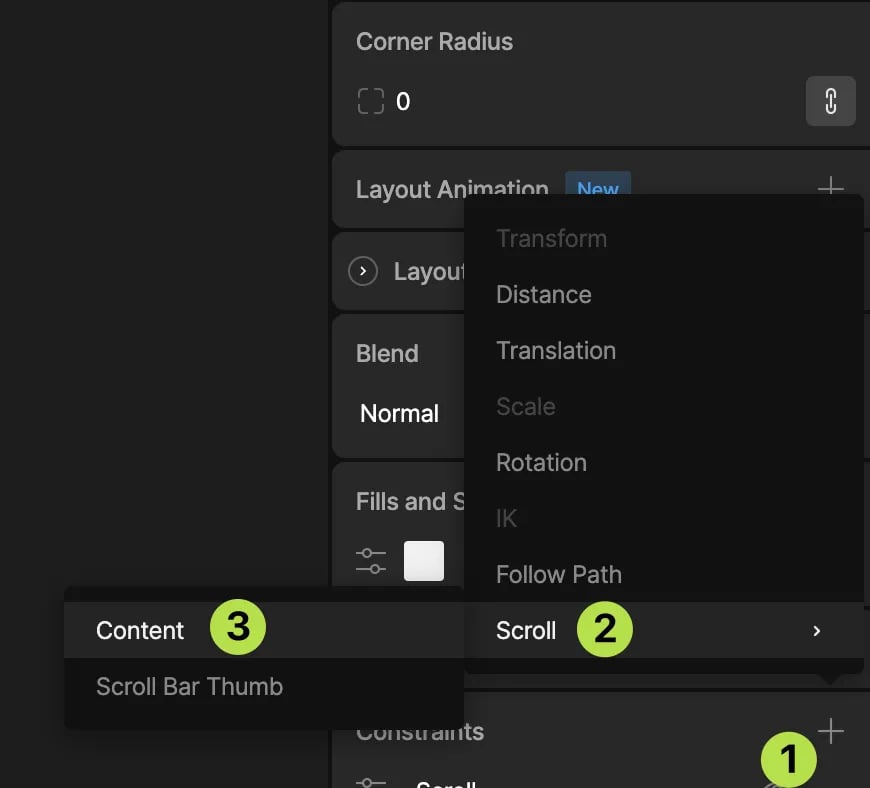
3
Click the options button on the constraint to open Scroll Constraint and set its properties.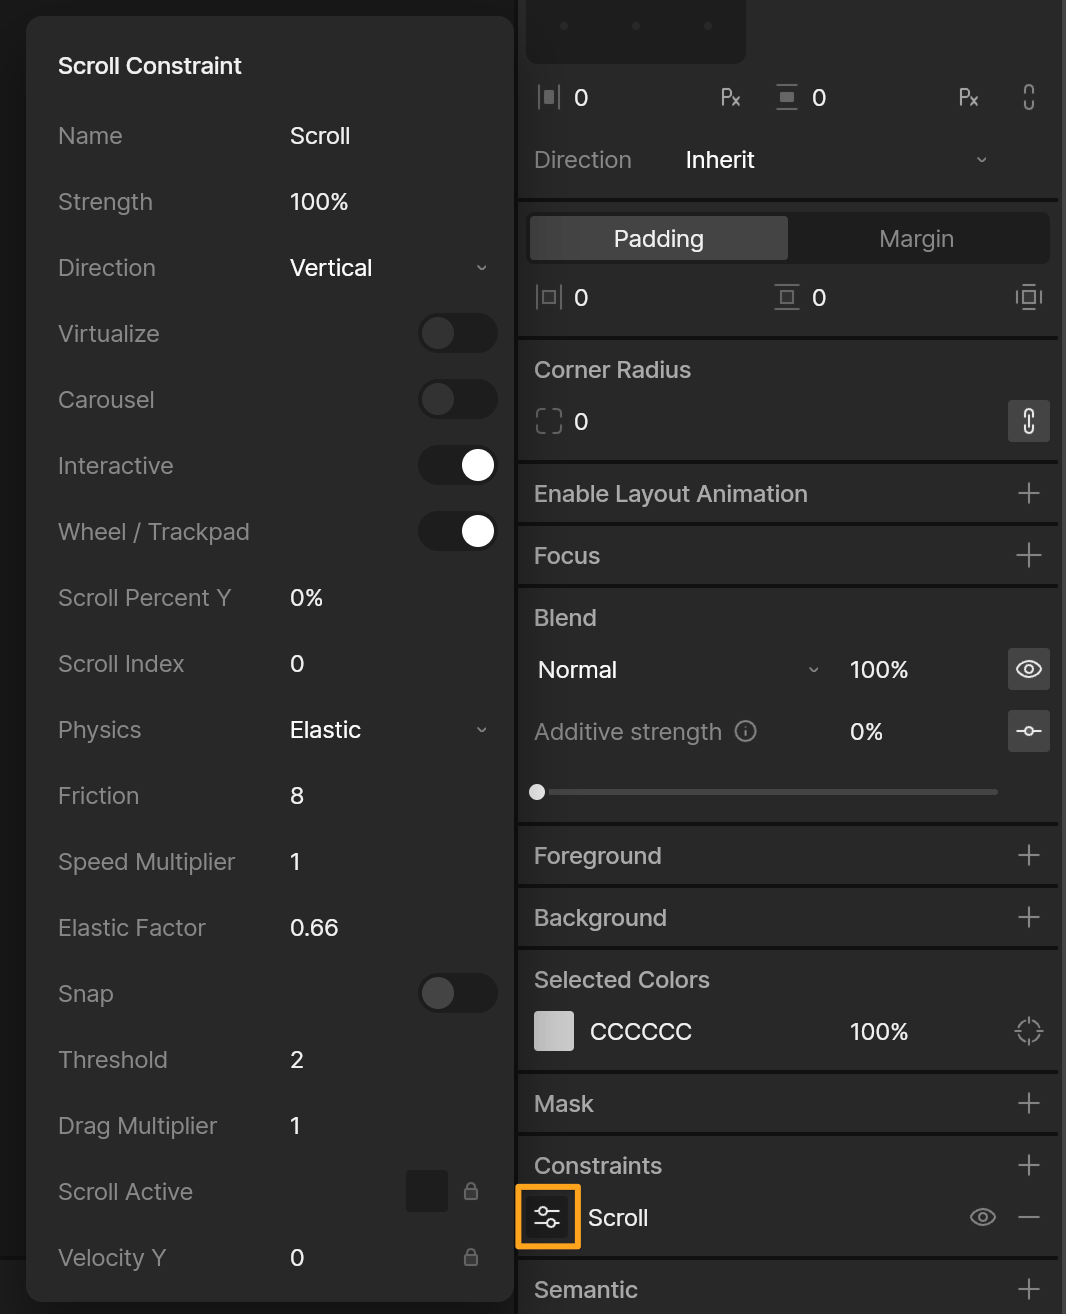
4
Switch to Animate mode and play a State Machine to test the scrolling. Drag inside the scroll view, or use a mouse wheel or trackpad.
Scroll constraint properties
Direction
- Vertical scrolls up and down only.
- Horizontal scrolls left and right only.
- All scrolls in both directions.
Interaction
- Interactive lets the viewer scroll the content by dragging. Turn it off to scroll only from an animation or Data Binding. It’s on by default.
- Wheel / Trackpad also lets the viewer scroll with a mouse wheel or trackpad. Turn it off to make the scroll view drag-only. It’s on by default and has no effect when Interactive is off.
- Threshold is how far, in units, the pointer must move before a drag starts scrolling. Raise it so that taps on scroll items aren’t mistaken for drags.
- Drag Multiplier scales how far the content moves for each drag or wheel movement. The default is 1.
Scroll position
- Scroll Percent X and Scroll Percent Y set the scroll position as a percentage, where 0% is the top or left and 100% is the bottom or right. Each appears only when the direction allows scrolling on that axis.
- Scroll Index scrolls to an item by its zero-based index. It appears only when the direction is Vertical or Horizontal.
Physics
- Elastic decelerates after a flick and rubber-bands at the edges, like scrolling on iOS. Set how it feels with:
- Friction: How quickly scrolling slows down after a flick.
- Speed Multiplier: How fast a flick scrolls.
- Elastic Factor: How far the content stretches past the edges.
- Clamped moves the content with the pointer and stops at the edges, with no momentum.
Snap
When Snap is on, the content always comes to rest with an item aligned to the top or left of the scroll view. It’s off by default.Read-only scroll state
These properties report what the scroll view is doing. You can’t edit them, but you can bind them to View Model properties to react to scrolling, for example to show a “back to top” button or fade a header:- Scroll Active is true while the content is being dragged or is still moving.
- Velocity X and Velocity Y report the current scroll speed on each axis.
Scrolling a list
To scroll a Data Binding list, use the same setup as above, but put a single list inside the scroll content instead of separate scroll items. These extra properties turn on once the scroll content contains a list:- Virtualize creates components only for the items that are visible, instead of for every item in the list. Turn it on for long lists to improve performance. Buffer keeps the given number of extra items ready on each side of the visible area, so they’re already running when they scroll into view. Stack layouts can’t be virtualized. A grid can be virtualized only if every child of the scroll content is a list.
- Carousel makes the list loop endlessly in both directions. Turning on Carousel also turns on Virtualize.
Adding a scroll bar
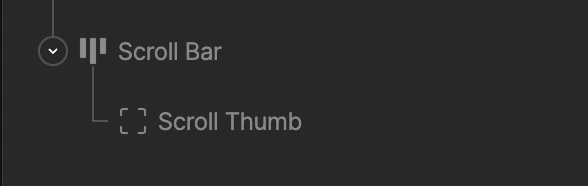
A scroll bar needs two Layouts:- Scroll bar: The Layout that defines the track.
- Scroll thumb: The Layout inside the track that the viewer drags.
1
Select the scroll thumb Layout.
2
In the Constraints section of the Inspector, click + and select Scroll Bar Thumb.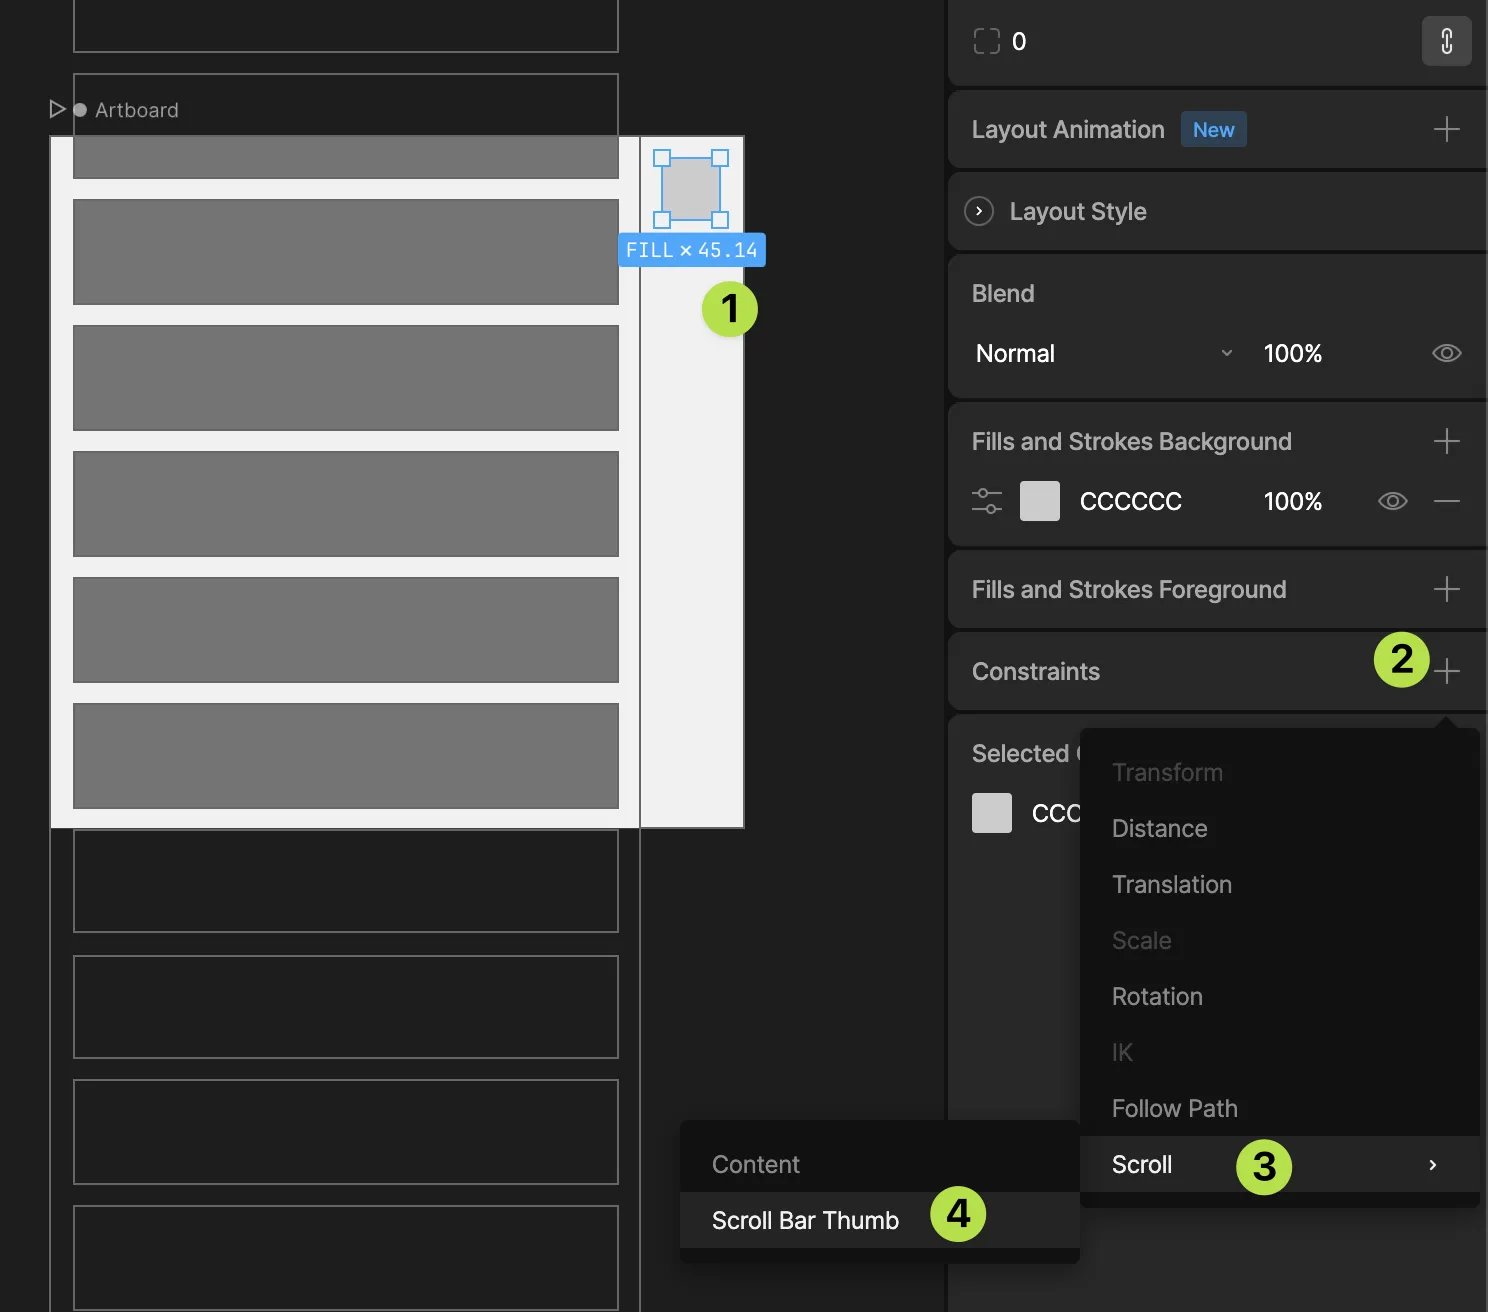
3
Open the constraint’s options. Use the target button to select the scroll content Layout, which is the Layout with the Scroll constraint.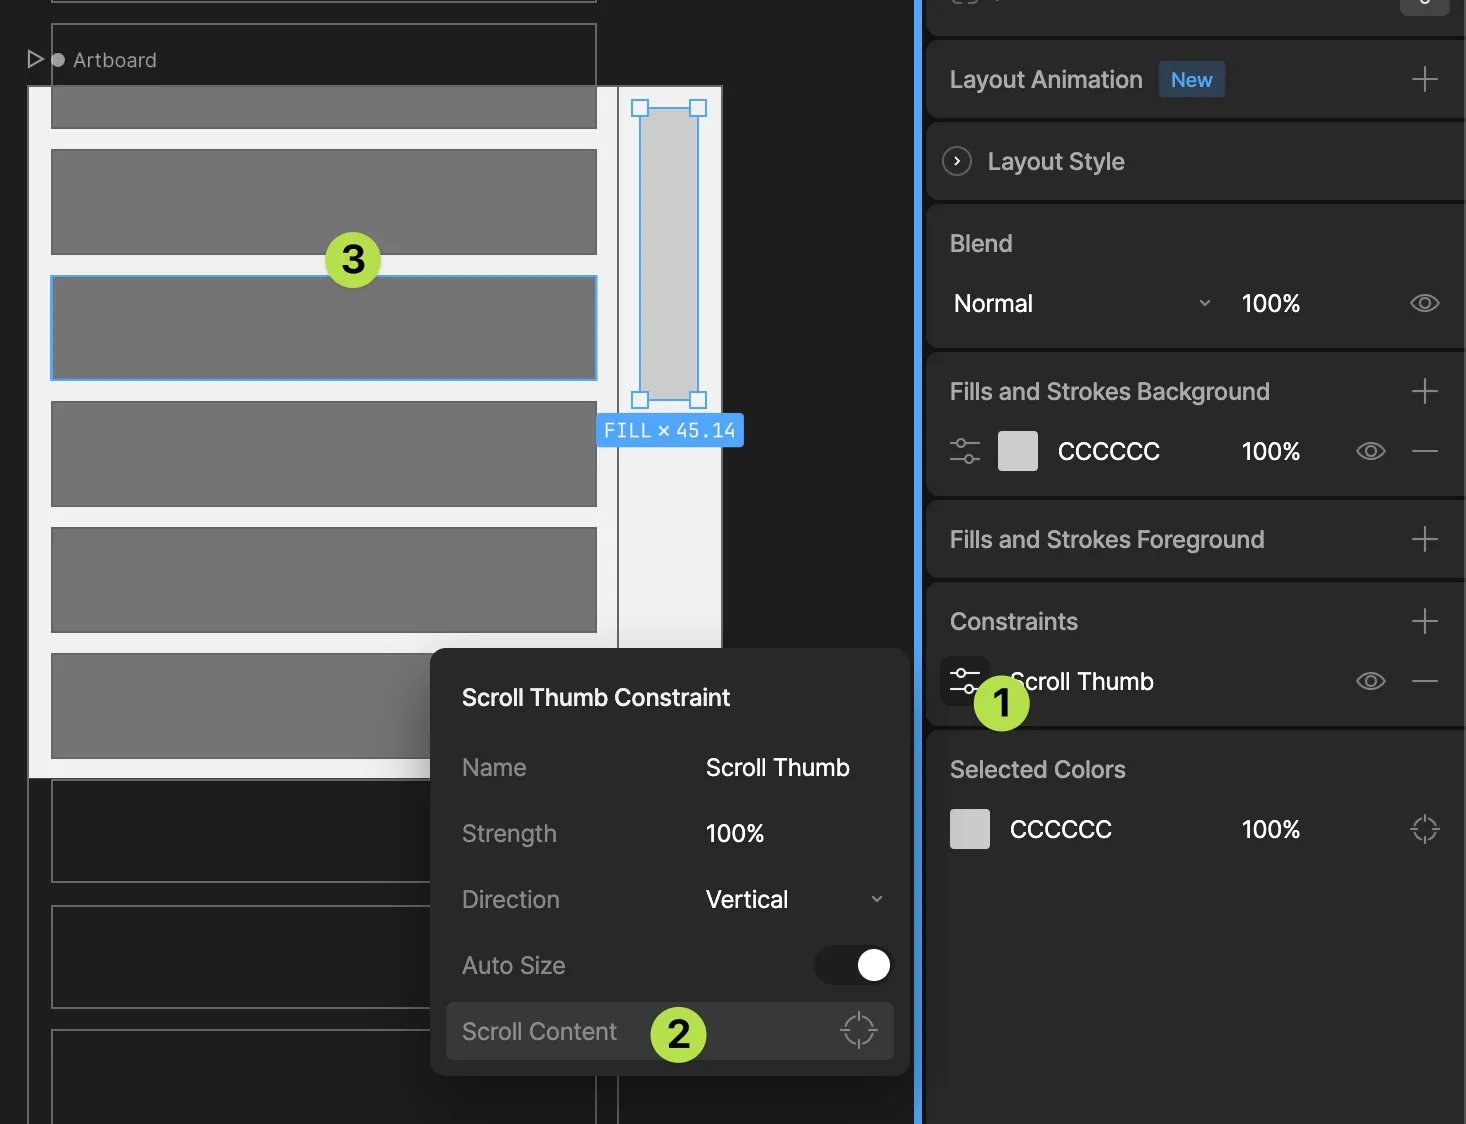
- Direction: The axis the thumb moves along.
- Auto Size: Resizes the thumb to show how much of the content is visible, like a browser scroll bar. When it’s off, the thumb keeps the size you set.