

Adding a fill or stroke
1
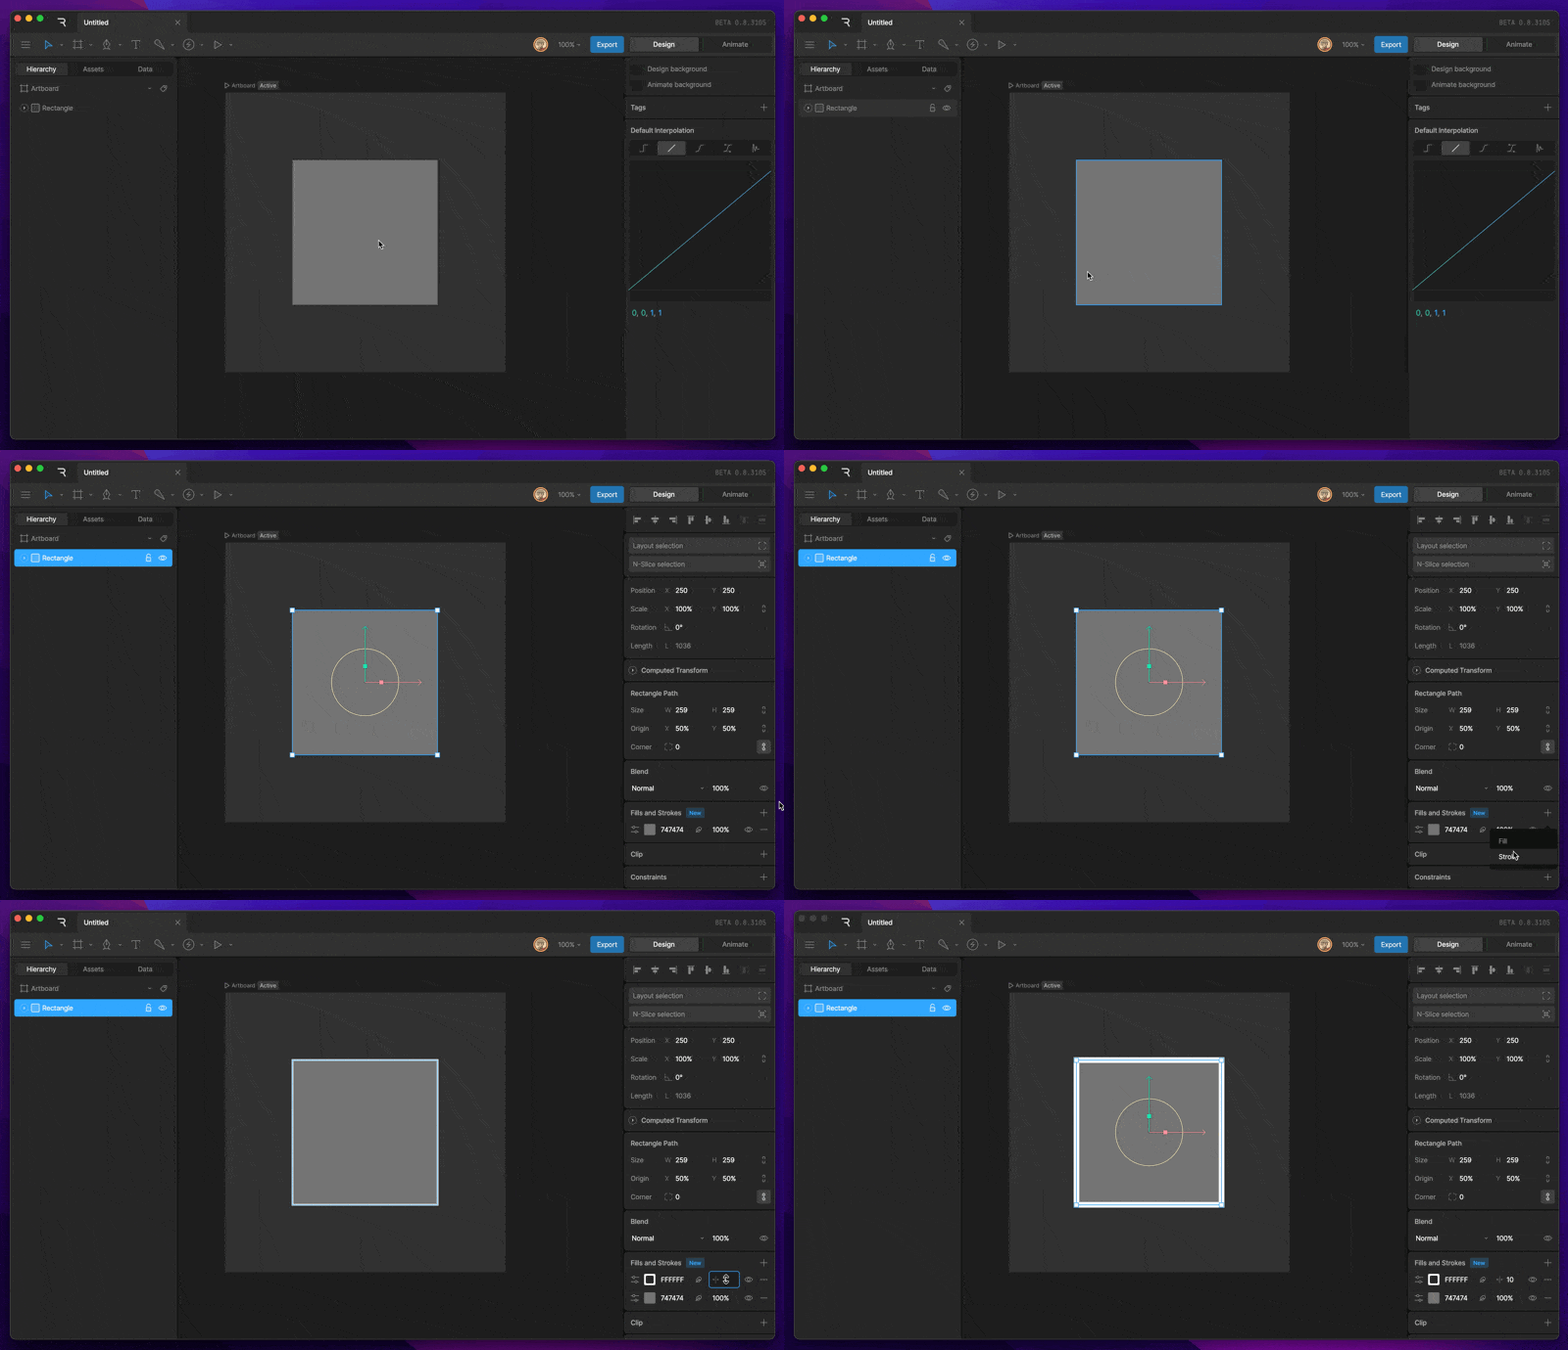
Select a shape.
2
In the Fills and Strokes section of the Inspector, click + and select Fill or Stroke.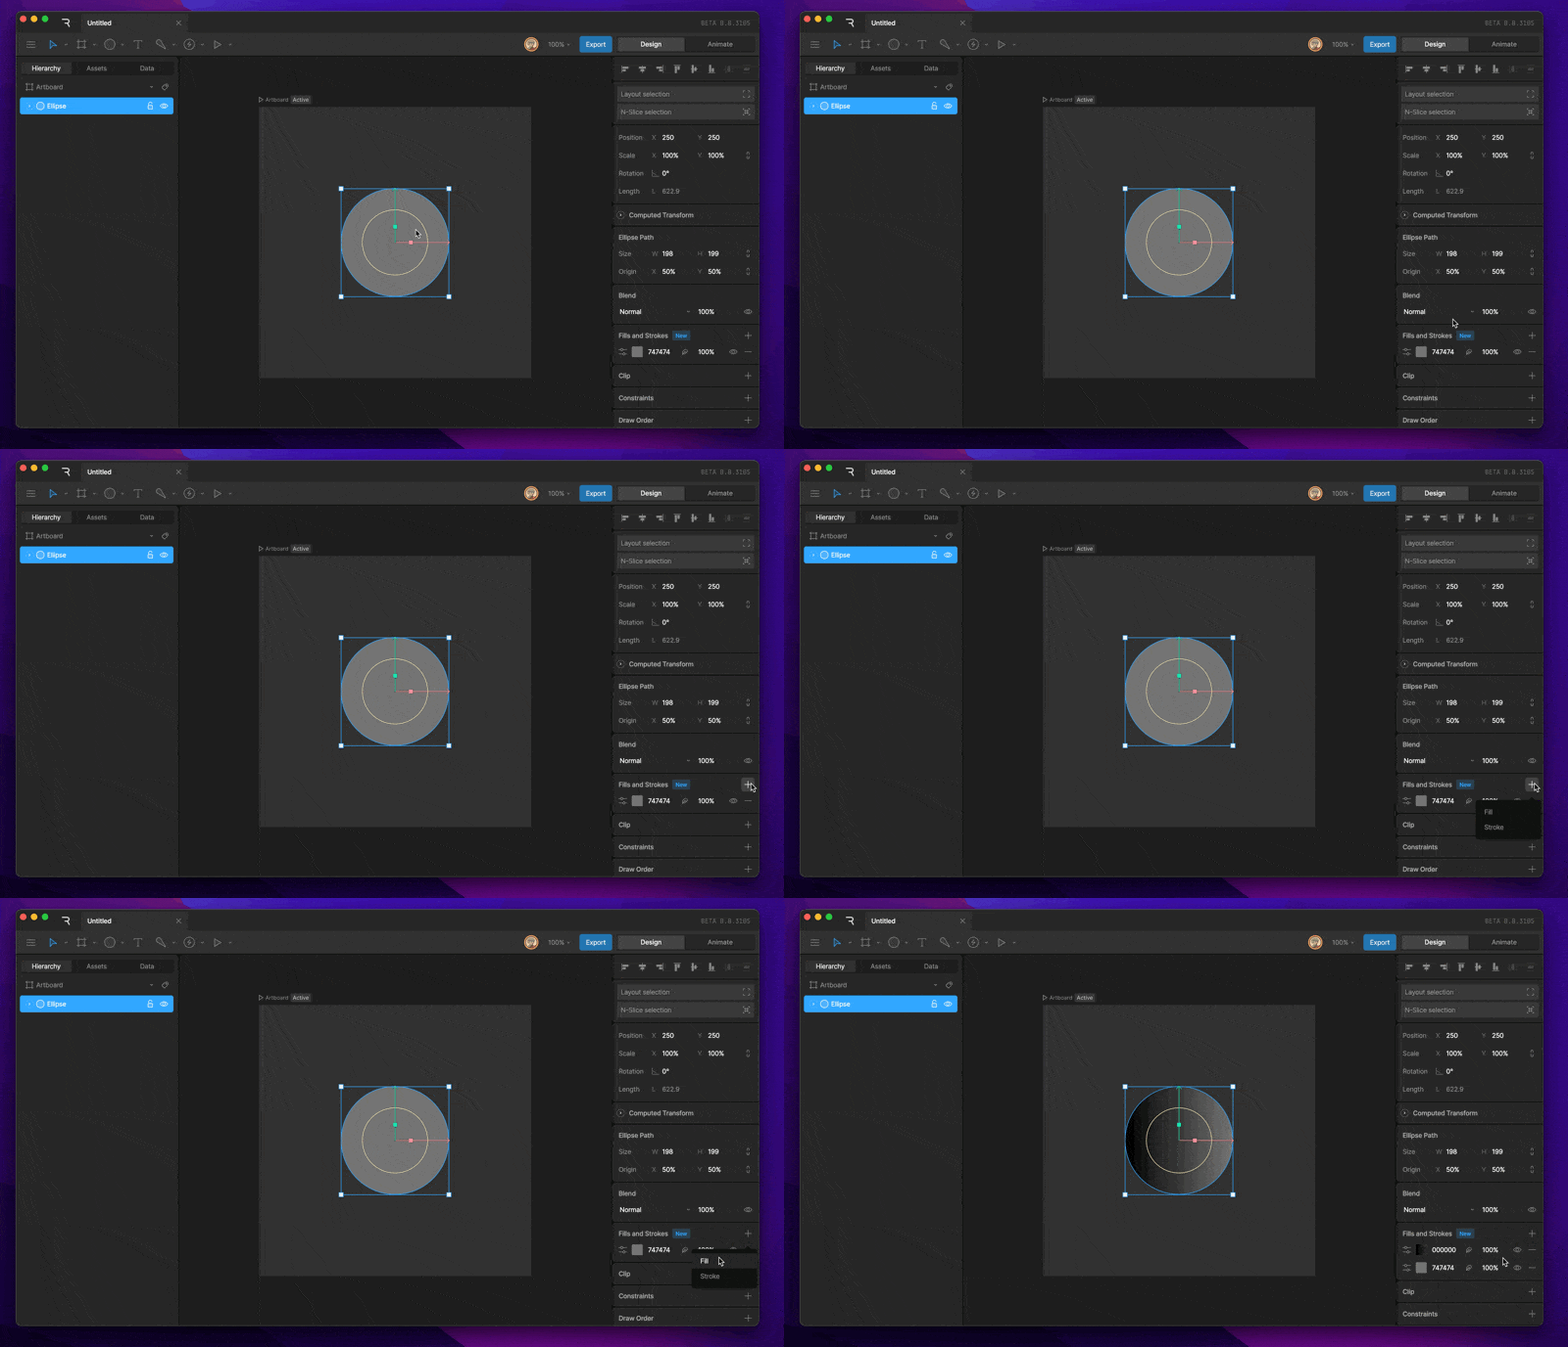
Managing fills and strokes
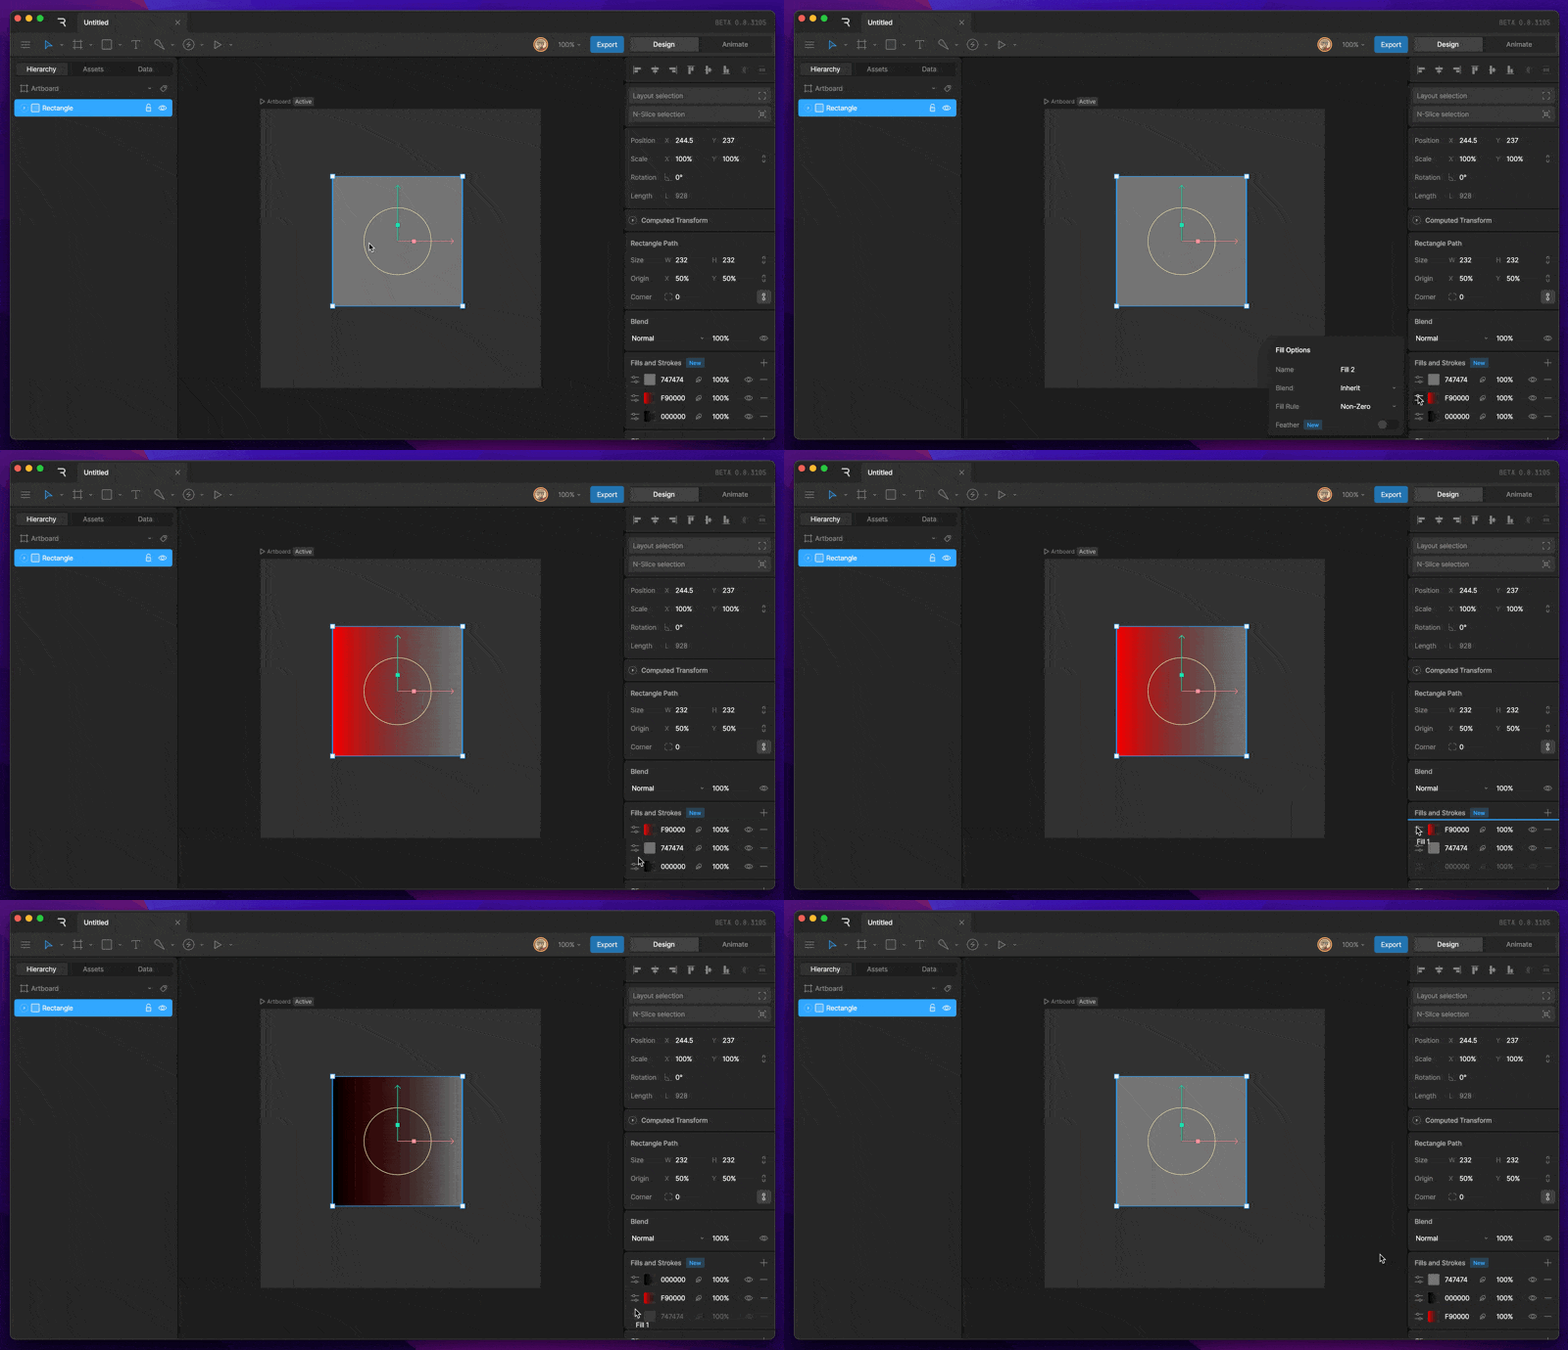
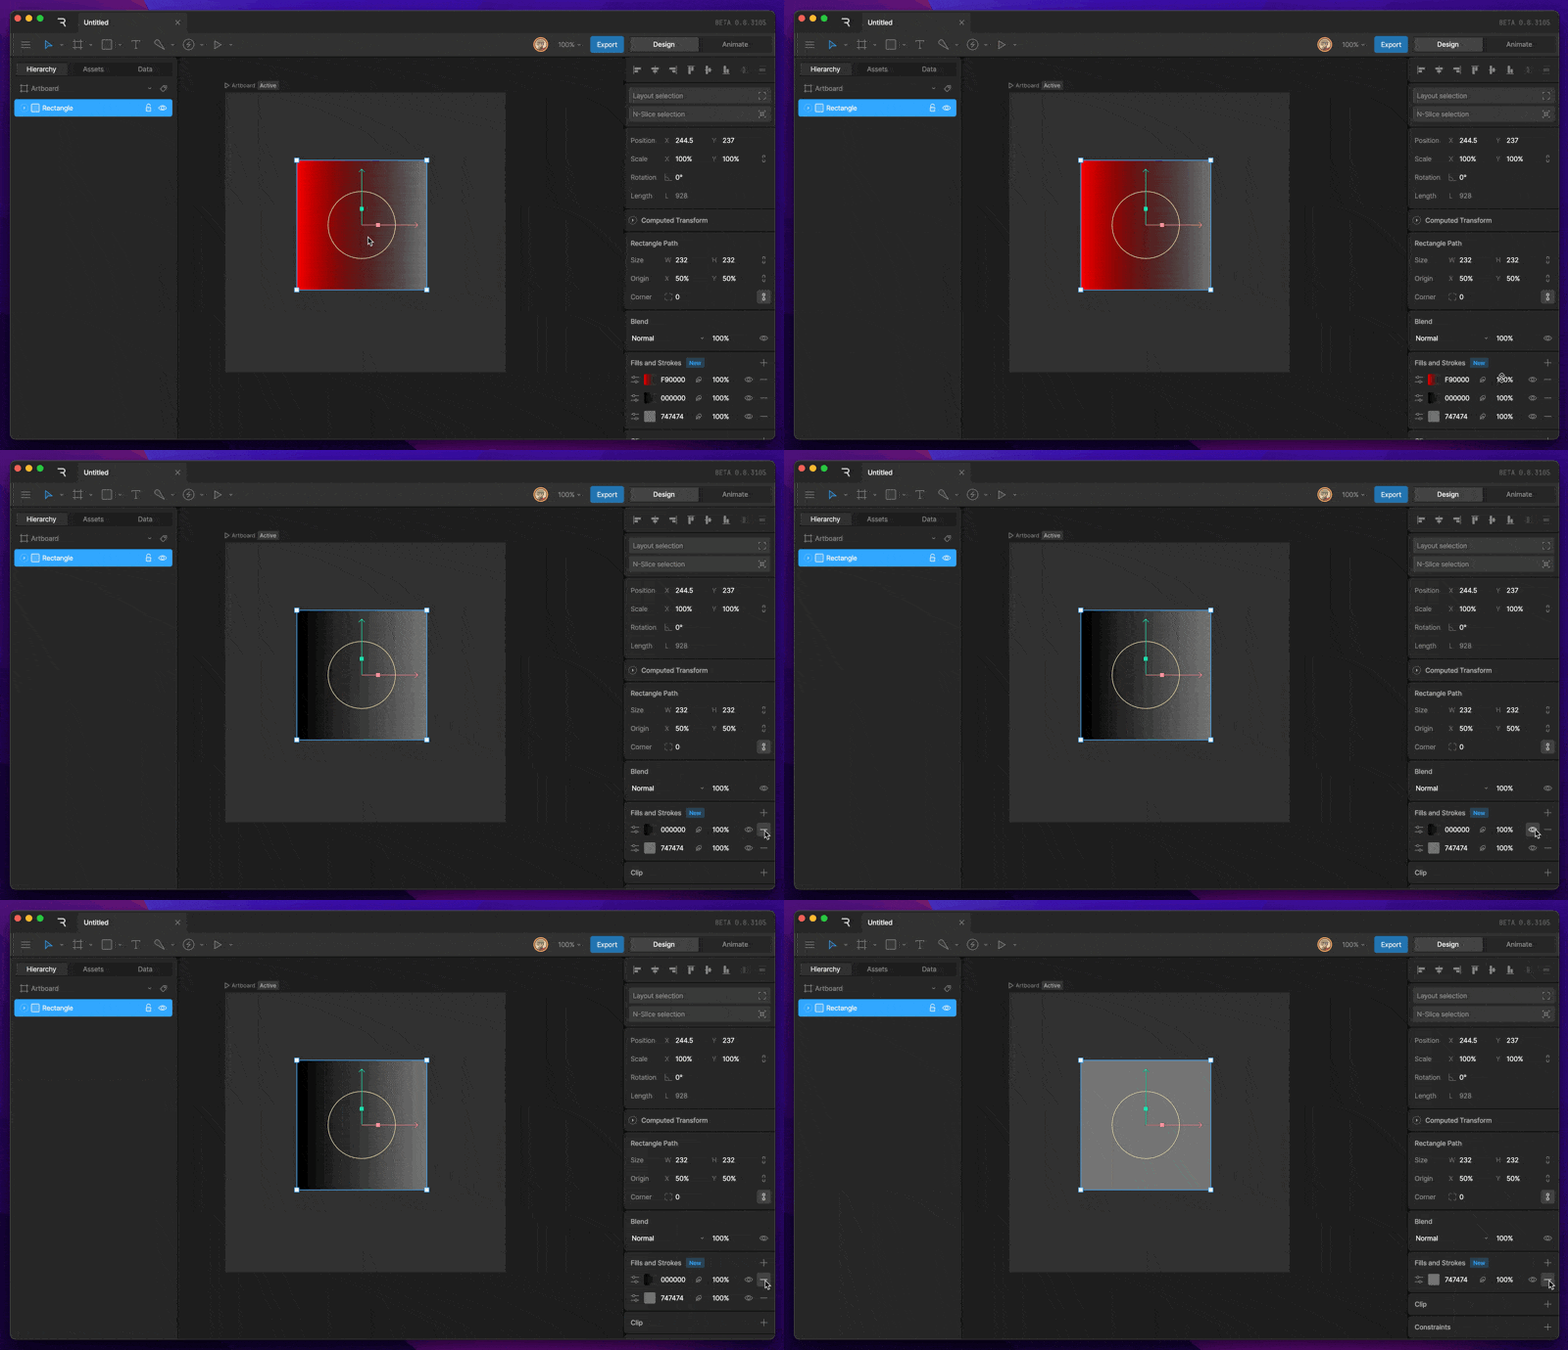
- Reorder: Drag a fill or stroke by an empty area of its row. Items higher in the list draw in front of items lower in the list.
- Hide: Click the eye icon. The fill or stroke stays on the shape, but doesn’t draw.
- Delete: Click the minus icon.
- Duplicate, copy, or convert: Right-click a fill or stroke to duplicate or copy it, or to convert a fill to a stroke and a stroke to a fill.
Fill options
Click the options button on a fill to open its options.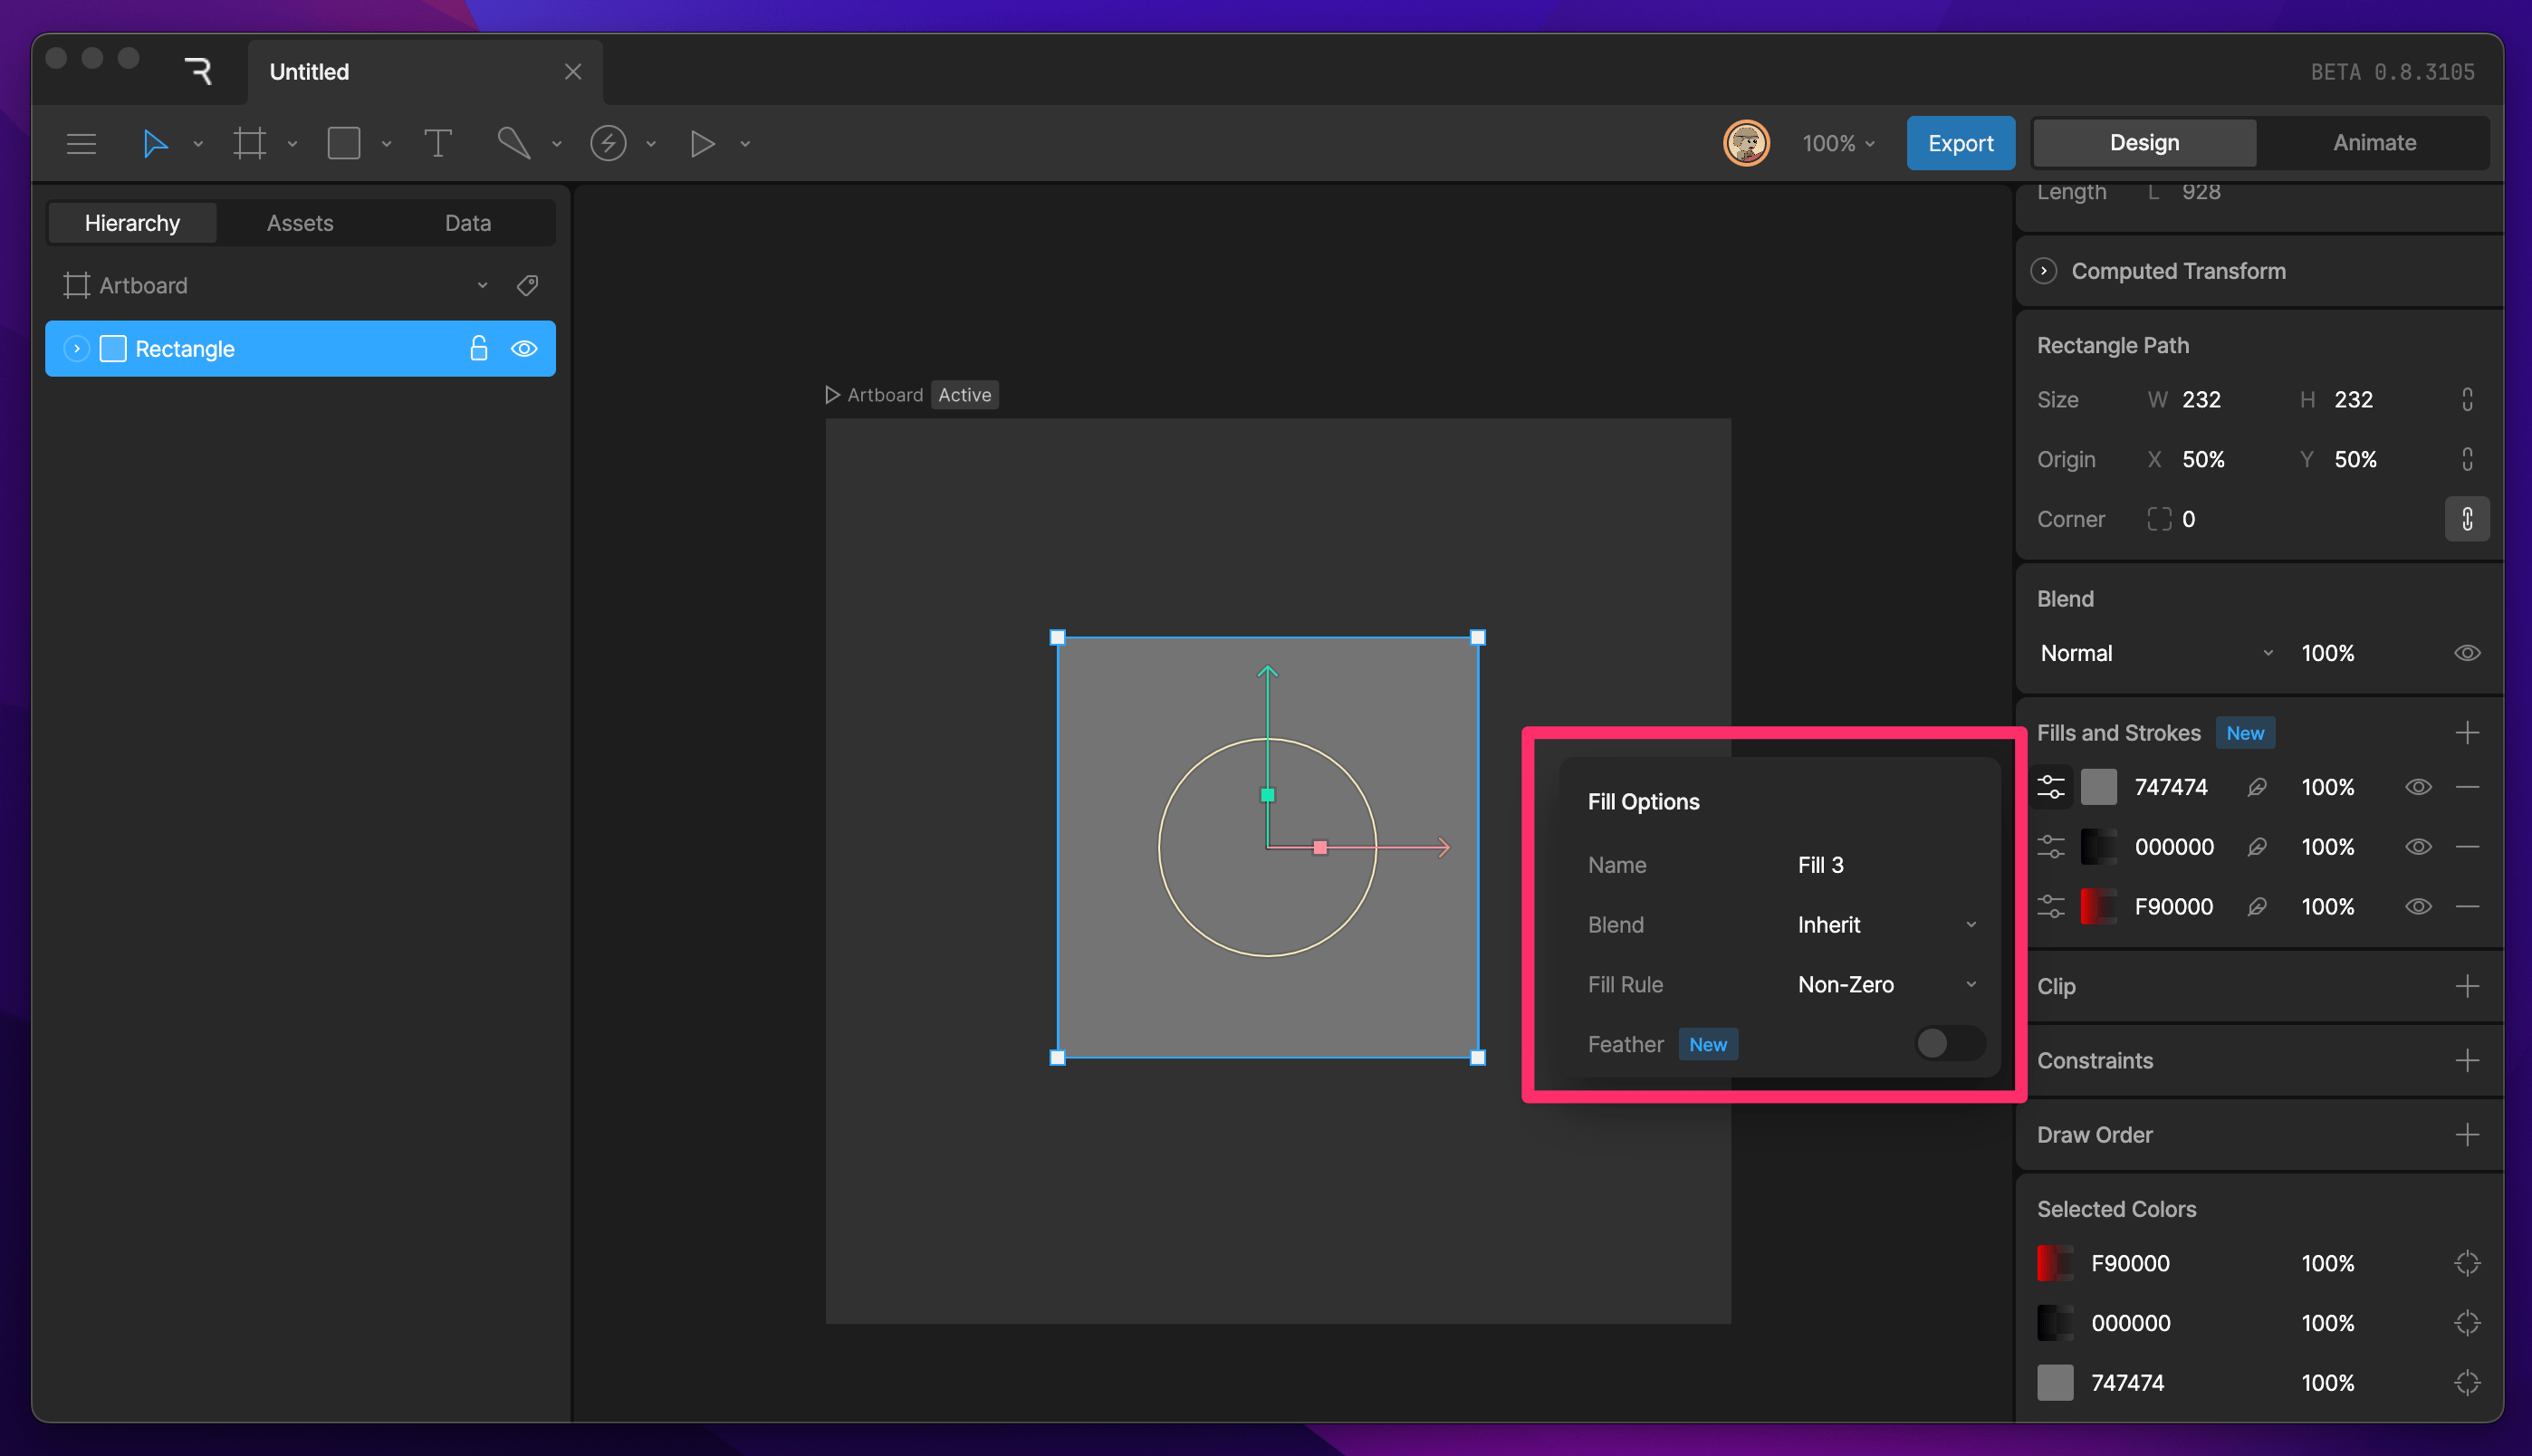
- Name: The fill’s name.
- Blend: The fill’s blend mode.
- Fill Rule: How overlapping paths are filled. See Fill rules.
- Feather: Softens the fill’s edge. See Vector Feathering.
Fill rules
When a shape has more than one path, or a path crosses itself, the fill rule decides which areas are inside the shape and get filled. To cut a hole in a shape, put the hole’s path inside the shape’s outer path and choose a fill rule that leaves the overlap empty.- Non-zero is the default. Each path counts +1 if it’s drawn clockwise and −1 if it’s drawn counter-clockwise. Areas where the total isn’t zero are filled. Two overlapping paths drawn in the same direction fill the overlap, and two drawn in opposite directions leave it empty.
- Even-odd ignores direction and counts how many paths surround an area. Areas inside an odd number of paths are filled, and areas inside an even number are empty. A path inside another path always makes a hole.
- Clockwise is a fill rule made by Rive. Paths drawn clockwise fill, and paths drawn counter-clockwise cut away from them, so you can subtract one path from another by reversing its direction. Feathered fills always use Clockwise.
Stroke options
Set a stroke’s thickness in the field on its row. Click the options button on a stroke to open the rest of its options.- Name: The stroke’s name.
- Blend: The stroke’s blend mode.
- Cap: How the ends of an open path look.
- Butt ends the stroke flat at the end point. A path with no length doesn’t draw.
- Round adds a rounded end. A path with no length draws a circle.
- Square adds a square end that extends past the end point. A path with no length draws a square.
- Join: How corners look: Round, Bevel, or Miter.
- Apply transform: When it’s on, scaling the shape also scales the stroke’s thickness. Turn it off to keep the thickness the same at any scale.
- Feather: Softens the stroke’s edge. See Vector Feathering.
Blend modes
Each fill and stroke has its own blend mode. By default it’s set to inherit the shape’s blend mode.Path effects
Path effects change the path a fill or stroke draws, without changing the shape itself. Add them from the Effects tab of a fill or stroke’s options:- Trim Effect draws only part of the path, so you can animate a line drawing on. See Trim and Dash.
- Dash Effect breaks the path into dashes and gaps. See Trim and Dash.
- Effect Group applies a shared stack of effects that you control in one place. See Effect Groups.
- Scripted path effects apply a path effect script.