

Libraries are available on Voyager and Enterprise plans. Learn more about our plans and pricing.
Creating a library
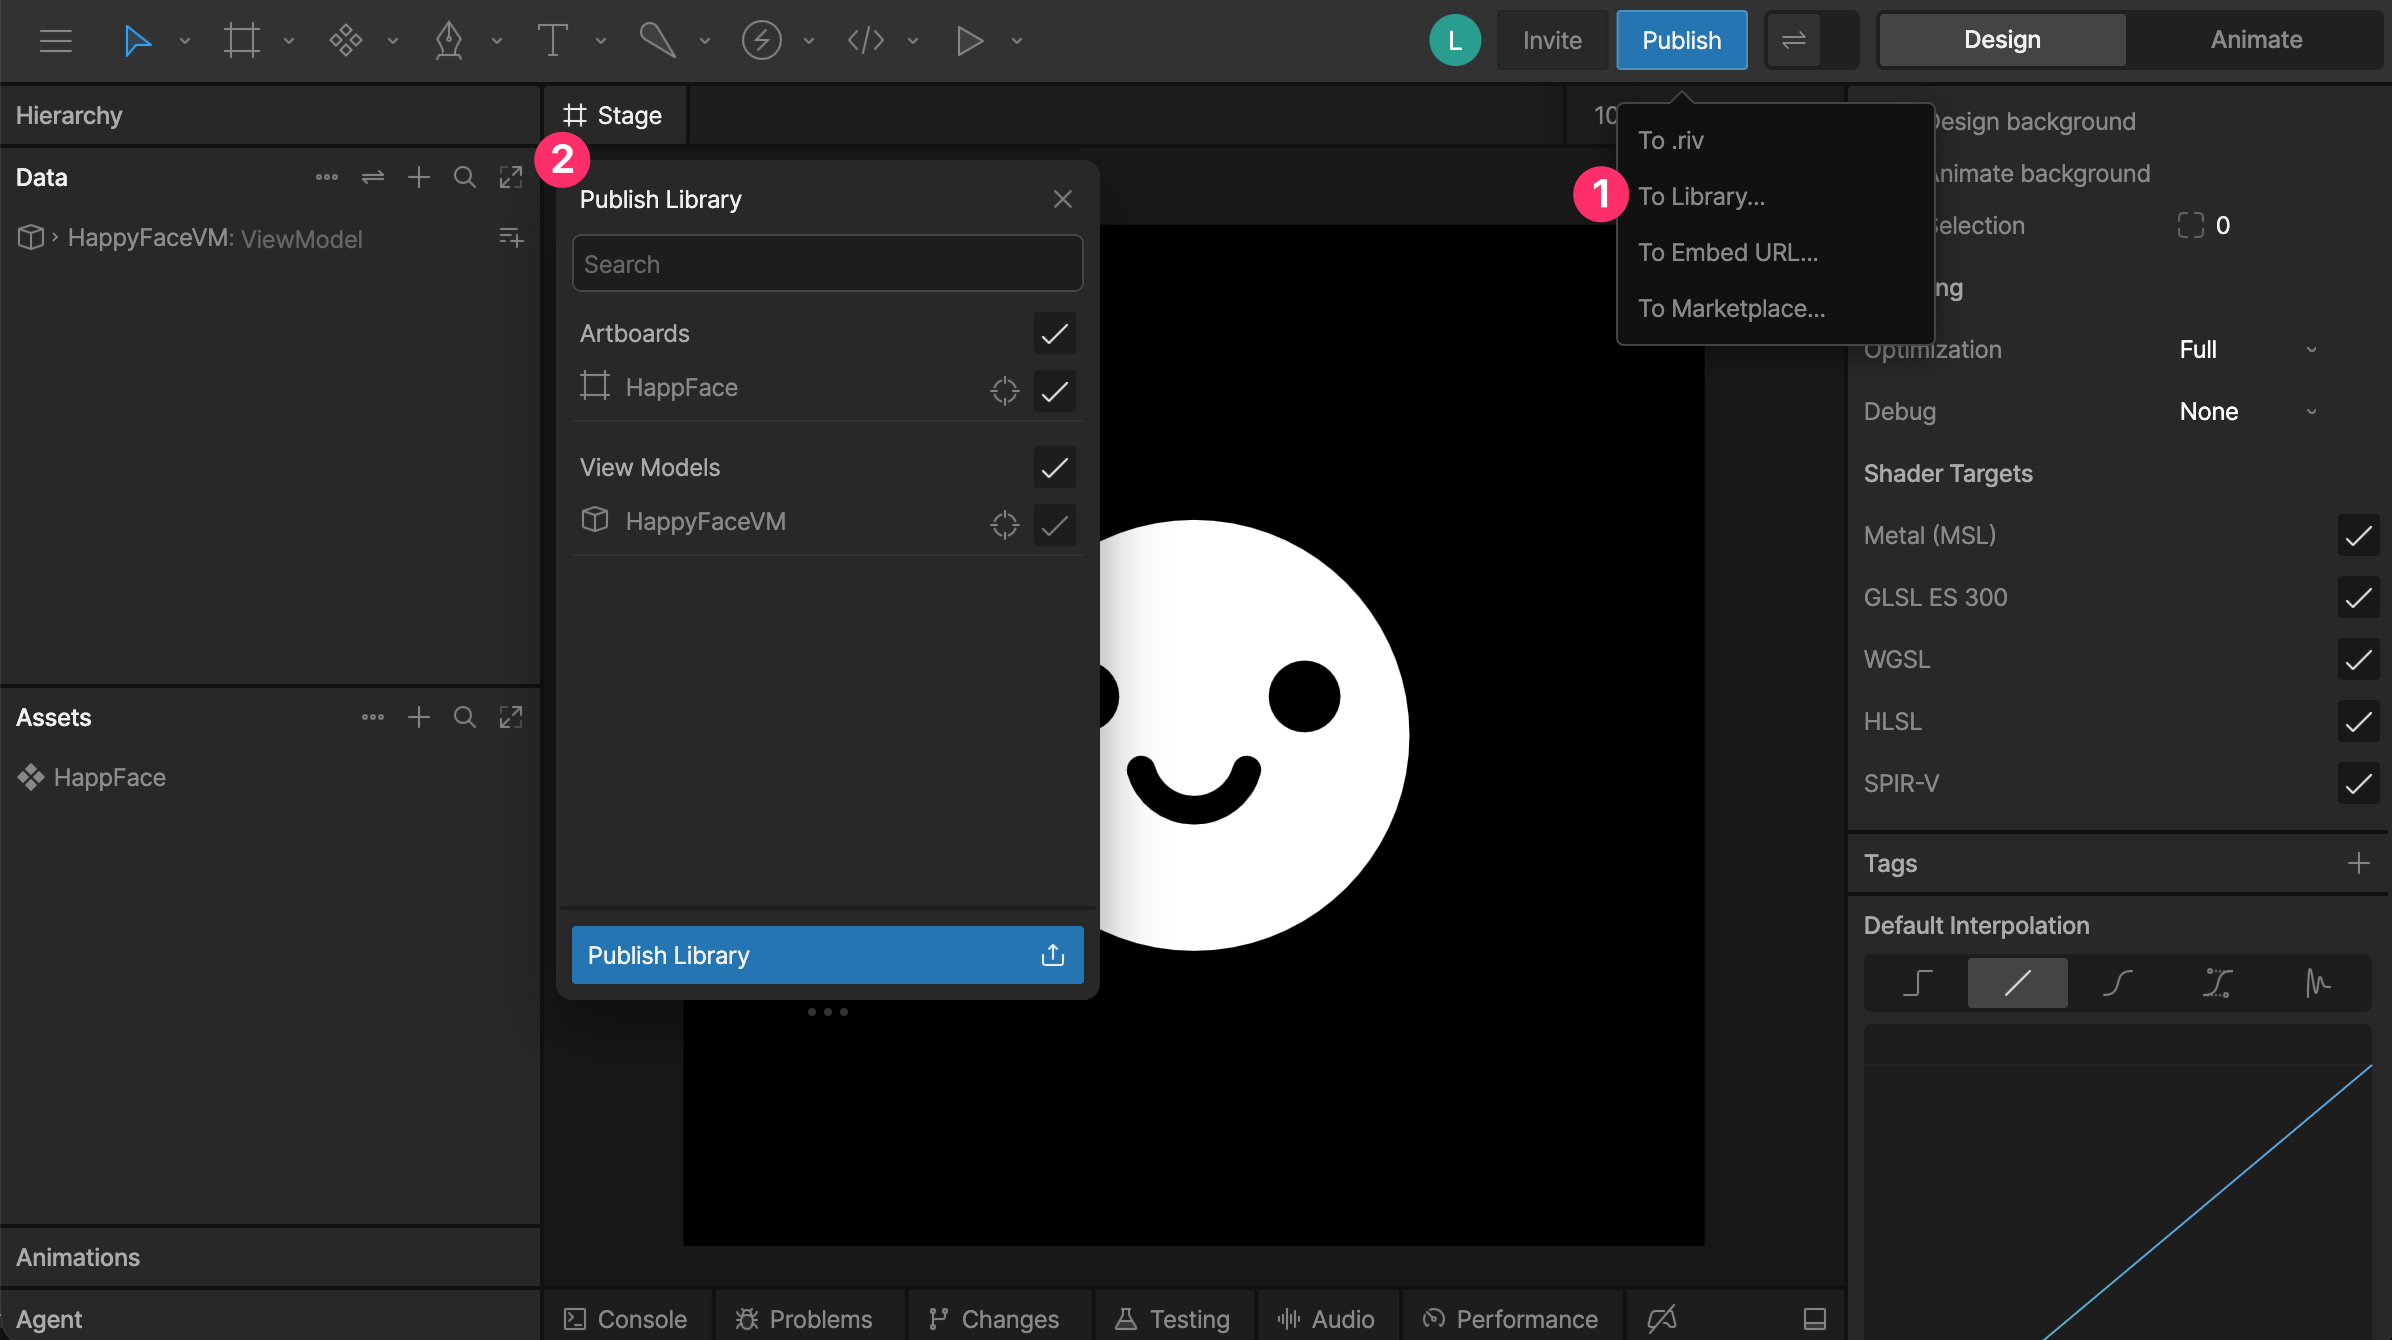
Any Rive file can become a library. To publish one:1
Create a component, a view model, or both. To turn an artboard into a component, select it on the stage and click the component icon in the inspector, or press
Shift + N.2
Open the publish menu in the toolbar and select To Library, or select Publish Library from the file menu.
3
In the publishing panel, choose which components, view models, and enums to publish.
Importing from a library
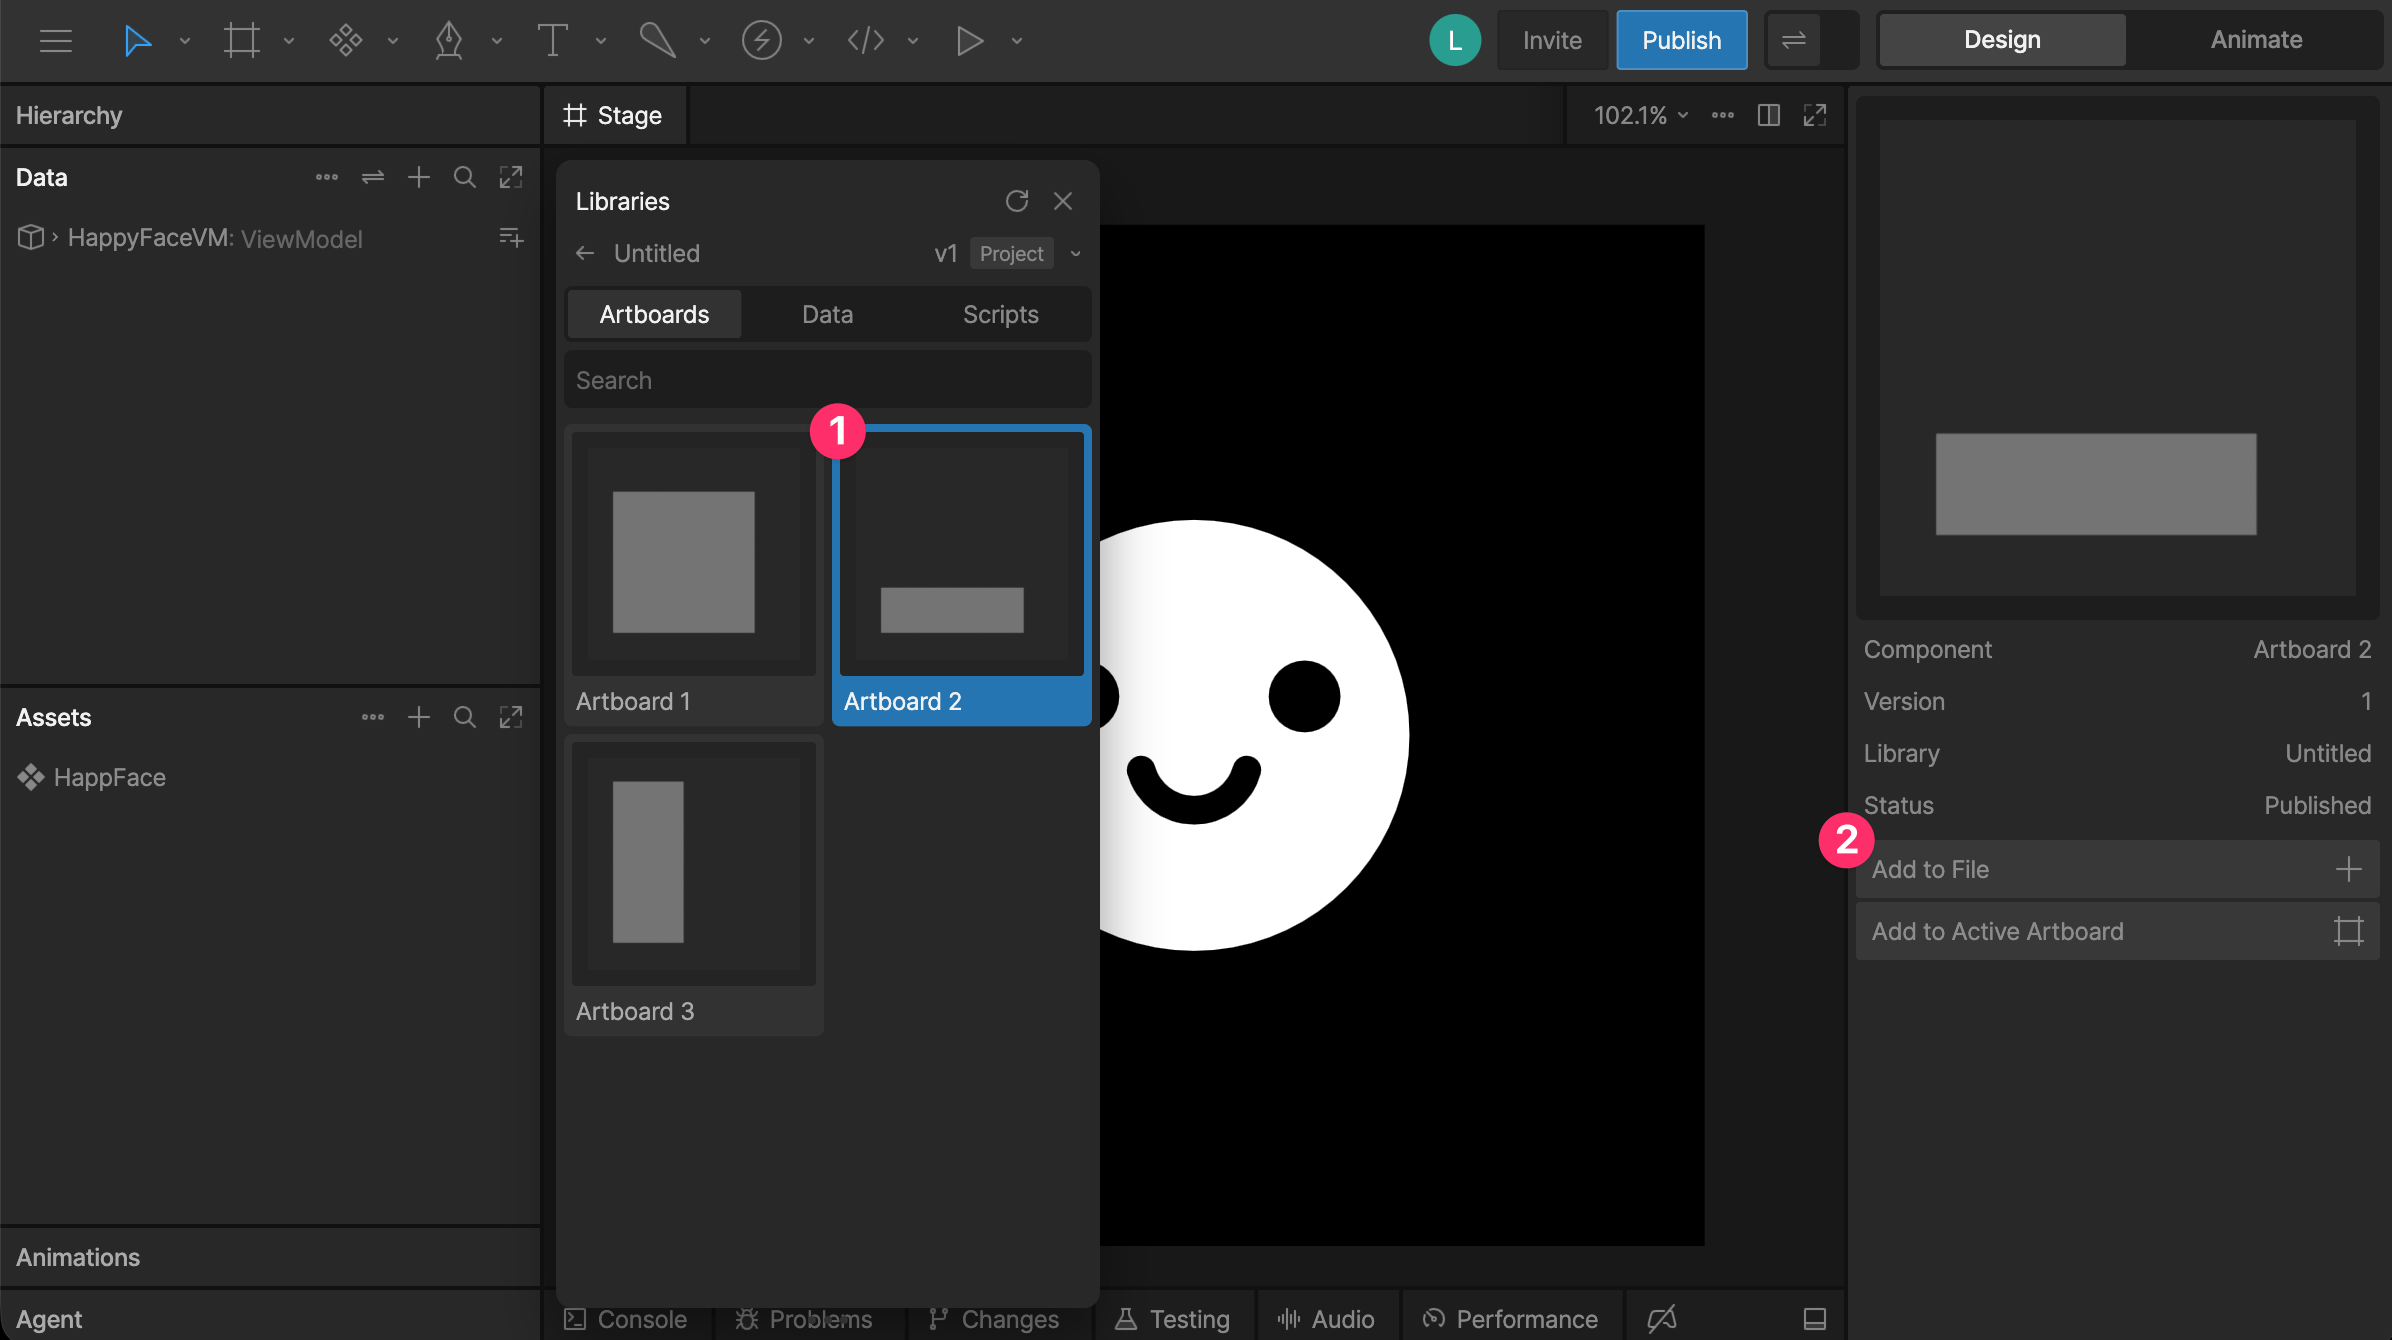
Click the + icon in the Assets or Data panel and select Library Component. The library panel opens beside the left sidebar and lists the libraries available to your file.Currently, a Rive file can only access libraries contained within the same project. Cross-project — or workspace — libraries are coming soon. Public libraries are planned soon after that.
Use the version dropdown to browse and import earlier versions of a library.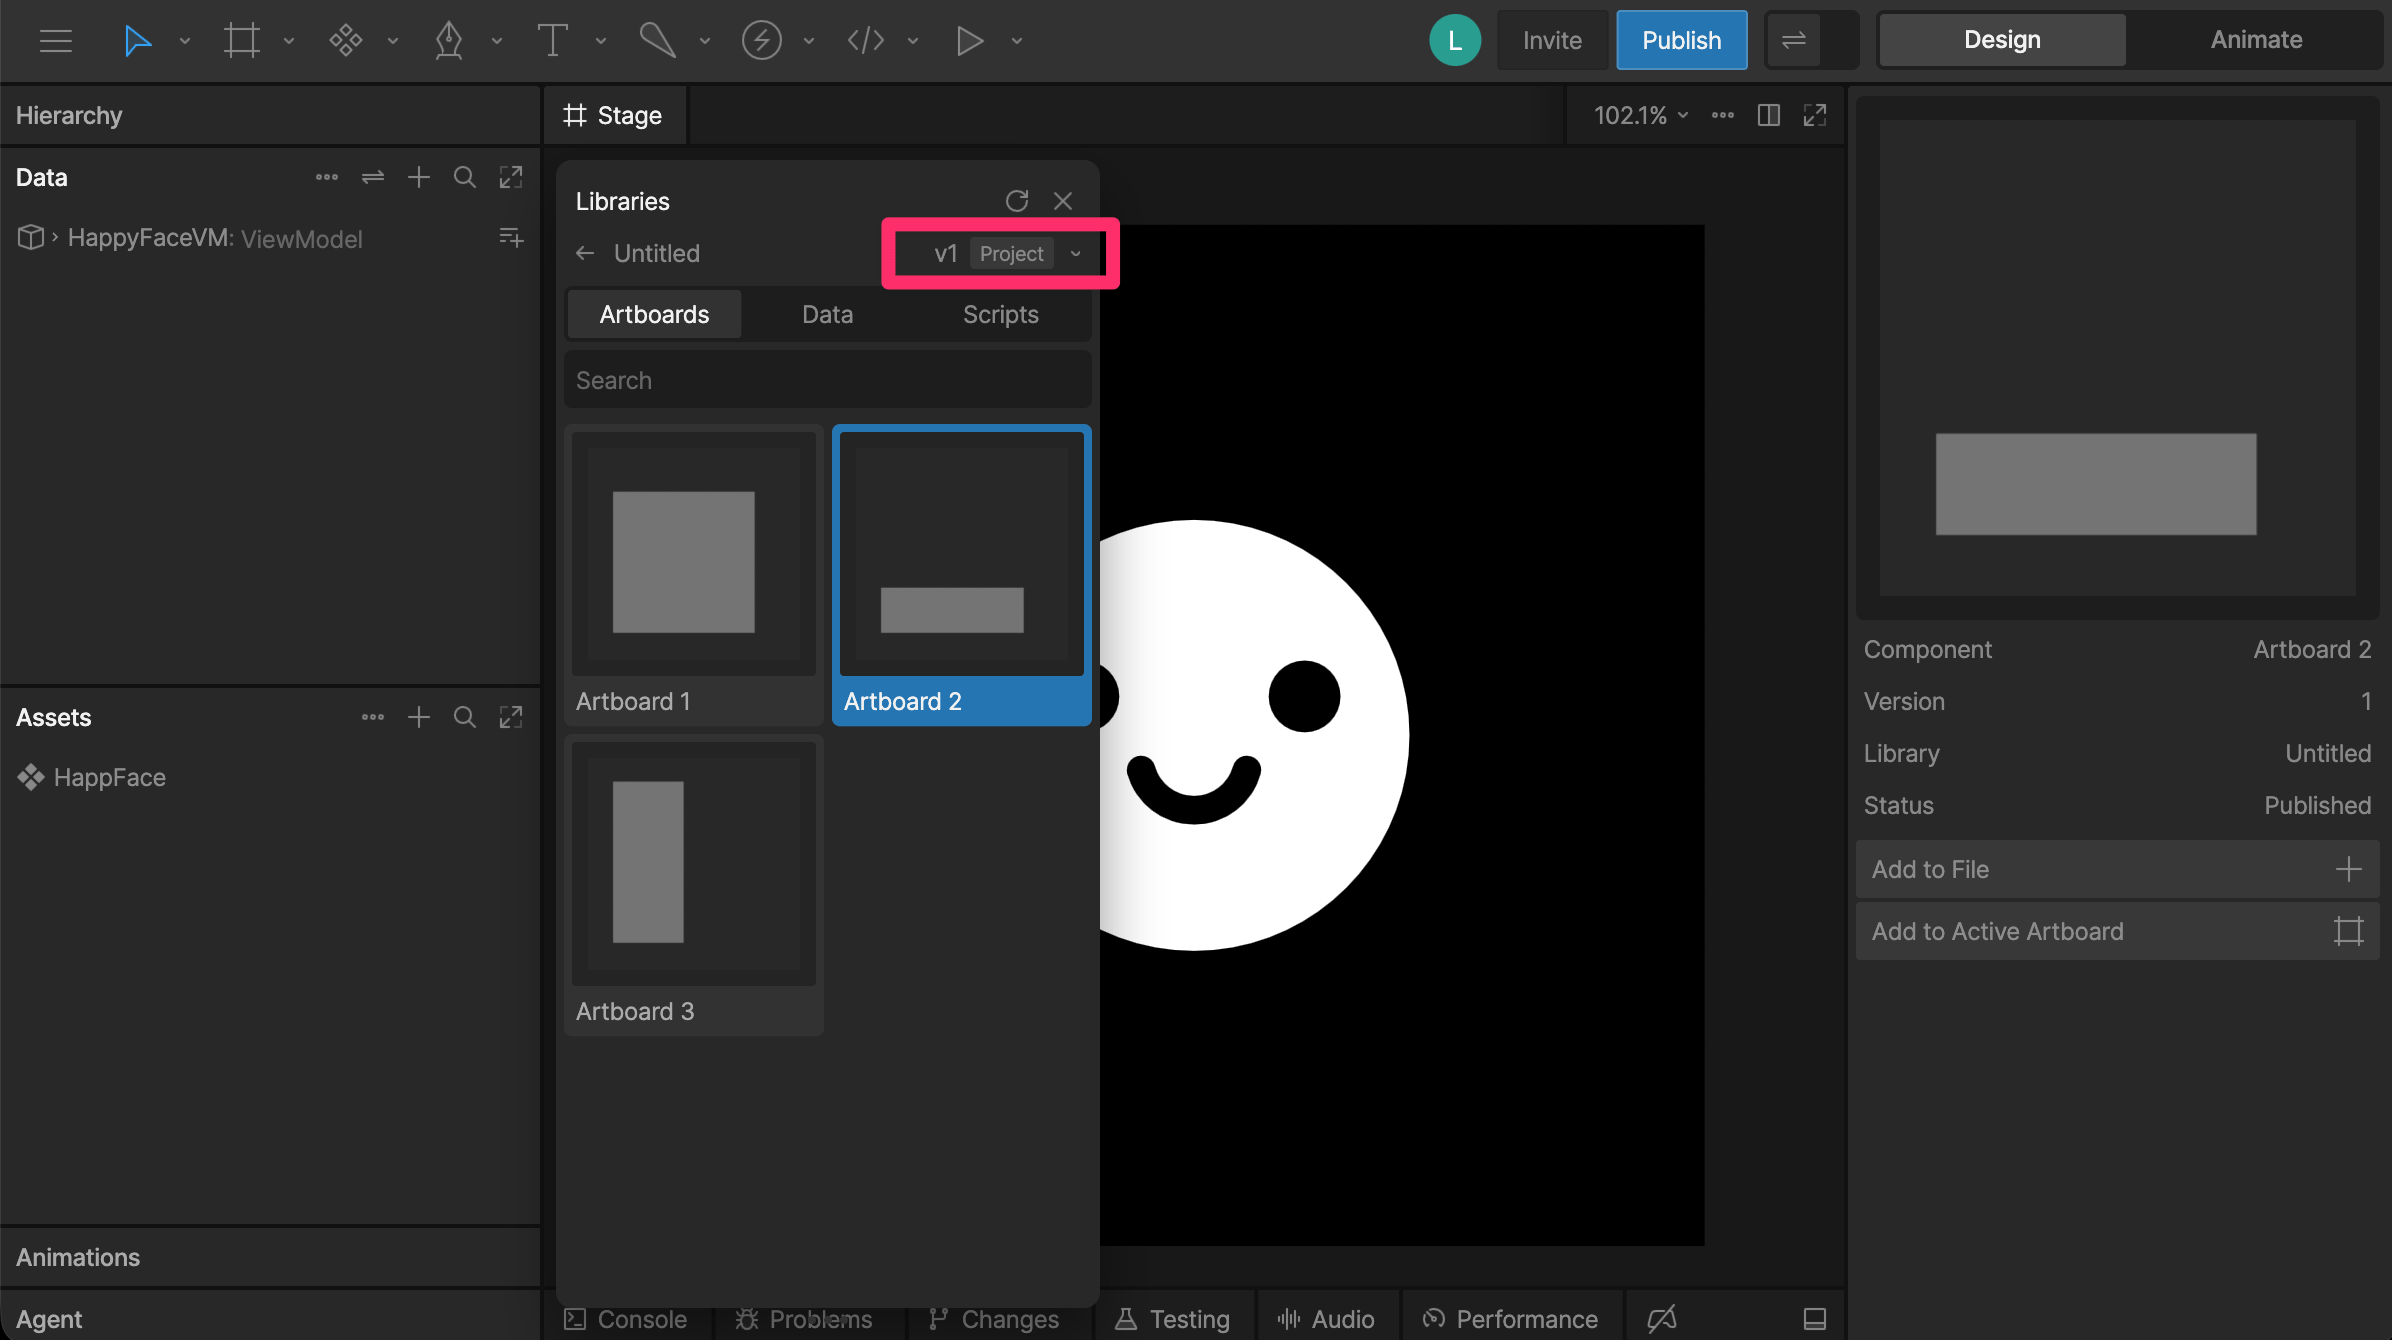

Updating a library
Publish changes
Edit the source file to change, add, or remove components, view models, and enums. Then republish using To Library in the toolbar’s publish menu or Publish Library in the file menu. Files that have imported elements from the library display a badge when an update is available.Update imported elements
1
In the file that uses the library, right-click the component in the Assets panel.
2
Select Library Options > Update Component.
3
Choose the library elements to update, then select Update Selected.
When you add a view model from a library to another file, Rive creates a unique instance of that view model in the Data panel. Its property values are independent of the library’s defaults, even if the instance isn’t used on an artboard.This prevents changes to library defaults from overwriting values you’ve customized in the host file.
Sync view model instances
To sync instances with the library, right-click the view model in the Data panel and select Library Options > Sync Instances. Syncing matches instances by name and:- Adds any library instances that are missing from your file.
- Sets the default instance to match the library’s default instance.
- Copies the library’s values into properties that are still set to their type’s default (for example,
0,false, or an empty string).
When you update a library, Rive automatically adds any new instances, but it doesn’t change your file’s default instance. Use Sync Instances if you also want the default instance to match the library’s.
Detaching
Detach an imported component or view model to make a local copy you can edit independently of the library. Right-click the component or view model in the left sidebar and select Library Options > Detach. Rive copies its contents into your file and redirects any references to the local copy.It’s not possible to re-attach a component after it has been detached.
Export options
Library components can depend on other elements, such as images or components from another library. Export options control which components and assets are included in the exported.riv file.
Select a component, asset, or library in the Assets panel to set its export options in the inspector.
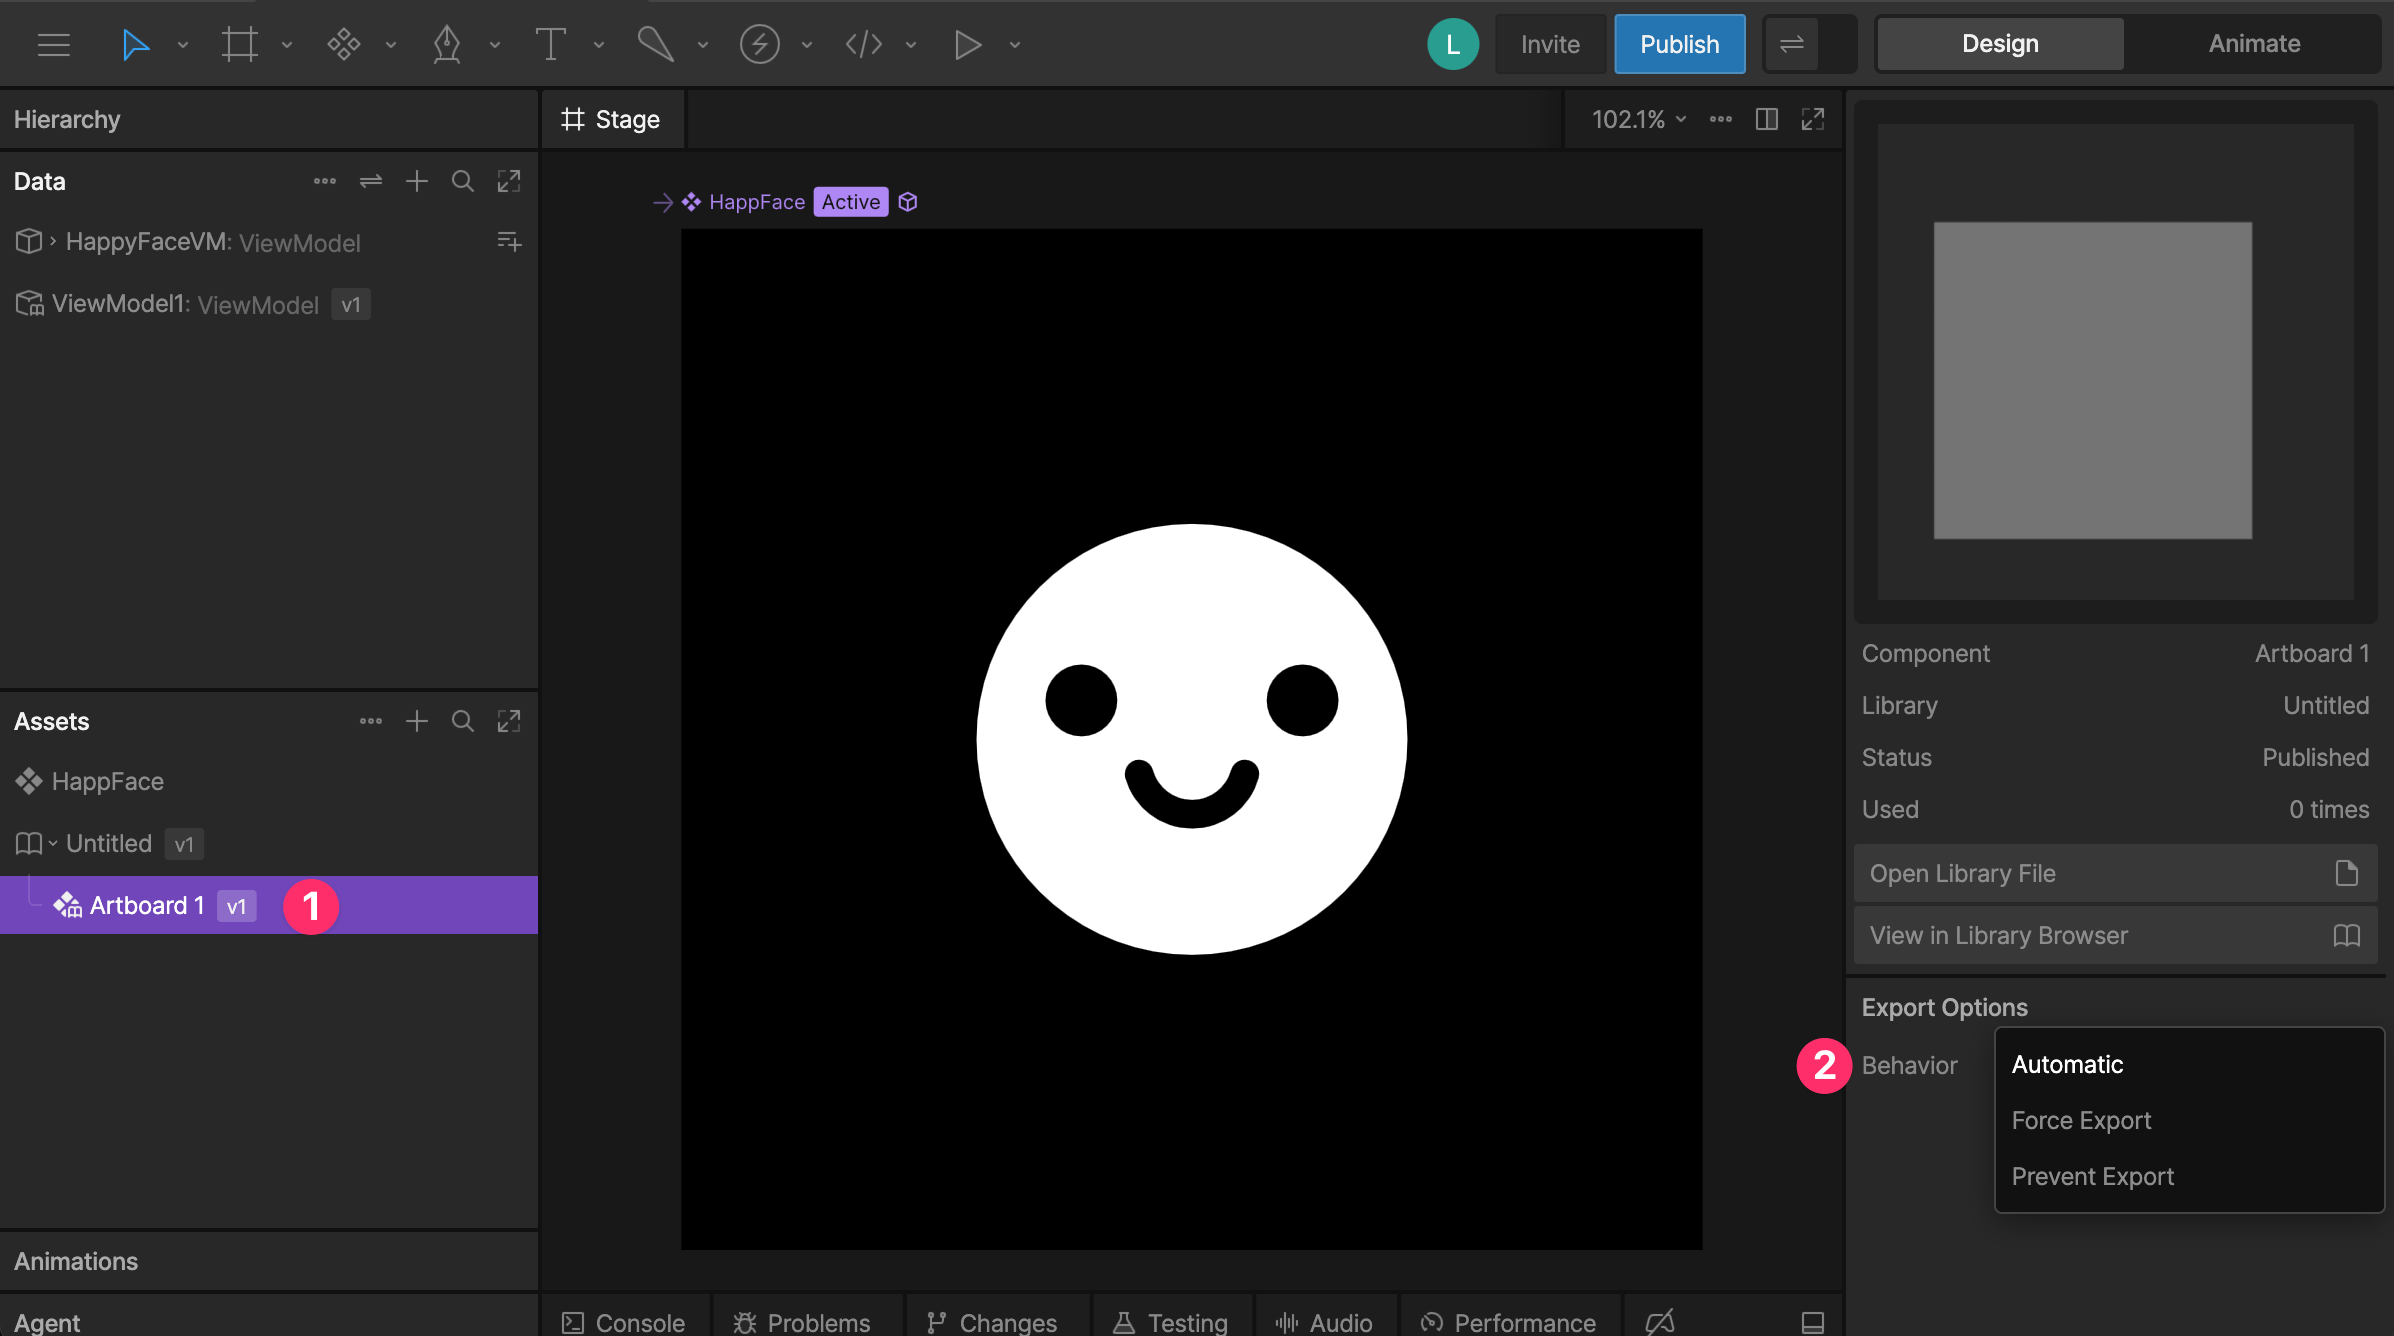
Choose export options based on how you’ll use the file at runtime. For example:
- If you supply an image from an external source at runtime, exclude it from the
.rivfile. - If you share a library component across multiple Rive files through data binding, export it separately and exclude it from the files that use it to avoid duplication.
Currently, the export behavior for assets within a library component can only be set at the library level, not per component. To do so, set the panel display mode to Source/Type, and select the library item in the asset panel.