Olá, olá! I'm Leo Mazzei, a Rive Ambassador and motion graphics specialist from Brazil, based in Ontario, Canada. For the past year, I've been deep in the Rive Community helping designers and developers get up to speed with the newest features.
We're coming up on that time of year where things start to slow down, but I think we can squeeze in one more fun Rive creation before then.
Put your safety goggles on and let's get started!

What we're building
We'll play with features like Solos, Lists, Property Groups, and the newest List Follow Path constraint to build a festive spinning loader with a twist: interactivity. Each time you hover one of the circles, it launches up, morphs into an ornament, and gracefully bounces back to its original shape. It's an oddly satisfying interaction that is guaranteed to grab anyone's attention.
👉 Remix the kickstarter file and the result file to follow along.
Getting started
To get things moving, the kickstarter file has an initial setup ready to go:
The Particle artboard has a solo with a default shape and 14 ornament variations.
The Particle view model is bound to it, with a few properties in place:
activeBall: number — Is already bound to the Solo. Determines which ball illustration is active, with 0 being the first in the hierarchy order.triggerJump: trigger — Triggers the particle jump animationsetRandomBall: trigger — Will be used to setactiveBallto a random numbersetDefaultBall: trigger — Will be used to setactiveBallback to 0 (default shape)
When you hover over the particle, the jump animation plays.
The plan
Moving forward, our task is to:
Fire the ball triggers inside of the “Jump” timeline with a Property Group.
Create a randomized behaviour with Converters and Listeners.
Create infinite copies and arrange them in a rotating circle with Lists and Constraints.
Ship it in time for the holidays!
1. Firing triggers inside a timeline
Property Groups have many uses, one of them is to fire a view model's triggers inside of a timeline with point-in-time precision — like we used to do with Events.
Use the toolbar to add a Property Group to the “Particle” artboard.
Add two trigger properties:
randomBallanddefaultBallBind these properties to the equivalent view model triggers with “Target to Source”
Now, the view model triggers are controlled by the property group triggers, but with a big advantage: we can keyframe exactly when we need them to fire.
Inside the “Jump” timeline, add one keyframe for each trigger at the time where you want the shape to change.
Even if they're not doing anything at this point, check if the view model triggers are being fired every time the ball jumps.
2. Creating a randomized behaviour
When the triggers fire, we can use Listeners to change property values.
Create two listeners targeting the
Particleartboard:setDefaultBall → set
activeBalltoValue0setRandomBall → set
activeBalltoactiveBall
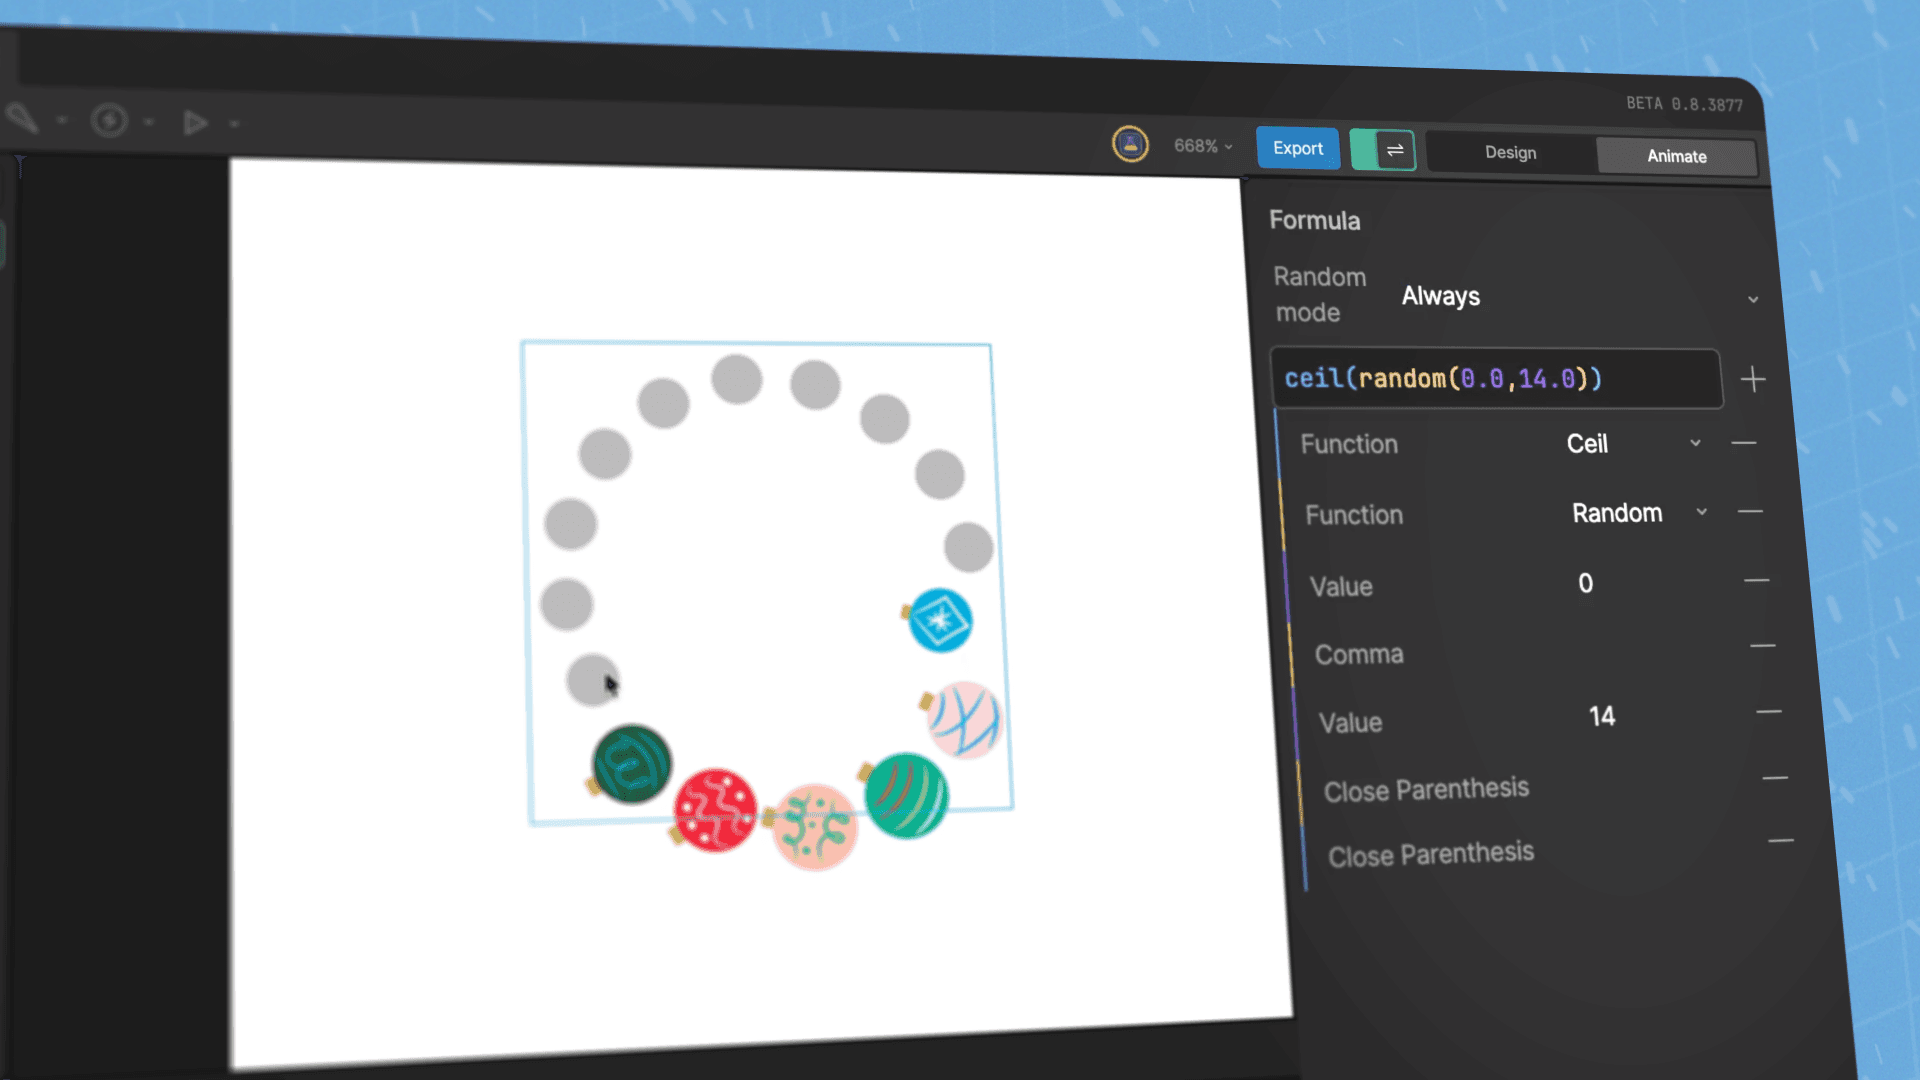
The second listener is currently setting the activeBall to itself. Let's add a Converter that will set it to a random round number instead.
Create a Formula Converter called
randomthat returns a number between 0 and 14 and rounds it up — that's the number of ball options inside the solo. There are two parts to it:random(0,14)generates the random number from 0–14 — including decimals — and wrapping it aroundceil()rounds that number up so the Solo can understand it.ceil(random(0,14))
Go back and assign the converter to the listener:
setRandomBall → set
activeBalltoactiveBallrandom
3. Creating infinite copies using a List
We'll use a List plus the Follow Path constraint to render an indefinite number of Particles in a circle.
Create the
Mainartboard with aMainview model bound to it.Add a number property
numParticlesto theMainview model and set its default value to 10.Add an Artboard List to the
Mainartboard via the Inspector.
To control the number of Particles in the array using numParticles, we must pair it with a converter.
Create a Number to List converter and set its model to
ParticleBind
numParticles+ the Number to List converter to the List property.
If everything is set up correctly, you should see all Particles grouped together at the origin of the artboard. If that's the case, we can move on to the next step: distributing them in a circle.
Draw an ellipse (or any path you want!)
Add a Follow Path constraint to the Artboard List
Set the ellipse as the target
To make it rotate, create a timeline set to Loop that animates the constraint's offset property from 0% to 100%.
That's a wrap!
Try not to get lost in the motion — it's ready to ship. Just in time for the festivities.
Congrats for making it this far. Consider this an important step towards mastering Rive.
Thanks for reading. Come say hi in the Rive Community, and enjoy the break!
More project breakdowns
Olá, olá! I'm Leo Mazzei, a Rive Ambassador and motion graphics specialist from Brazil, based in Ontario, Canada. For the past year, I've been deep in the Rive Community helping designers and developers get up to speed with the newest features.
We're coming up on that time of year where things start to slow down, but I think we can squeeze in one more fun Rive creation before then.
Put your safety goggles on and let's get started!
What we're building
We'll play with features like Solos, Lists, Property Groups, and the newest List Follow Path constraint to build a festive spinning loader with a twist: interactivity. Each time you hover one of the circles, it launches up, morphs into an ornament, and gracefully bounces back to its original shape. It's an oddly satisfying interaction that is guaranteed to grab anyone's attention.
👉 Remix the kickstarter file and the result file to follow along.
Getting started
To get things moving, the kickstarter file has an initial setup ready to go:
The Particle artboard has a solo with a default shape and 14 ornament variations.
The Particle view model is bound to it, with a few properties in place:
activeBall: number — Is already bound to the Solo. Determines which ball illustration is active, with 0 being the first in the hierarchy order.triggerJump: trigger — Triggers the particle jump animationsetRandomBall: trigger — Will be used to setactiveBallto a random numbersetDefaultBall: trigger — Will be used to setactiveBallback to 0 (default shape)
When you hover over the particle, the jump animation plays.
The plan
Moving forward, our task is to:
Fire the ball triggers inside of the “Jump” timeline with a Property Group.
Create a randomized behaviour with Converters and Listeners.
Create infinite copies and arrange them in a rotating circle with Lists and Constraints.
Ship it in time for the holidays!
1. Firing triggers inside a timeline
Property Groups have many uses, one of them is to fire a view model's triggers inside of a timeline with point-in-time precision — like we used to do with Events.
Use the toolbar to add a Property Group to the “Particle” artboard.
Add two trigger properties:
randomBallanddefaultBallBind these properties to the equivalent view model triggers with “Target to Source”
Now, the view model triggers are controlled by the property group triggers, but with a big advantage: we can keyframe exactly when we need them to fire.
Inside the “Jump” timeline, add one keyframe for each trigger at the time where you want the shape to change.
Even if they're not doing anything at this point, check if the view model triggers are being fired every time the ball jumps.
2. Creating a randomized behaviour
When the triggers fire, we can use Listeners to change property values.
Create two listeners targeting the
Particleartboard:setDefaultBall → set
activeBalltoValue0setRandomBall → set
activeBalltoactiveBall
The second listener is currently setting the activeBall to itself. Let's add a Converter that will set it to a random round number instead.
Create a Formula Converter called
randomthat returns a number between 0 and 14 and rounds it up — that's the number of ball options inside the solo. There are two parts to it:random(0,14)generates the random number from 0–14 — including decimals — and wrapping it aroundceil()rounds that number up so the Solo can understand it.ceil(random(0,14))
Go back and assign the converter to the listener:
setRandomBall → set
activeBalltoactiveBallrandom
3. Creating infinite copies using a List
We'll use a List plus the Follow Path constraint to render an indefinite number of Particles in a circle.
Create the
Mainartboard with aMainview model bound to it.Add a number property
numParticlesto theMainview model and set its default value to 10.Add an Artboard List to the
Mainartboard via the Inspector.
To control the number of Particles in the array using numParticles, we must pair it with a converter.
Create a Number to List converter and set its model to
ParticleBind
numParticles+ the Number to List converter to the List property.
If everything is set up correctly, you should see all Particles grouped together at the origin of the artboard. If that's the case, we can move on to the next step: distributing them in a circle.
Draw an ellipse (or any path you want!)
Add a Follow Path constraint to the Artboard List
Set the ellipse as the target
To make it rotate, create a timeline set to Loop that animates the constraint's offset property from 0% to 100%.
That's a wrap!
Try not to get lost in the motion — it's ready to ship. Just in time for the festivities.
Congrats for making it this far. Consider this an important step towards mastering Rive.
Thanks for reading. Come say hi in the Rive Community, and enjoy the break!
More project breakdowns
Join our newsletter
Get all the latest Rive news delivered to your inbox.