This post focuses on a quick way to create loading animations by reusing and offsetting animation keys. You can find a complementary Rive Unplugged Video here. You can also check out the original file in the Rive Community here. These examples are useful when we need something quick and functional for a website, app, or game.
Process preview

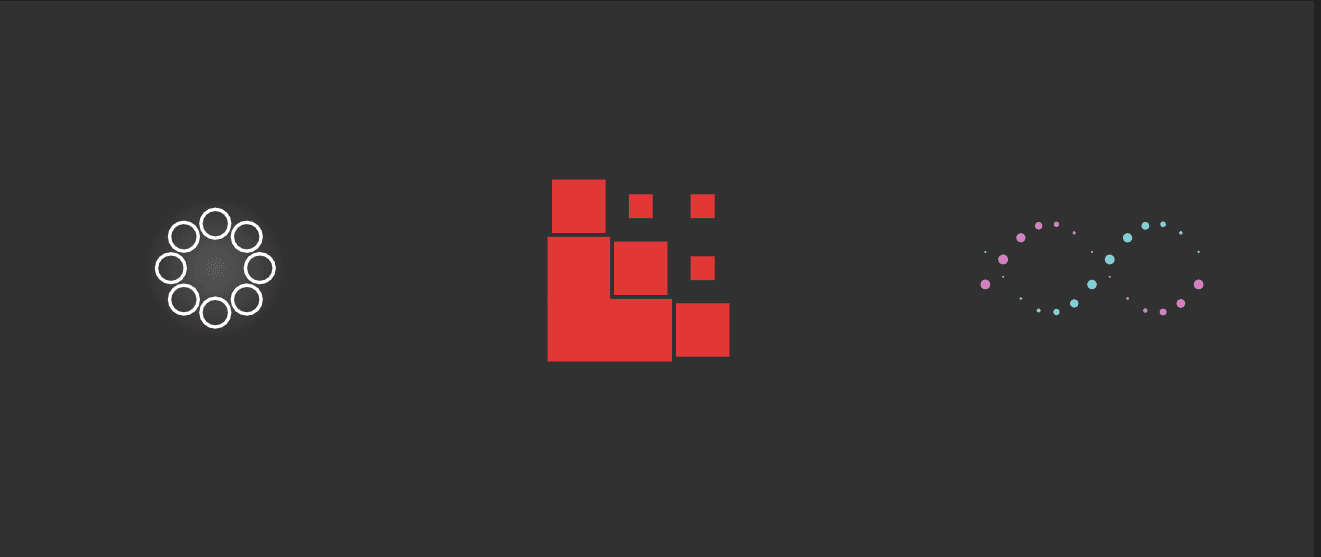
Often, loading animations are multiple objects that repeat the same motion continuously. For example, this square loader is a series of rectangles that change their scale in sequence.
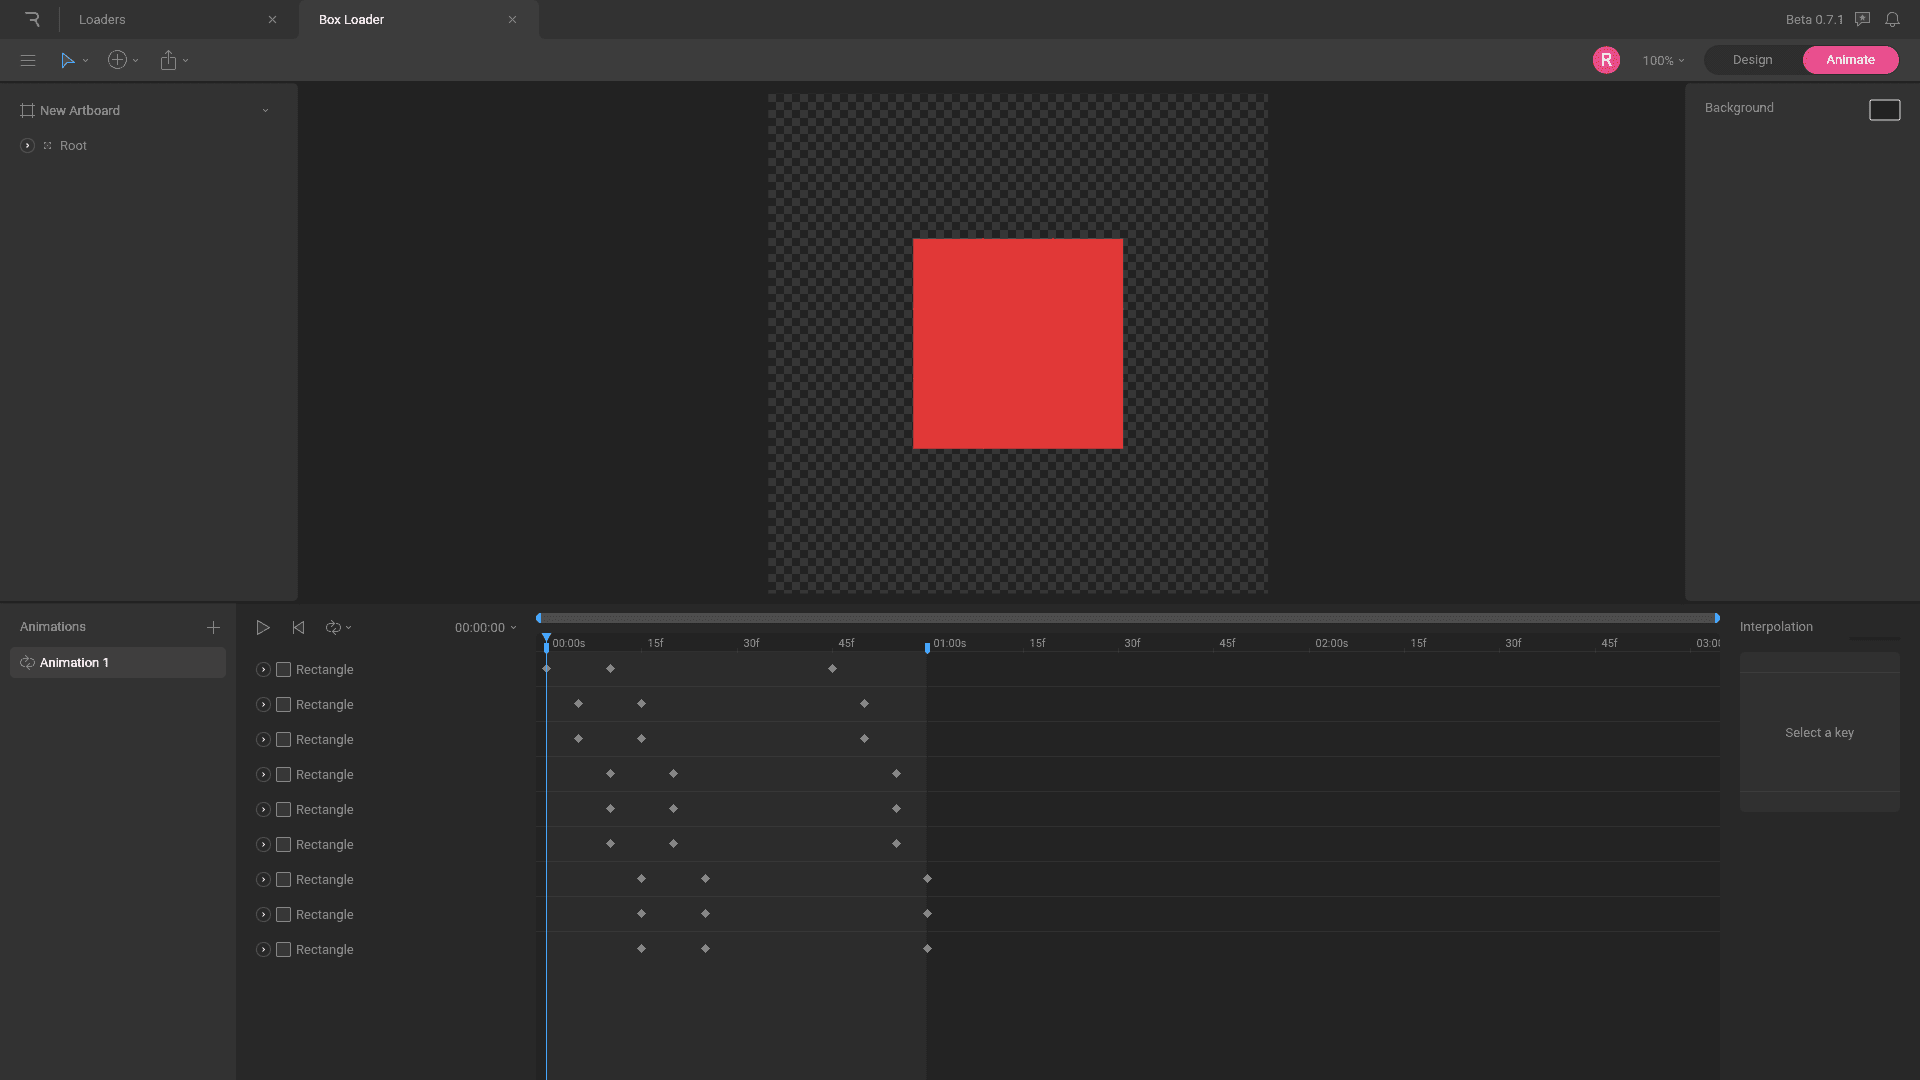
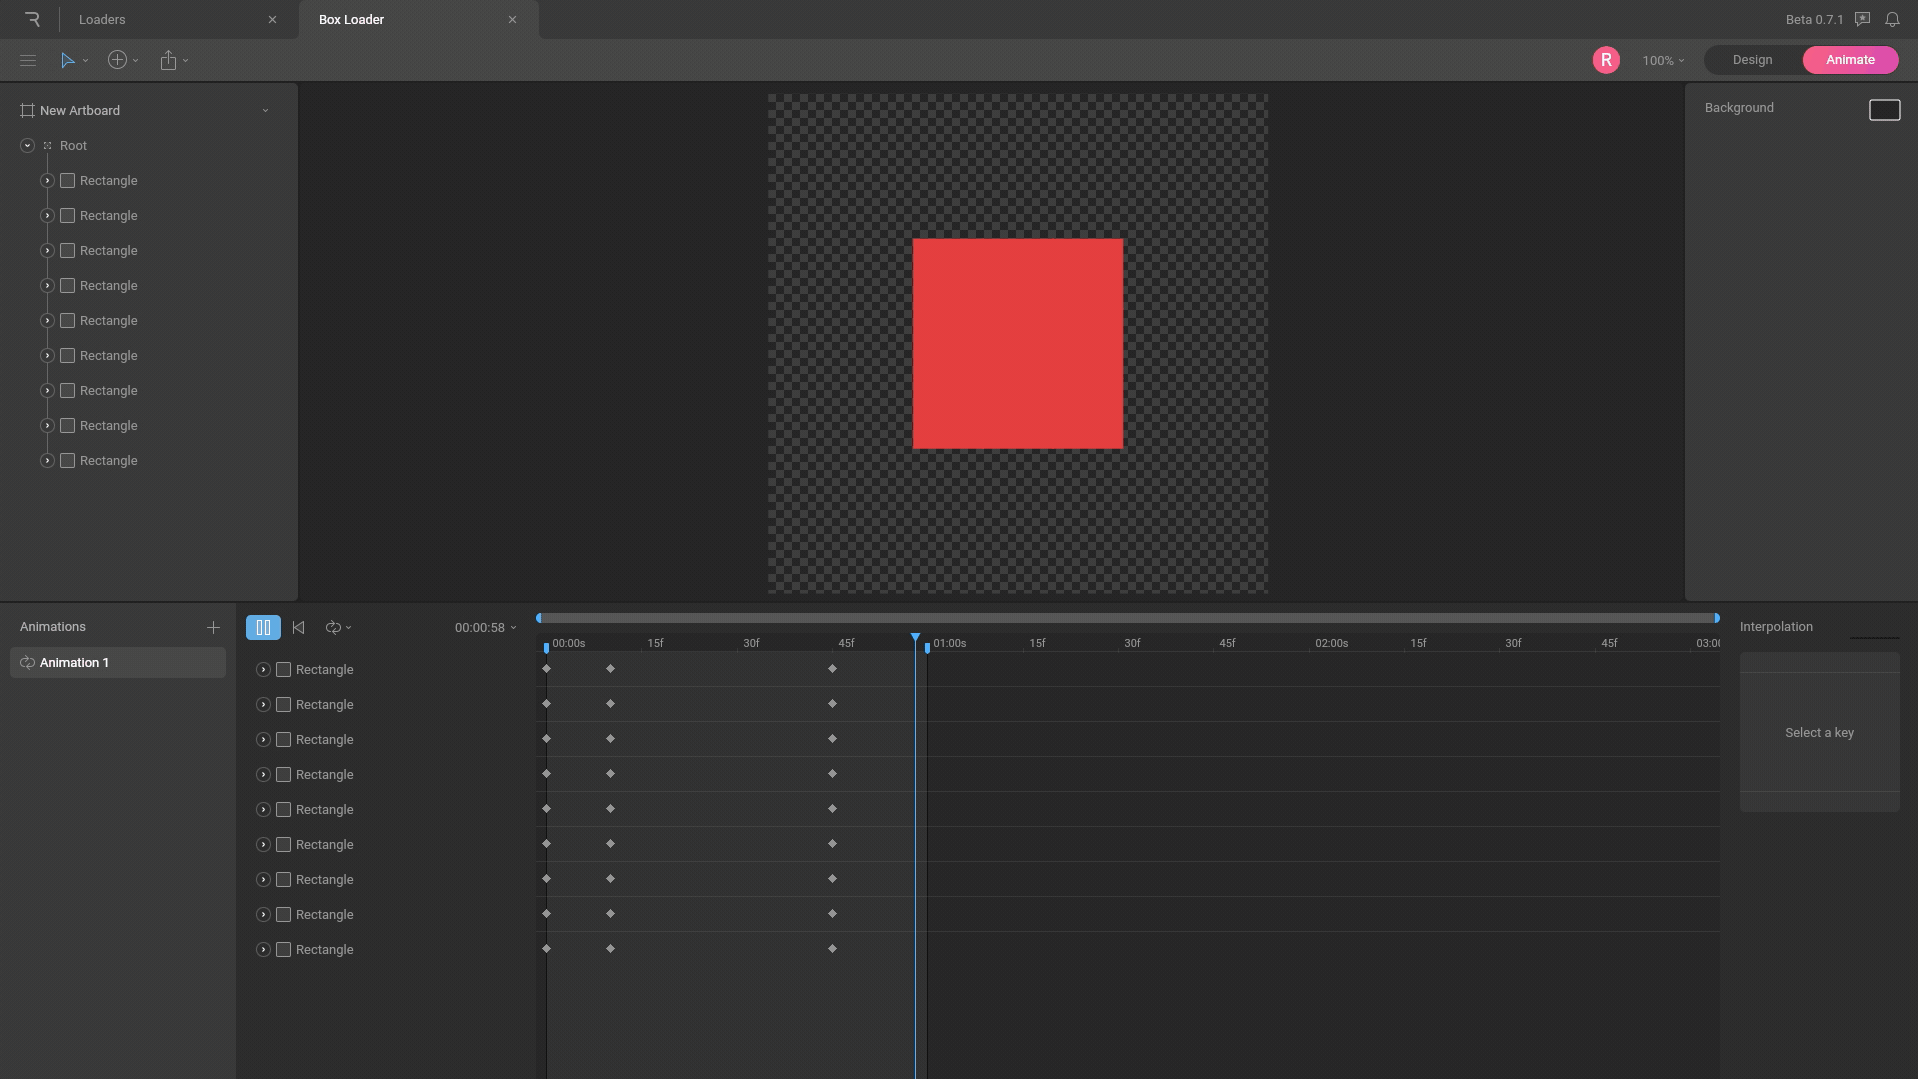
When we dig into the keys that create the animation, you'll notice that each rectangle shares the same number of keys, timing, and easing. Note that not all of the keys align.
Imagine that each set of keys did line up. We would expect to see the individual rectangles change their scale concurrently, which wouldn't be visually intriguing. Instead of leaving each key aligned, we offset them away from one another to have each object or group of objects animate at a different time.
We can create different motion sequences depending on how we offset our keys. For example, we can have rows or columns animate in series by offsetting the correct keys together on the timeline.

The process
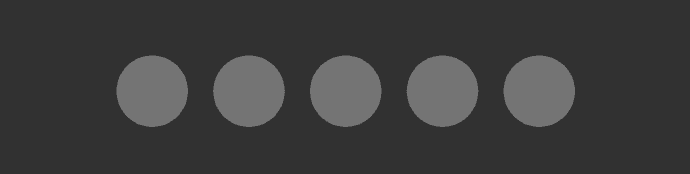
Now that we understand what we are trying to accomplish, let's look at how we can achieve it. Let's start by walking through a simple example together. We'll take these five ellipses and create a loading animation.
First, we need to create motion keys for one of the ellipses. In this case, I create keys Y position keys for the first ellipse to go up and down in a loop. In addition to creating the keys, I also change the interpolation to cubic and set the animation to loop.

Notice that the playback loops smoothly because the first and last key in the loop has the same Y value.
Instead of creating the same keys for each ellipse one by one, we can copy the keys we already have and paste them onto the other ellipses. Notice new lines of keys appear on the timeline. When we play the animation, all of the ellipses move in unison.

We need to offset our keys to create the exact motion we are searching for, but we need to give ourselves more room on the timeline to do that. Extend the timeline by two additional seconds to create more room to work with.
Next, define a work area roughly centered on the timeline. This allows us to have keys extend past the confines of the work area, both to the left and right.

Offset the keys by marquee selecting rows of keys and moving them forward on the timeline. As you move the keys forward, count the number of milliseconds you've moved each row of keys. This will help you offset each row of keys by the same amount.

When we preview the animation, you'll notice that the motion looks much better! Unfortunately, we don't have a solid loop. You'll see that as the playhead reaches the end of the work area and loops back to the start, we have a severe hitch in the animation. This is due to a mismatch of values at the beginning and end of the work area. You can check this by noting the Y value at the start of the work area and comparing it to when your playhead is at the end of the work area. Luckily, this is an easy fix!
Instead of offsetting the keys right away, start by copying the first loop and pasting it to the start of the timeline. Now, drag the new loop to the right on the timeline until the last key of the first loop overlaps the first key of the second loop. Now when you offset your keys as before, you'll see that you've created a much better loop. The works because the Y values and interpolation are the same at the beginning and end of the work area.

Notice that the waving motion is led by the left ellipse in this example. We can have the rightmost ellipse lead the wave by offsetting the keys to the left instead of the right. To do this, paste a new loop of keys at the end of the work area, align the keys, then offset them.
As a quick tip, it's best to organize your objects in the hierarchy in the order you plan to animate them. For example, I have the left-most ellipse at the top of my list and the rightmost one at the bottom. This way, when I begin to offset the keys, I never have to search for the next object.
Of course, none of the loaders shown in this post are interactive. If you are curious about how to make them interactive, check out this video here and the blog post here.
This post focuses on a quick way to create loading animations by reusing and offsetting animation keys. You can find a complementary Rive Unplugged Video here. You can also check out the original file in the Rive Community here. These examples are useful when we need something quick and functional for a website, app, or game.
Process preview
Often, loading animations are multiple objects that repeat the same motion continuously. For example, this square loader is a series of rectangles that change their scale in sequence.
When we dig into the keys that create the animation, you'll notice that each rectangle shares the same number of keys, timing, and easing. Note that not all of the keys align.
Imagine that each set of keys did line up. We would expect to see the individual rectangles change their scale concurrently, which wouldn't be visually intriguing. Instead of leaving each key aligned, we offset them away from one another to have each object or group of objects animate at a different time.
We can create different motion sequences depending on how we offset our keys. For example, we can have rows or columns animate in series by offsetting the correct keys together on the timeline.
The process
Now that we understand what we are trying to accomplish, let's look at how we can achieve it. Let's start by walking through a simple example together. We'll take these five ellipses and create a loading animation.
First, we need to create motion keys for one of the ellipses. In this case, I create keys Y position keys for the first ellipse to go up and down in a loop. In addition to creating the keys, I also change the interpolation to cubic and set the animation to loop.
Notice that the playback loops smoothly because the first and last key in the loop has the same Y value.
Instead of creating the same keys for each ellipse one by one, we can copy the keys we already have and paste them onto the other ellipses. Notice new lines of keys appear on the timeline. When we play the animation, all of the ellipses move in unison.
We need to offset our keys to create the exact motion we are searching for, but we need to give ourselves more room on the timeline to do that. Extend the timeline by two additional seconds to create more room to work with.
Next, define a work area roughly centered on the timeline. This allows us to have keys extend past the confines of the work area, both to the left and right.
Offset the keys by marquee selecting rows of keys and moving them forward on the timeline. As you move the keys forward, count the number of milliseconds you've moved each row of keys. This will help you offset each row of keys by the same amount.
When we preview the animation, you'll notice that the motion looks much better! Unfortunately, we don't have a solid loop. You'll see that as the playhead reaches the end of the work area and loops back to the start, we have a severe hitch in the animation. This is due to a mismatch of values at the beginning and end of the work area. You can check this by noting the Y value at the start of the work area and comparing it to when your playhead is at the end of the work area. Luckily, this is an easy fix!
Instead of offsetting the keys right away, start by copying the first loop and pasting it to the start of the timeline. Now, drag the new loop to the right on the timeline until the last key of the first loop overlaps the first key of the second loop. Now when you offset your keys as before, you'll see that you've created a much better loop. The works because the Y values and interpolation are the same at the beginning and end of the work area.
Notice that the waving motion is led by the left ellipse in this example. We can have the rightmost ellipse lead the wave by offsetting the keys to the left instead of the right. To do this, paste a new loop of keys at the end of the work area, align the keys, then offset them.
As a quick tip, it's best to organize your objects in the hierarchy in the order you plan to animate them. For example, I have the left-most ellipse at the top of my list and the rightmost one at the bottom. This way, when I begin to offset the keys, I never have to search for the next object.
Of course, none of the loaders shown in this post are interactive. If you are curious about how to make them interactive, check out this video here and the blog post here.
Join our newsletter
Get all the latest Rive news delivered to your inbox.