Using the OnRiveReady Event
Accessing rive objects requires them to be initialized. This is due to the multithreaded nature of Rive’s underlying implementation. OnRiveReady events can be used to determine when Rive is ready for use. For instance, you may want to set data in a Rive component when it is first created, like filling in the user’s name in a Text Run when a RiveWidget is created. The blueprint below shows how to bind to the OnRiveReady event of a RiveWidget and set the text when play has begun and the RiveWidget is ready for use.
Translate mouse events to Rive artboard events
-
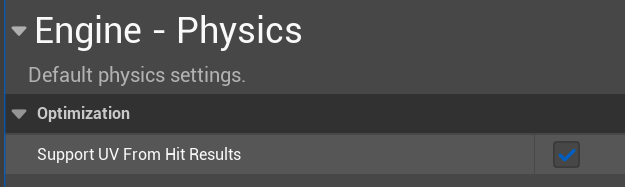
Enable “Support UV from hit results” in your Project Settings.
-
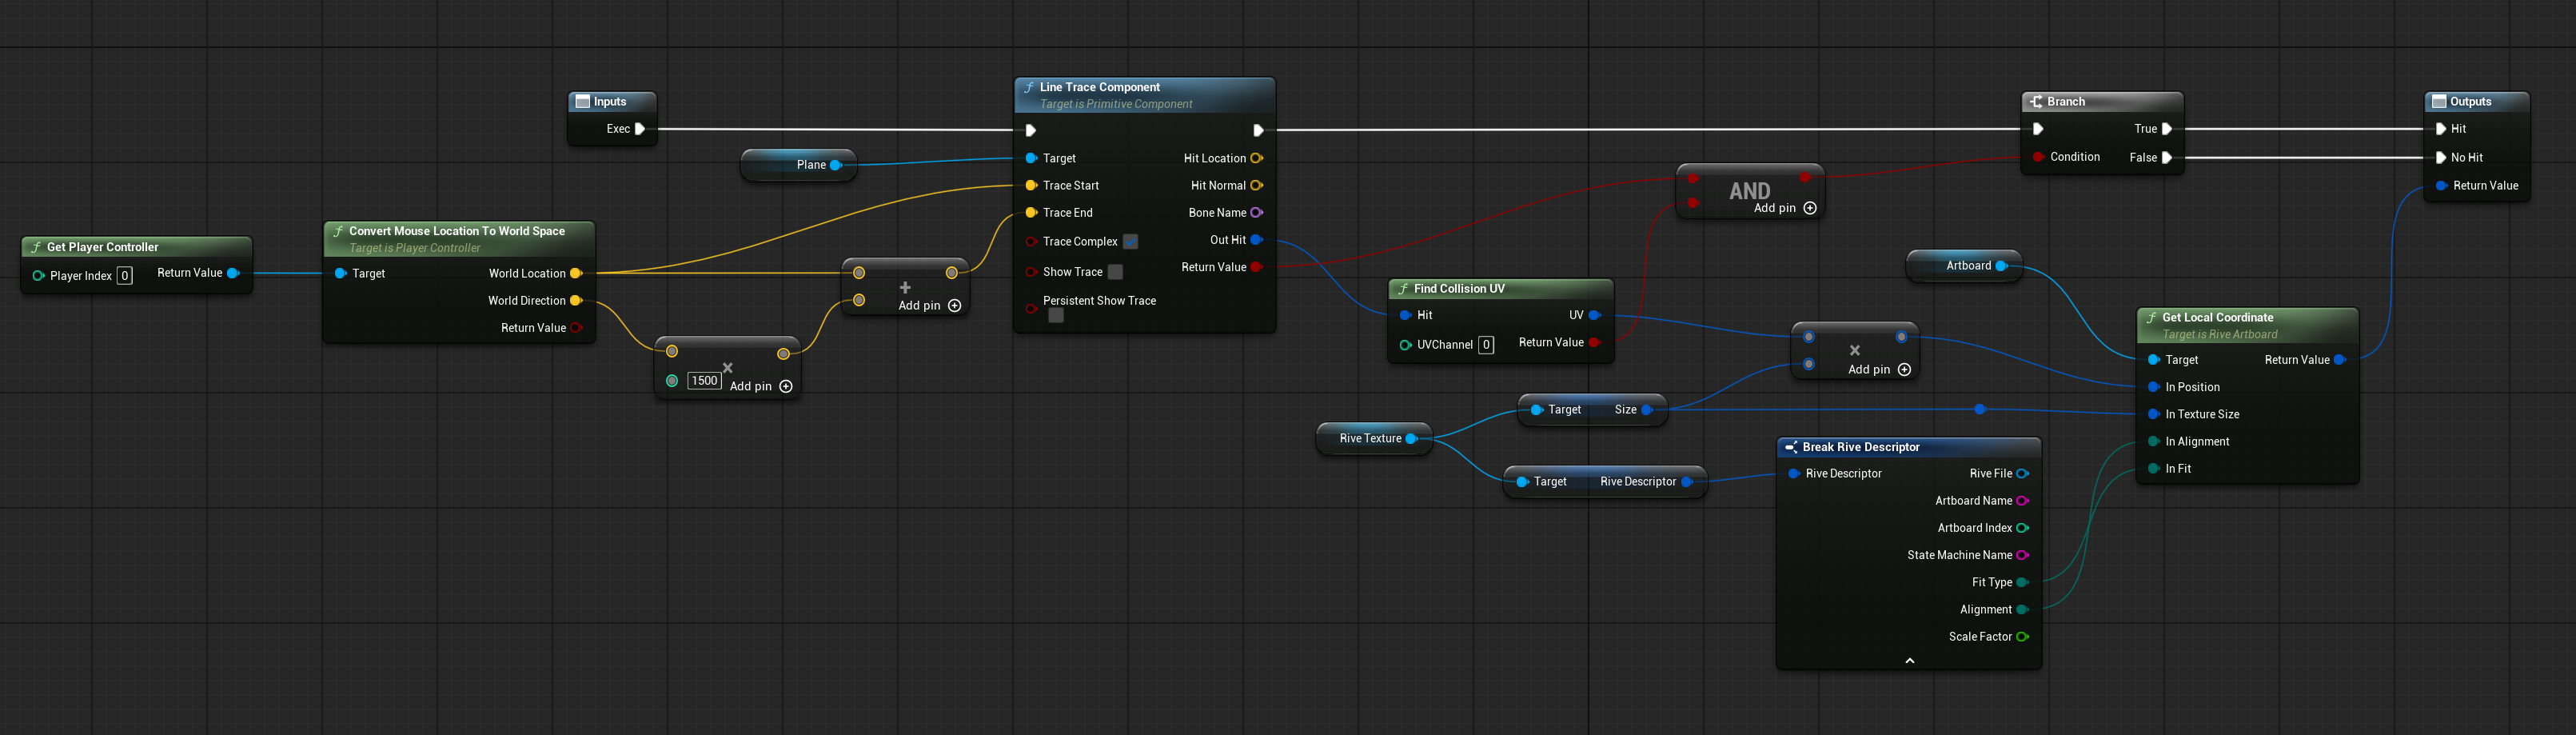
Create a blueprint that translates mouse location to artboard hits. The Topography Map level in the Rive Unreal Demos repository has an example of a Macro that does this using line traces:
-
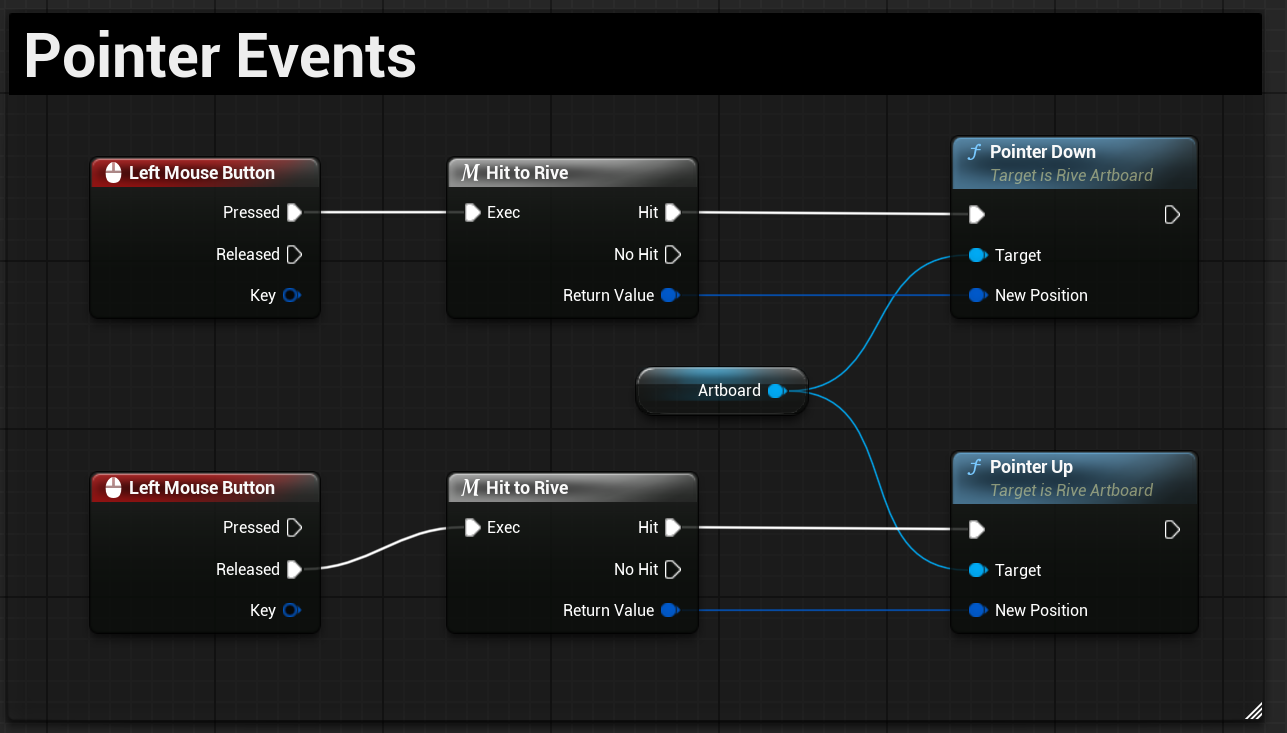
Call the Macro for the corresponding events and pass them to the artboard:
Controlling Rive files in Unreal Sequencer
Rive files have both inputs and triggers that can be called via Blueprints, which in turn can be called by triggers in the Unreal Sequencer. The Rive and Unreal terminology collides a bit here, so I’ll try to be as clear as possible.In sequencer, add your RiveActor as a track.
Move the timeline head to the location where you want to trigger an input or Rive trigger.
Add a key.
Right-click the key, select Properties and select “Create New Endpoint”. This will create a Blueprint node that will trigger whatever Blueprint action you like, including Rive actions.
Open the Blueprint (double-click on Event) and add a Rive Set Bool Value node (be sure to uncheck “Context Sensitive” in the search box.
The Rive Set Value nodes require an artboard as an input which can be derived from the Sequencer Event node. Add a Rive Get Artboard node and drag the target from the Sequencer Event node. A conversion node will be automatically added.
Ensure the Blueprint’s “Call In Editor” box is checked.