.riv file, and displaying it in UMG.
Prerequisites
- Unreal Engine 5.6 or above.
- A C++ toolchain. The Rive plugin is a C++ plugin, so it’s compiled as part
of your project regardless of how you install it:
- Windows: Visual Studio 2022 with the Game development with C++ workload (it includes the Windows SDK and .NET components Unreal needs).
- macOS: Xcode with the command-line tools (
xcode-select --install).
1) Install the Plugin
- Fab (Recommended)
- GitHub
1
Open the Epic Games Launcher or Unreal Editor.
2
Open Fab.
3
Search for Rive or go directly to:
https://www.fab.com/listings/3a2968c1-4a1d-427c-934e-92e4d8578b77
https://www.fab.com/listings/3a2968c1-4a1d-427c-934e-92e4d8578b77
4
Add the plugin to your engine or project.
5
Restart Unreal Engine if prompted.
2) Build the Project
The Rive plugin is C++, so your project must be compiled before the editor can load it.- Windows
- macOS
1
Right-click your
.uproject file and choose Generate Visual Studio
project files.2
Open the generated
.sln in Visual Studio 2022.3
Set the configuration to Development Editor / Win64 and build.
.uproject directly — if the plugin modules
aren’t built, Unreal offers to rebuild them; click Yes.
3) Enable the Plugin
- Open Edit → Plugins.
- Locate Rive under Runtime.
- Enable the plugin.
- Restart the editor if required.
4) Import a Rive File
- Open the Content Browser.
- Drag and drop a
.rivfile into your project.
A Rive File is an Unreal asset. It does not render directly.
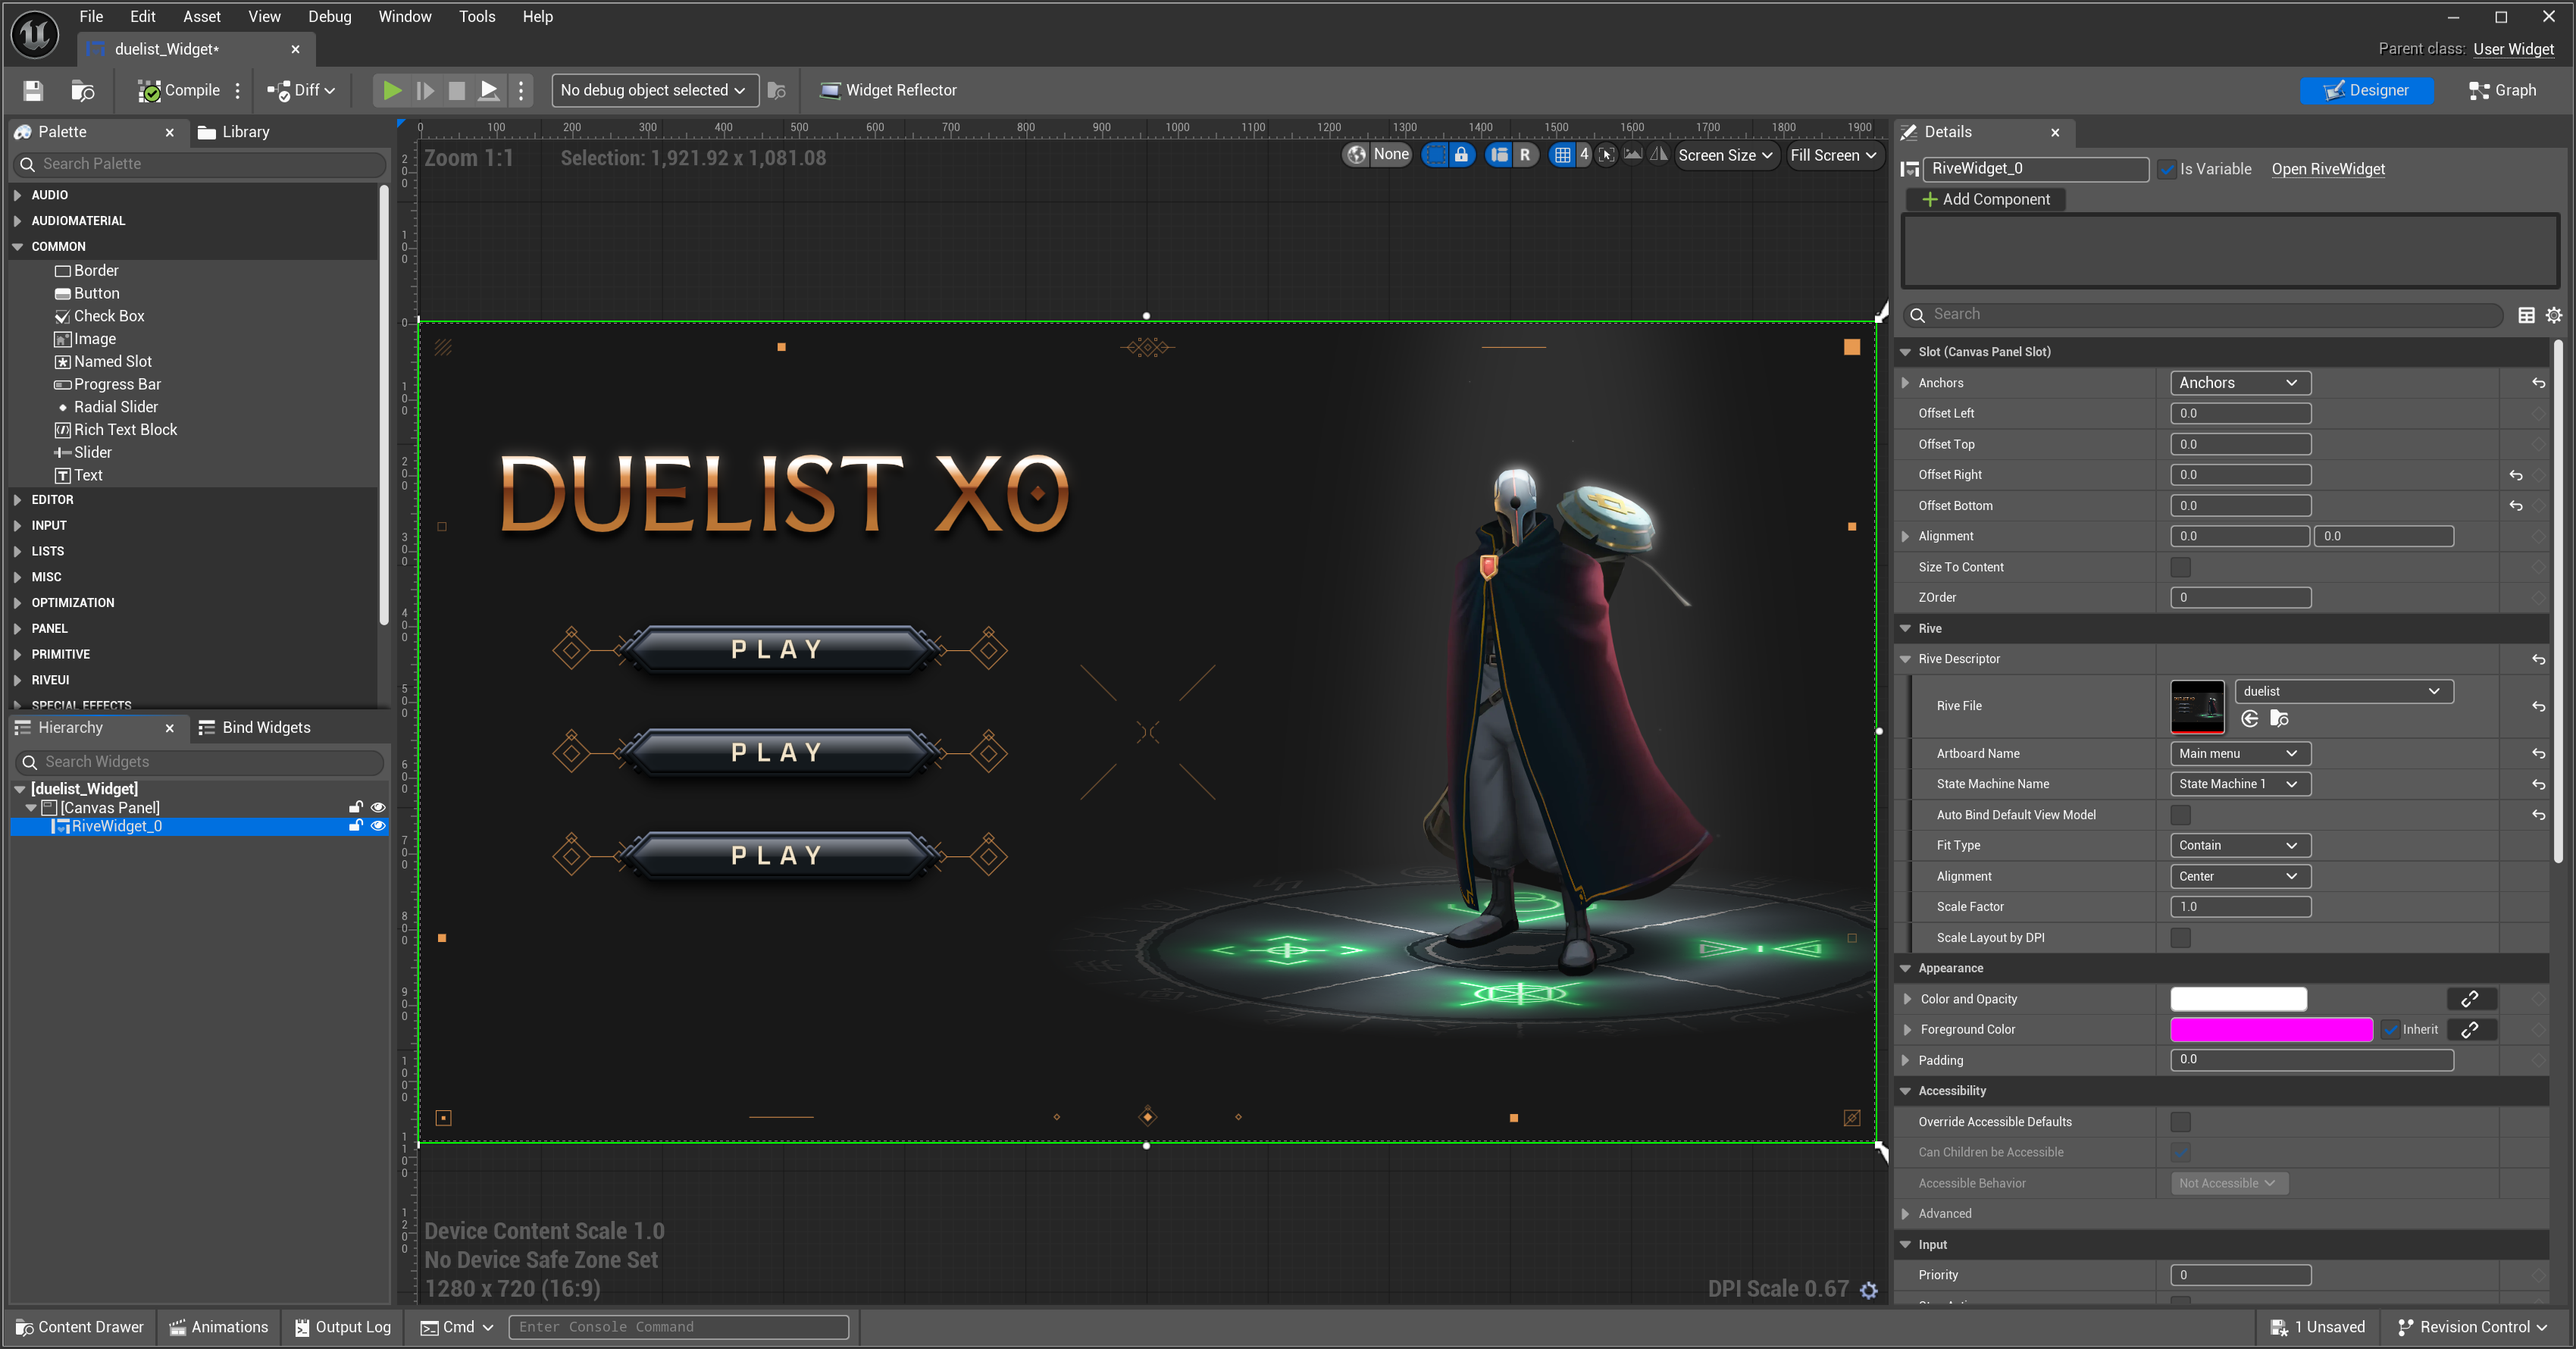
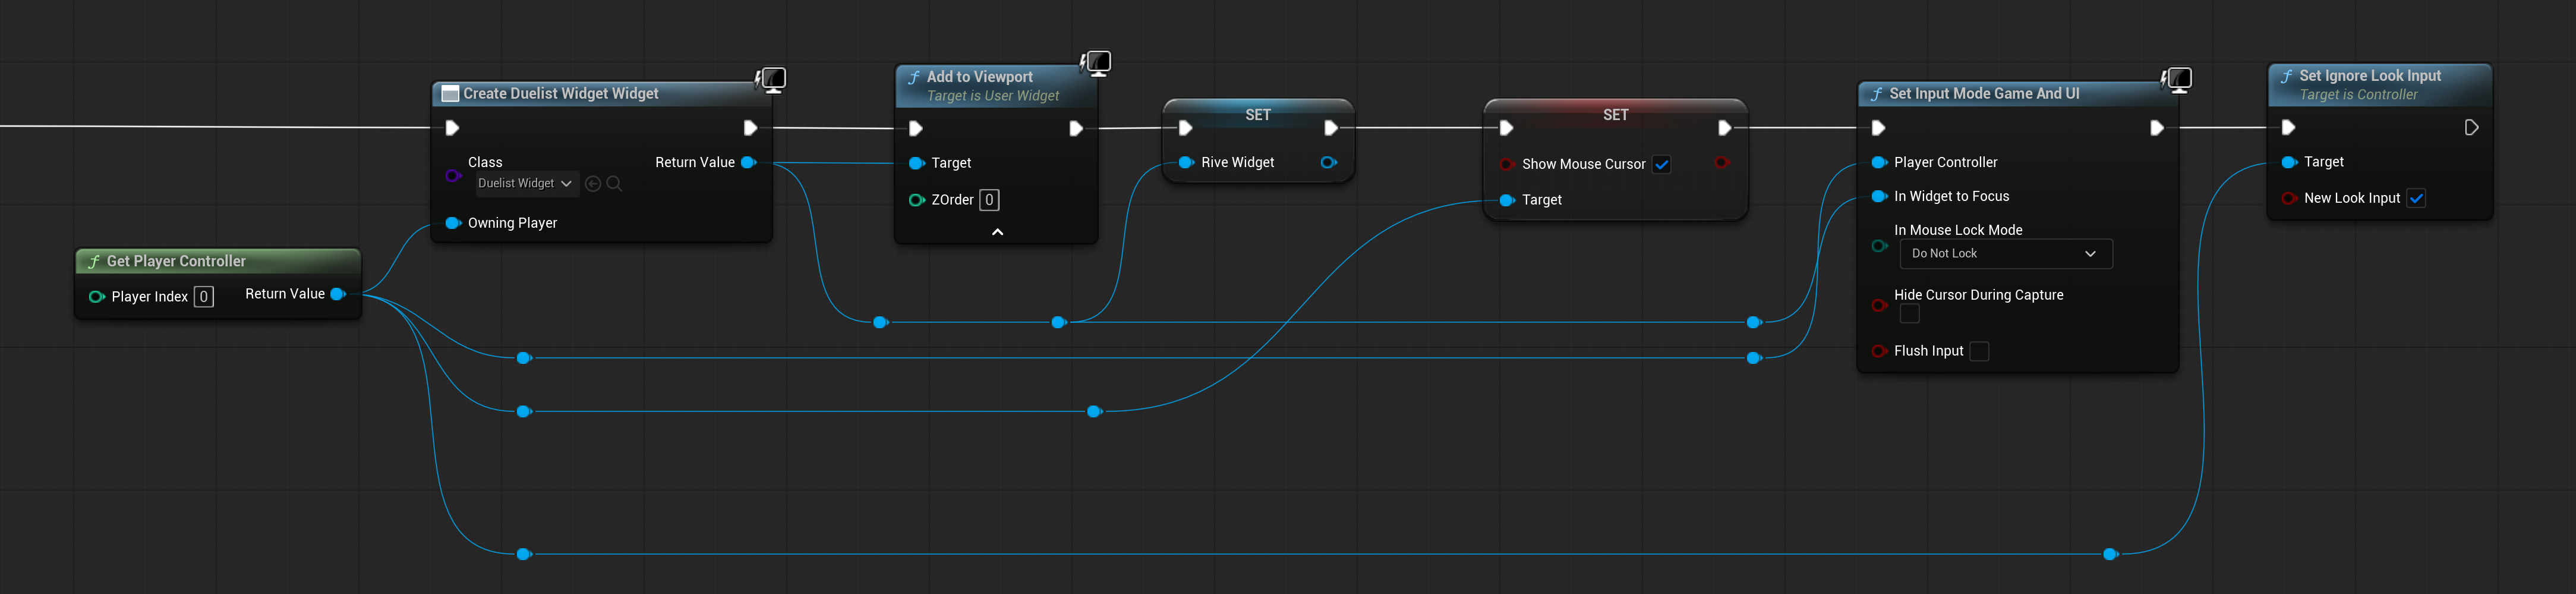
5) Create a Widget
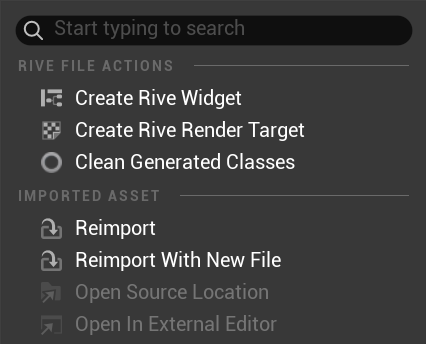
- Right-click on the Rive file asset and select Create Rive Widget from the context menu.
6) Create a Blueprint
-
You can now use the widget in a blueprint just as you would any other widget.
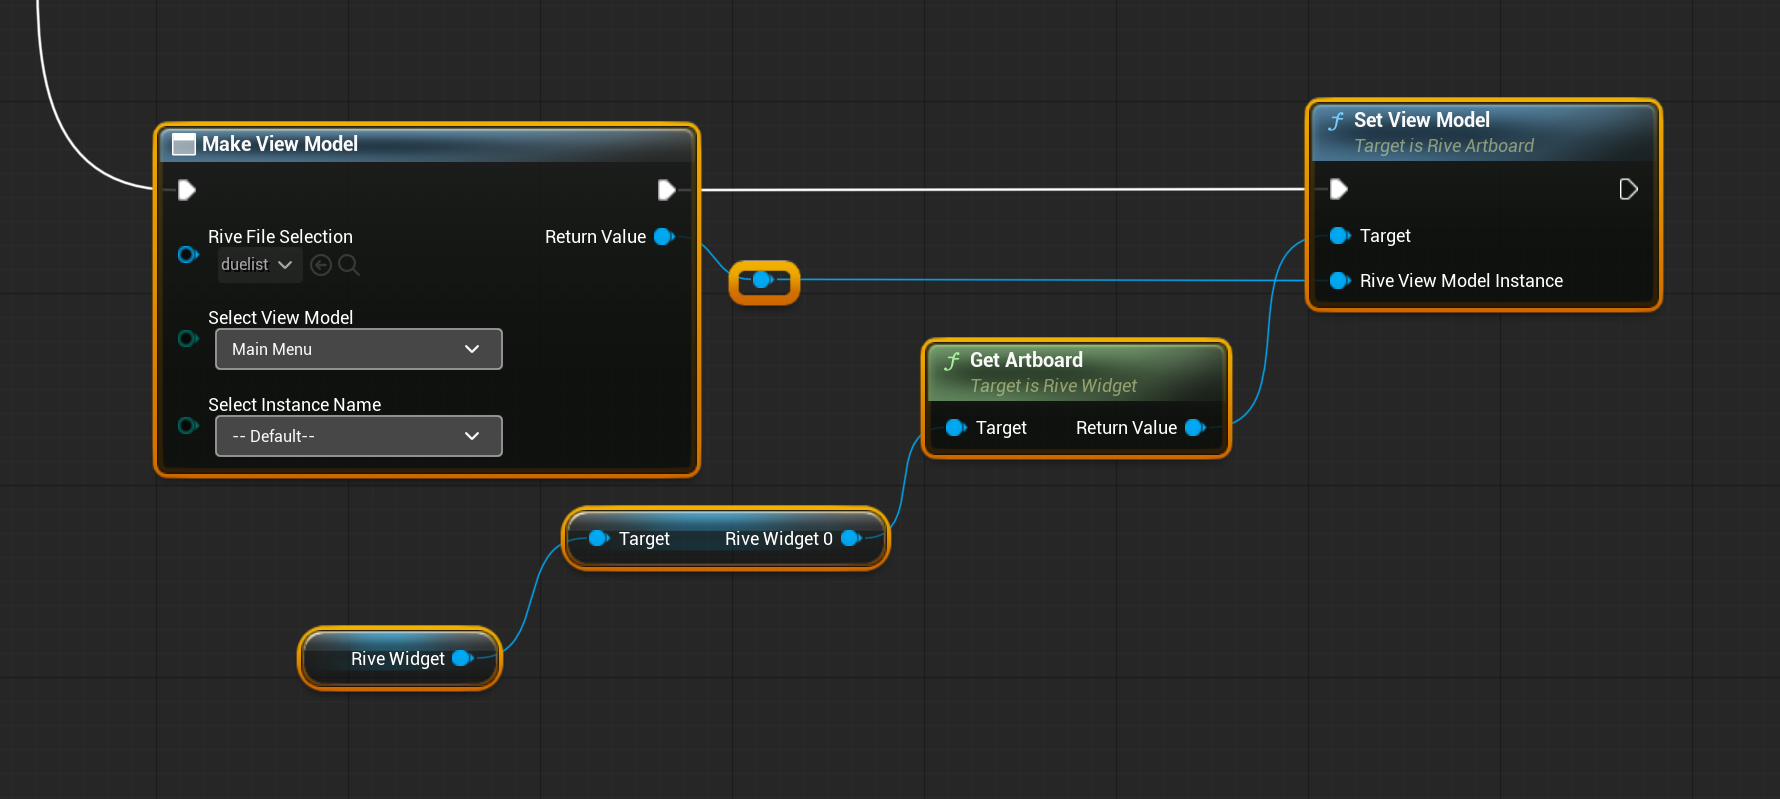
7) Bind a ViewModel
If the Rive File is not using autobinding, you must assign a viewmodel. This can be done in blueprints using the Make View Model node.