

Creating a timeline
1
Switch to Animate mode and select the artboard you want to animate.
2
Click + next to the timeline tabs and select Timeline.
Playing a timeline
Click the play button on the timeline tabs, or press Space, to play and pause the selected timeline.Animation type
The buttons next to the time display set what happens when the playhead reaches the end of the timeline:- One-Shot plays once and stops at the end. This is the default.
- Loop jumps back to the start and plays again, continuously.
- Ping-Pong plays to the end, then backward to the start, continuously.
Work area
The work area limits playback to part of a timeline, so you can focus on one section of a longer animation. Click the Work Area button in the timeline toolbar to turn it on, then drag the work area’s start and end on the time ruler. To fit the work area to your keys, select the keys, right-click, and select Set work area. With a single key selected, choose whether the work area starts or ends at that key.Timeline settings
Click the time display at the top of the timeline to open the timeline’s settings.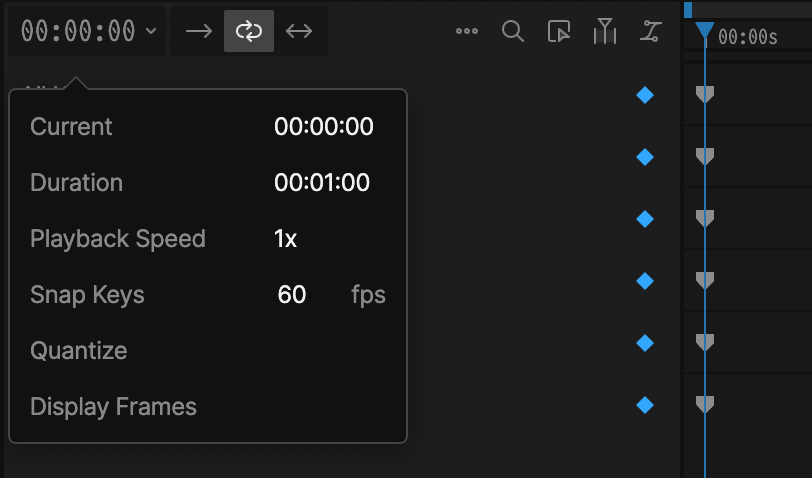
- Current: The playhead’s position. Type a time to move the playhead.
- Duration: How long the timeline is.
- Playback Speed: How fast the timeline plays. The default is 1x. Negative values play the timeline backward.
- Snap Keys: The timeline’s frame rate, in frames per second. Keys snap to these frames. The default is 60.
- Quantize: Plays the timeline at its frame rate instead of updating on every frame the app draws. Turn it on for stepped or choppy motion, like a sprite animation. It’s off by default.
- Display Frames / Display Time: Switches the time display between frames and time.
Finding objects and properties
When many objects are keyed, these tools help you focus on the rows you need:- Search: Click the search button in the timeline toolbar to filter the rows by name.
- Show Selected: Click the Show Selected button to show only the rows for the objects you’ve selected on the stage or in the Hierarchy.
- Expand and collapse: Press U to expand or collapse the rows of the selected objects.
- Show one property: With objects selected, press P for position, R for rotation, S for scale, O for opacity, or T for all transform properties to show only those rows. Hold Shift to add more.
Timeline options
Click the options button in the timeline toolbar for more ways to set up the timeline: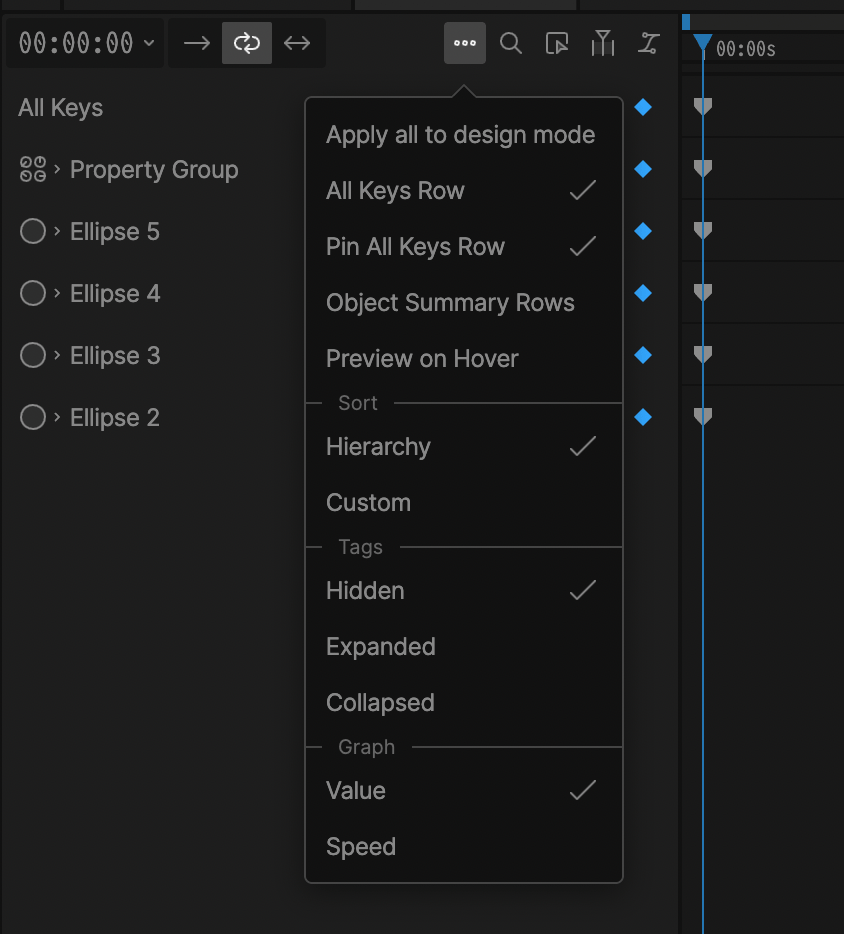
- Apply all to design mode: Copies the keyed values at the playhead to the design. Use it when you want the design to match a moment in the animation.
- All Keys Row: Shows a row at the top of the timeline with every key in the timeline. Pin All Keys Row keeps it in view as you scroll.
- Object Summary Rows: Shows each object’s keys as a single bar instead of a stack of keys.
- Preview on Hover: Shows the frame under the pointer on the stage as you hover over the timeline.
- Sort: Orders the rows by the Hierarchy or in a Custom order.
- Tags: Shows tags on the rows as Expanded or Collapsed, or hides them.
- Graph: Chooses whether the Graph Editor plots Value or Speed. See Speed Graph.
Navigating the timeline
- Scroll and zoom: Drag the bar at the top of the timeline to scroll. Drag its ends to zoom in or out.
- Pan: Right-click and drag, or hold Space and drag.
- Maximize: Click the maximize button on the timeline tabs to give the timeline more room. Click it again to restore the layout.