

Setting keys
With a timeline selected in Animate mode, move the playhead to the time you want, then set a key in any of these ways:- Move, rotate, or scale an object on the stage. Rive keys each property that changes.
- Change a property’s value in the Inspector.
- Click the key button next to a property in the Inspector to key its current value.
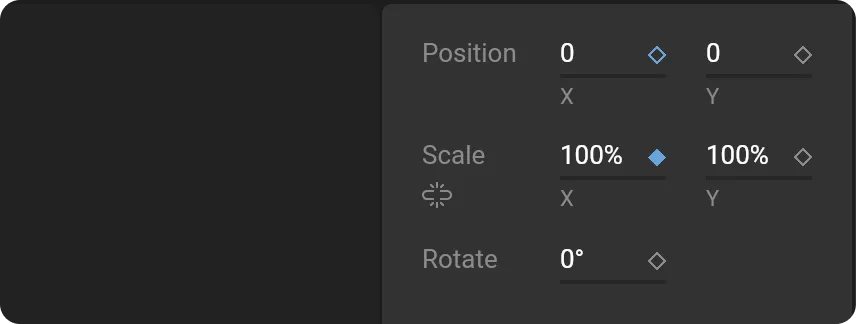
- Grey outline: The property isn’t animated in this timeline.
- Colored outline: The property is animated, but there’s no key at the playhead.
- Filled: There’s a key at the playhead.
Selecting keys
- Click a key to select it. Shift-click to add or remove keys.
- Drag across the timeline to select every key in an area.
- Click a key on an object’s row to select the keys of all of that object’s properties at that time.
Moving keys
Drag selected keys left or right to change when they happen. Drag a grey key to move every property on that row at once, or a blue key to move a single property.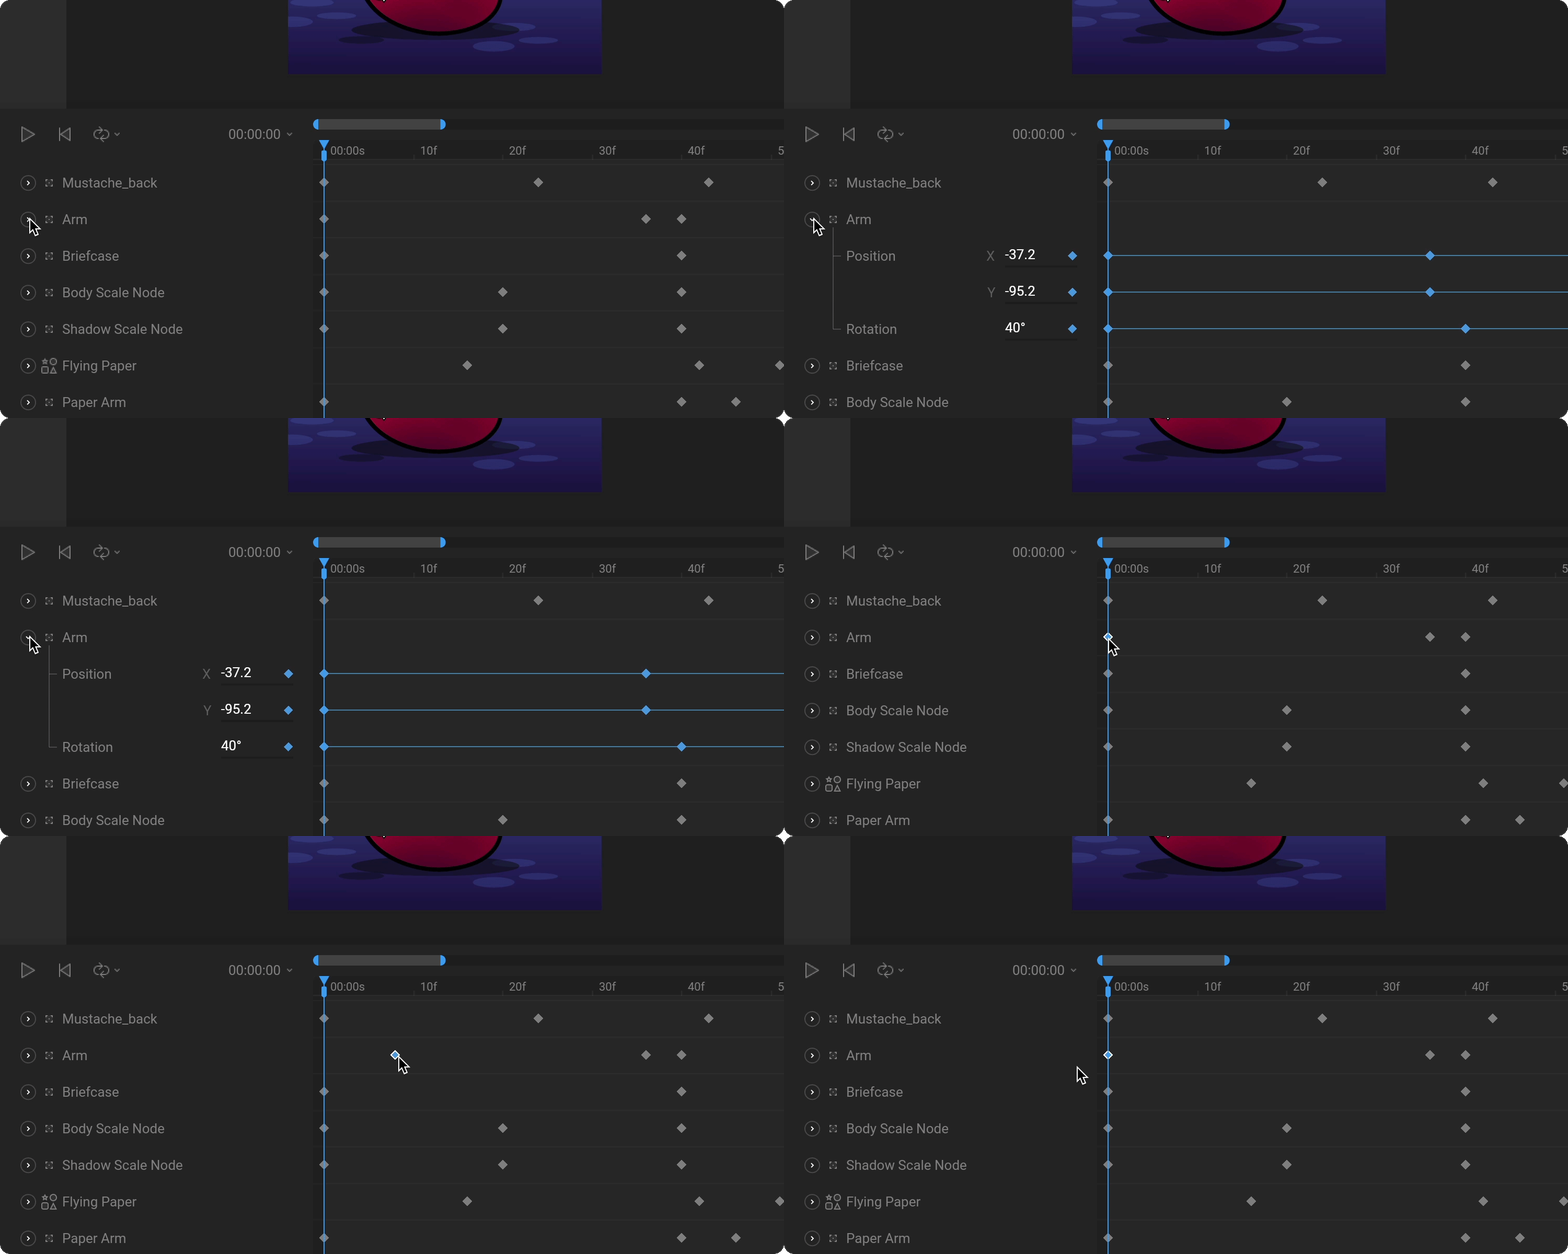
Resizing keys
To speed up or slow down part of an animation, select two or more keys, hold Alt, and drag the first or last selected key. The keys in between spread out or squeeze together to match.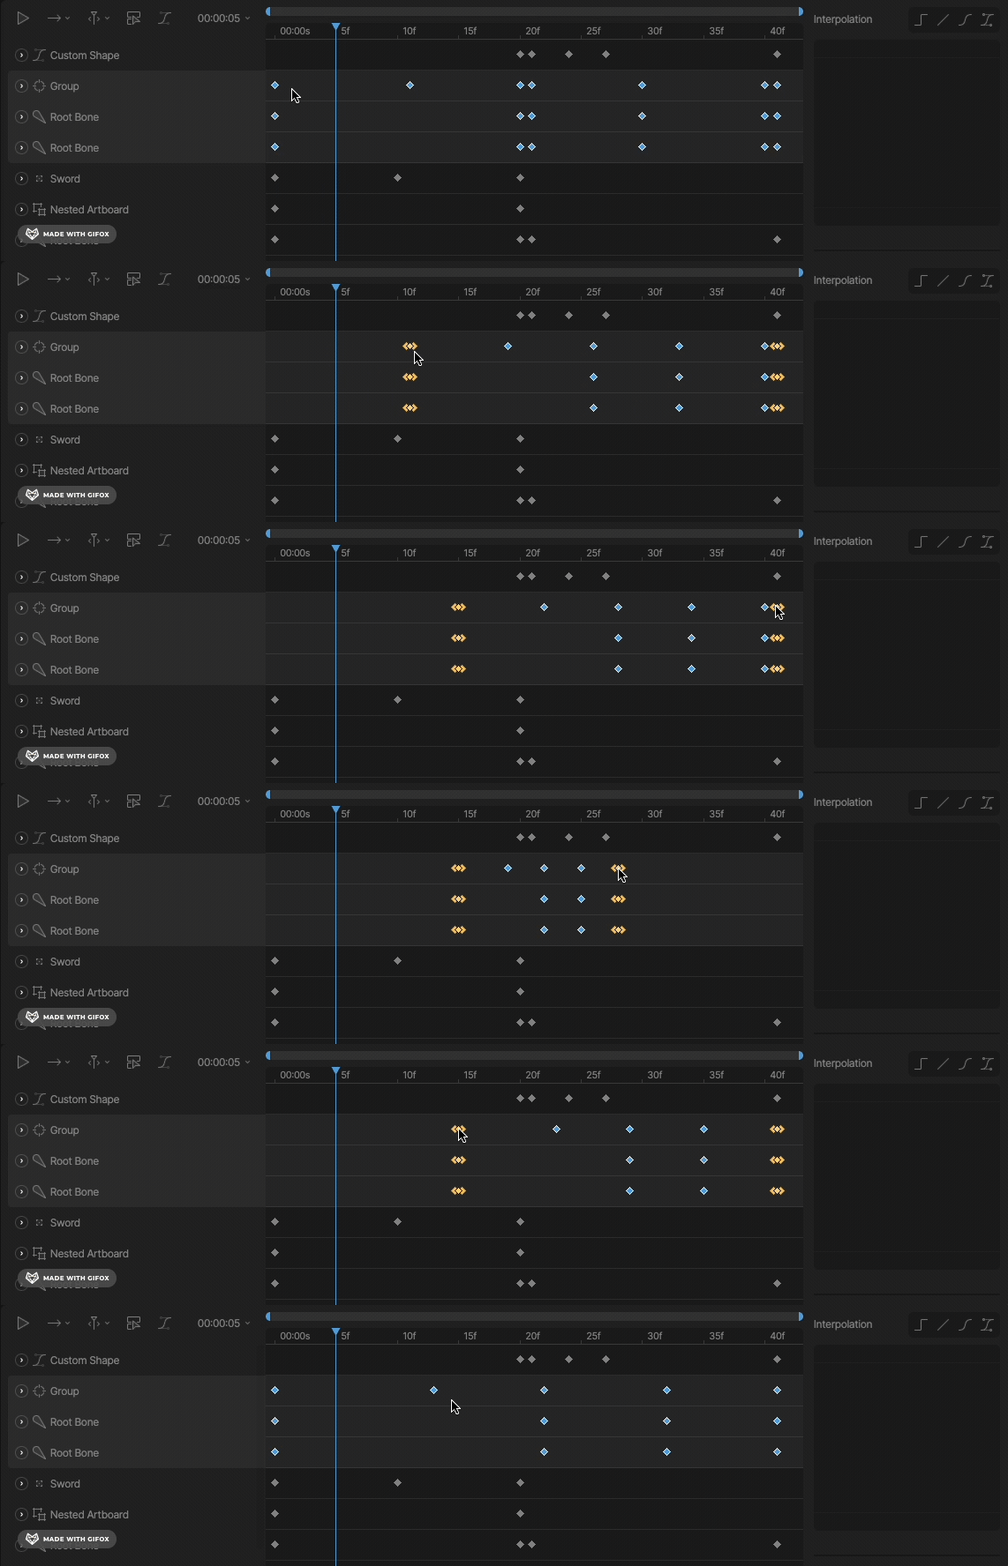
Staggering keys
To offset the same motion across several objects, so each one starts a little after the last, select the keys, hold Cmd/Ctrl + Alt, and drag. Each object’s keys shift by a growing amount, in the order the rows appear on the timeline. When the rows are expanded, each property’s keys stagger separately. When they’re collapsed, each object’s keys move together.Copying and pasting keys
Copy selected keys with Cmd/Ctrl + C. Then select a destination and press Cmd/Ctrl + V. The keys are pasted at the playhead.- To reuse the same motion on another object, select that object and paste. Rive pastes keys onto the matching properties and skips any the object doesn’t have.
- To copy keys from one property to another, such as from X to Y, select the destination property’s row and paste.
Reversing keys
To play a section of an animation backward, select the keys, right-click, and select Reverse keys.Setting the interpolation
To control how a value changes between two keys, select the first key and choose its interpolation. You can also right-click keys and choose a type from the Interpolation menu.Binding key values
You can data bind the value stored in a key. This lets a keyed value come from data instead of being fixed on the timeline.1
Right-click the key you want to bind.
2
Select Data Bind.
3
Choose the property you want to bind to the key value.