> ## Documentation Index
> Fetch the complete documentation index at: https://rive.app/docs/llms.txt
> Use this file to discover all available pages before exploring further.
# World-Space RenderTargets
> Drag a Rive RenderTarget into the level to create an in-world surface with an auto-generated material.
# World-Space RenderTargets
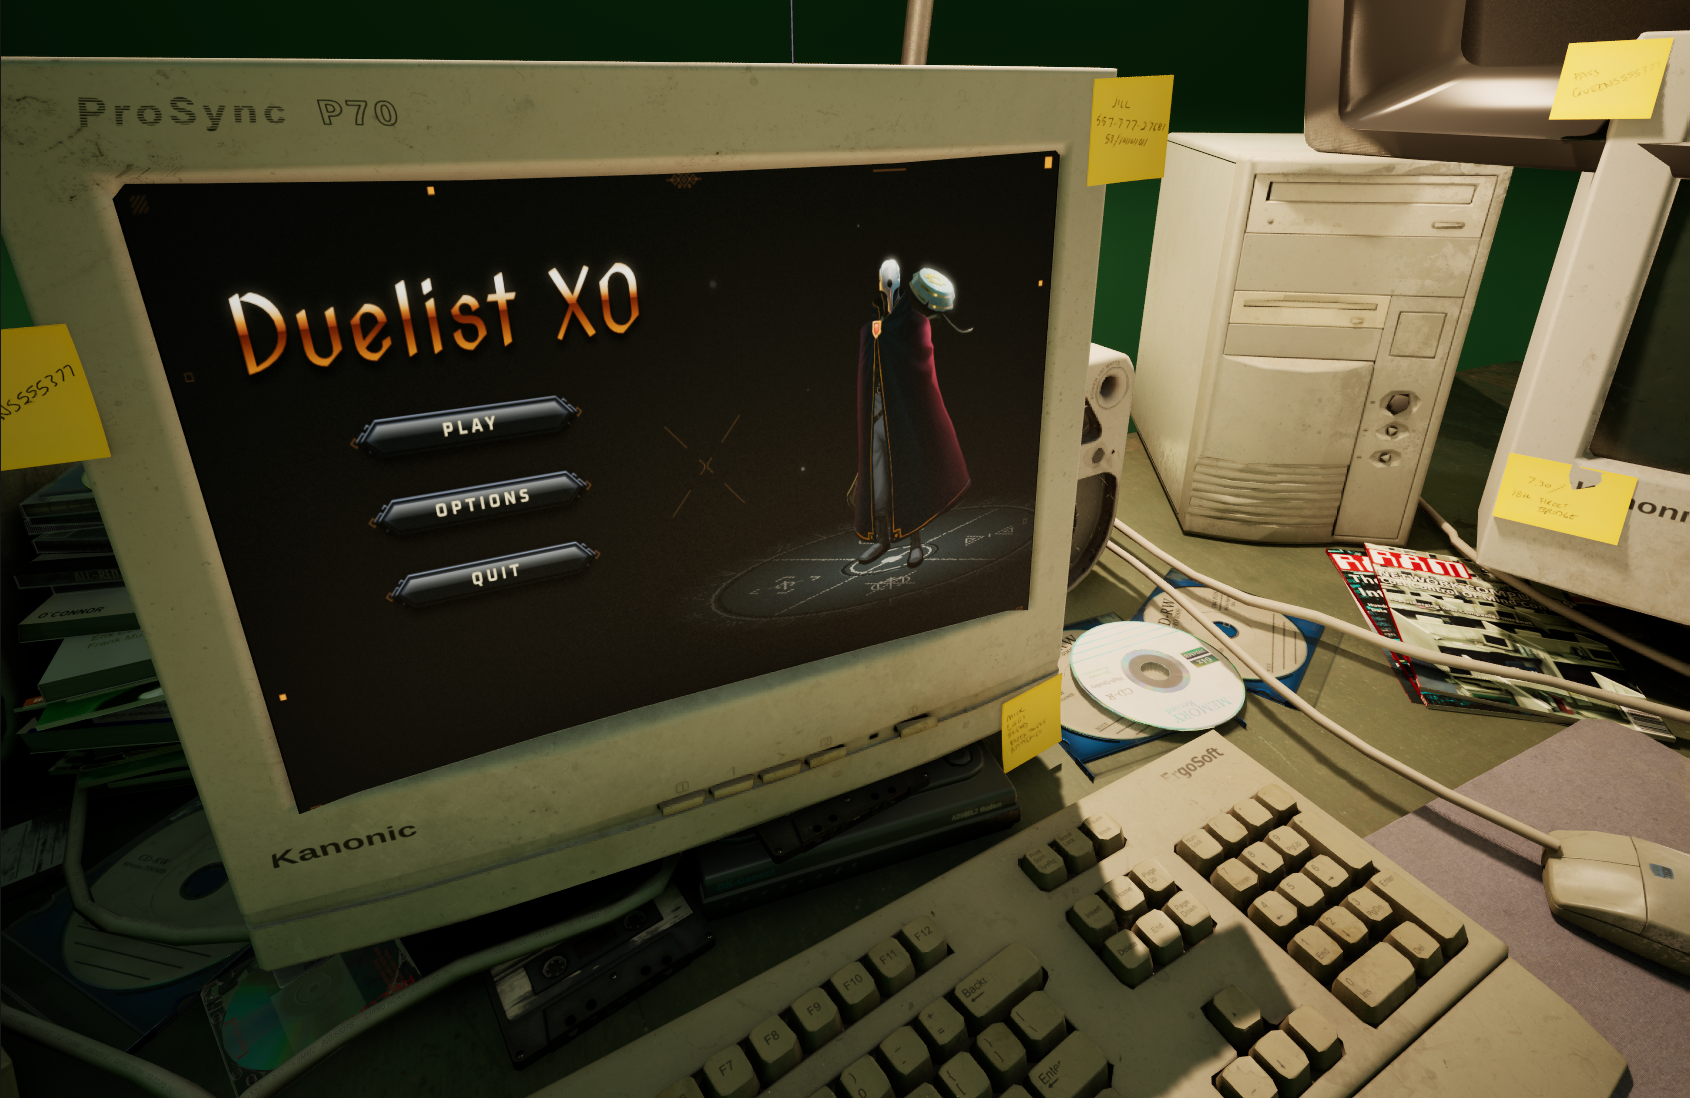 The fastest way to put Rive content on a mesh in world space is to use a **Rive RenderTarget** asset.
You can drag a **Rive RenderTarget** directly into the level. Unreal will:
* Spawn an actor in the scene
* Create a material that displays the RenderTarget texture
* Assign the material to the spawned mesh
This workflow is ideal for:
* In-world screens
* Monitors / kiosks
* Control panels
* “TV” surfaces
This page covers world-space RenderTargets.\
For screen-space UI (HUDs/menus), use **URiveWidget**.
## 1) Create a Rive RenderTarget asset
1. Rigt-click on a Rive file asset.
2. Select **Create Rive Render Target.**
Double clicking the created RenderTarget will open the asset editor in which you can specify:
* **Rive File**
* **Artboard**
* **State Machine** (optional)
* **Size / Resolution**
Start with 512×512. Increase only if the screen is large and close to the camera.
## 2) Drag it into the Level
Drag the RenderTarget from the Content Browser into the viewport to apply it to a mesh. Unreal will automatically create a material that samples the RenderTarget texture. At this point you should see the Rive content on the surface.
## 3) How updates work (Tick + Draw)
A RenderTarget is a texture output. It only changes when the runtime is advanced and drawn.
In practice, you must ensure there is a driver in your scene that:
* Advances the runtime (Tick)
* Draws the frame into the RenderTarget (Draw)
If nothing is driving the RenderTarget, it will appear static.
The recommended driver for RenderTargets is **RiveRenderTargetUpdater**, which is designed specifically for in-world textures.
## 4) Driving the RenderTarget with RiveRenderTargetUpdater
If you are using the RenderTarget workflow, place an Actor in the level that owns the runtime and renders to the target.
Typical setup:
1. Create an Actor Blueprint (e.g. `BP_RiveRenderDriver`)
2. Add a **RiveRenderTargetUpdater** component.
3. Point it at the **RenderTarget** in the details pane.
4. Set the RenderTarget size to match your in-world material needs.
**RiveRenderTargetUpdater** is intended for RenderTargets (world-space textures).\
It is not intended for screen-space widgets.
## 5) Interactivity
If your Rive content is interactive (state machine + view model):
* Bind a ViewModel
* Set ViewModel values
* Fire triggers
The RenderTarget will reflect changes the next time it is driven (tick/draw).
The fastest way to put Rive content on a mesh in world space is to use a **Rive RenderTarget** asset.
You can drag a **Rive RenderTarget** directly into the level. Unreal will:
* Spawn an actor in the scene
* Create a material that displays the RenderTarget texture
* Assign the material to the spawned mesh
This workflow is ideal for:
* In-world screens
* Monitors / kiosks
* Control panels
* “TV” surfaces
This page covers world-space RenderTargets.\
For screen-space UI (HUDs/menus), use **URiveWidget**.
## 1) Create a Rive RenderTarget asset
1. Rigt-click on a Rive file asset.
2. Select **Create Rive Render Target.**
Double clicking the created RenderTarget will open the asset editor in which you can specify:
* **Rive File**
* **Artboard**
* **State Machine** (optional)
* **Size / Resolution**
Start with 512×512. Increase only if the screen is large and close to the camera.
## 2) Drag it into the Level
Drag the RenderTarget from the Content Browser into the viewport to apply it to a mesh. Unreal will automatically create a material that samples the RenderTarget texture. At this point you should see the Rive content on the surface.
## 3) How updates work (Tick + Draw)
A RenderTarget is a texture output. It only changes when the runtime is advanced and drawn.
In practice, you must ensure there is a driver in your scene that:
* Advances the runtime (Tick)
* Draws the frame into the RenderTarget (Draw)
If nothing is driving the RenderTarget, it will appear static.
The recommended driver for RenderTargets is **RiveRenderTargetUpdater**, which is designed specifically for in-world textures.
## 4) Driving the RenderTarget with RiveRenderTargetUpdater
If you are using the RenderTarget workflow, place an Actor in the level that owns the runtime and renders to the target.
Typical setup:
1. Create an Actor Blueprint (e.g. `BP_RiveRenderDriver`)
2. Add a **RiveRenderTargetUpdater** component.
3. Point it at the **RenderTarget** in the details pane.
4. Set the RenderTarget size to match your in-world material needs.
**RiveRenderTargetUpdater** is intended for RenderTargets (world-space textures).\
It is not intended for screen-space widgets.
## 5) Interactivity
If your Rive content is interactive (state machine + view model):
* Bind a ViewModel
* Set ViewModel values
* Fire triggers
The RenderTarget will reflect changes the next time it is driven (tick/draw).