> ## Documentation Index
> Fetch the complete documentation index at: https://rive.app/docs/llms.txt
> Use this file to discover all available pages before exploring further.
# Joysticks
> Joysticks make it easy to set up sophisticated rigs with simple controls. You can quickly animate body poses, eyes, mouths, hands, and more. You can even control joysticks with other joysticks.
export const YouTube = ({id, timestamp}) => {
const videoSrc = timestamp ? `https://www.youtube.com/embed/${id}?start=${timestamp}` : `https://www.youtube.com/embed/${id}`;
return ;
};
Joysticks work by allowing you to pan through different timelines that are assigned to either the X or Y axis of the joystick. Once you’ve assigned the timelines, you can use the joystick to set keys to create animations.
Either watch the video, or read more below.
## Creating a new Joystick
To create a new joystick, either find the Joystick Tool in the Stage Controls Tool menu, or by hitting the J key. Once the tool is activated, click anywhere on the stage to add a new Joystick.
 If joysticks aren't visible on the stage, open the **View Options** menu and make sure **Joysticks** is enabled.
 ## Joystick Properties
With the Joystick selected, you’ll see a number of properties that you can use in the Inspector.
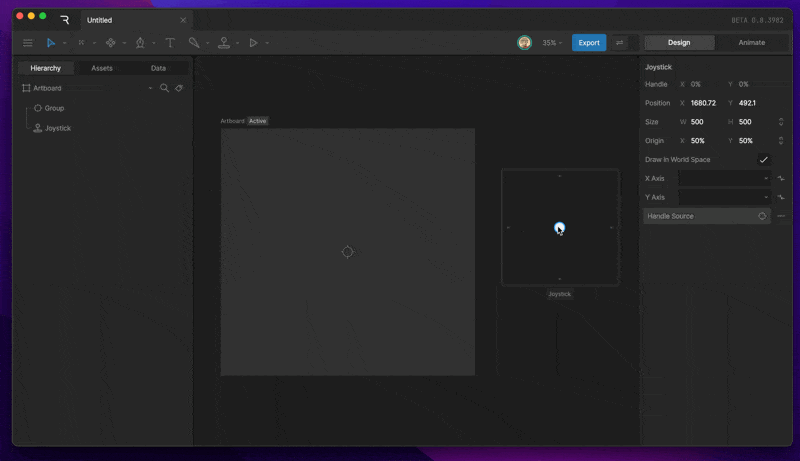
### Handle
The Handle X and Y property describes the position that the handle is currently in. You’ll notice that these properties update as you move the handle around the Joystick.
### Position
The position property describes the position of the Joystick on the stage. For the most part, we won't need to update this property at all while animating.
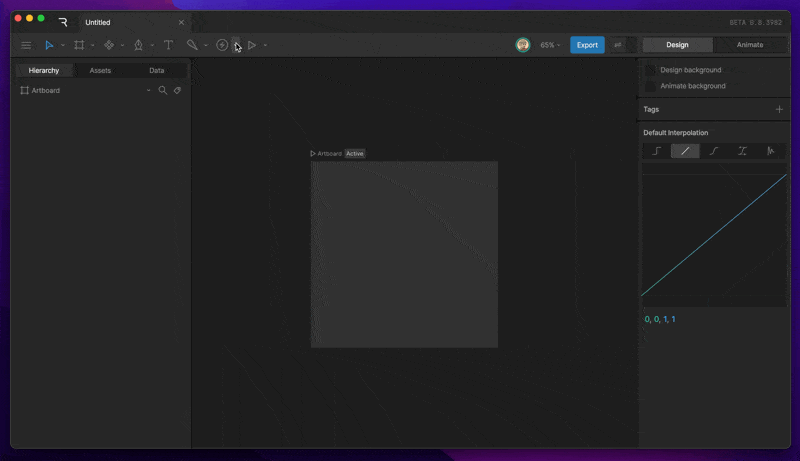
## Joystick Properties
With the Joystick selected, you’ll see a number of properties that you can use in the Inspector.
### Handle
The Handle X and Y property describes the position that the handle is currently in. You’ll notice that these properties update as you move the handle around the Joystick.
### Position
The position property describes the position of the Joystick on the stage. For the most part, we won't need to update this property at all while animating.
 ### Size
The size property describes the size of the joystick. We can modify this property to fit our needs by making the joystick longer/shorter or wider/skinnier.
### Size
The size property describes the size of the joystick. We can modify this property to fit our needs by making the joystick longer/shorter or wider/skinnier.
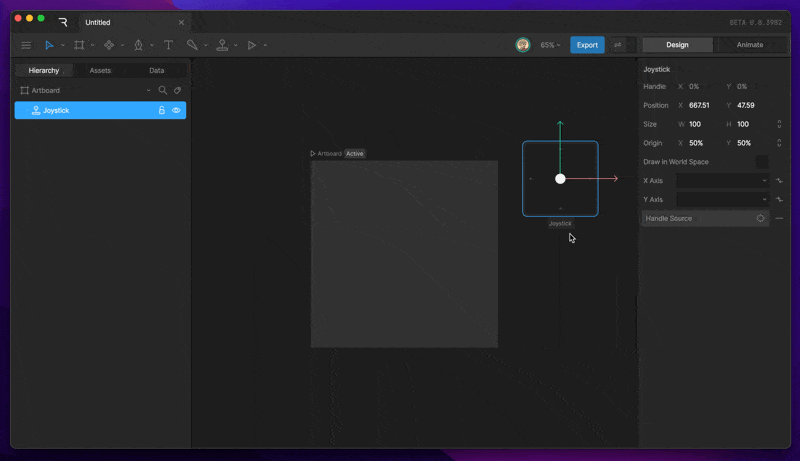 ### Draw in World Space
This toggle tells the joystick whether the joystick will scale with the zoom level or not. This option is useful when we need the joystick to always stay the same size, relative to the artboard.
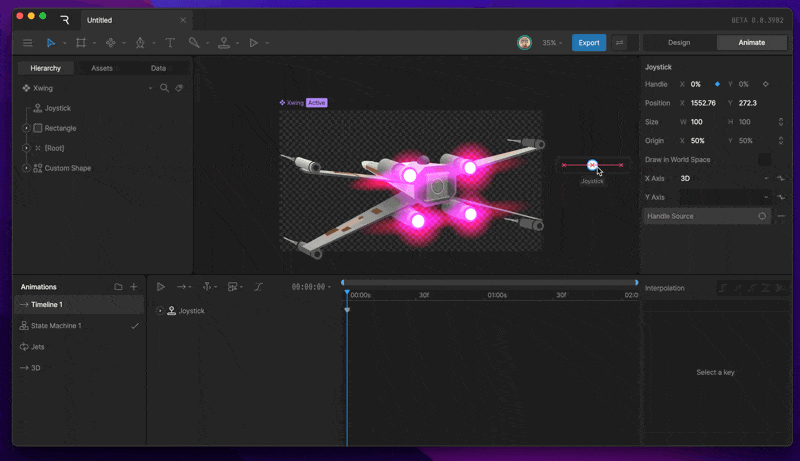
### X & Y dropdown
The X & Y dropdowns allow us to assign timelines to the different axis of the Joystick.
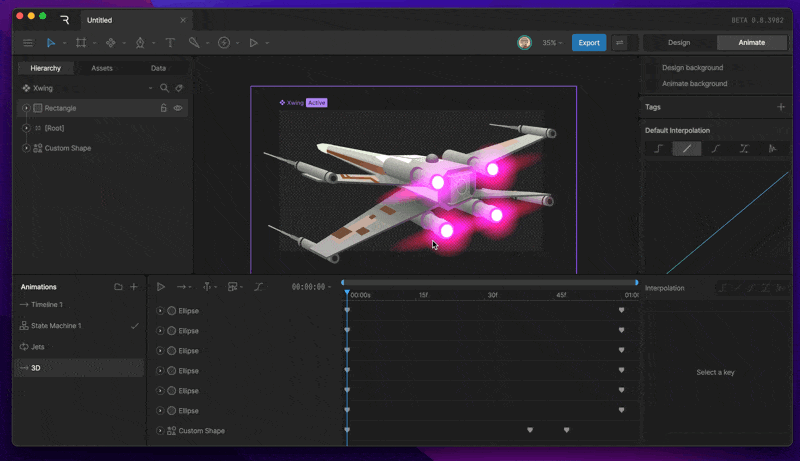
For example, this timeline animates the 3D rotation of this ship. You'll notice many keys, which would make reusing this animation within other animations tricky to achieve.
### Draw in World Space
This toggle tells the joystick whether the joystick will scale with the zoom level or not. This option is useful when we need the joystick to always stay the same size, relative to the artboard.
### X & Y dropdown
The X & Y dropdowns allow us to assign timelines to the different axis of the Joystick.
For example, this timeline animates the 3D rotation of this ship. You'll notice many keys, which would make reusing this animation within other animations tricky to achieve.
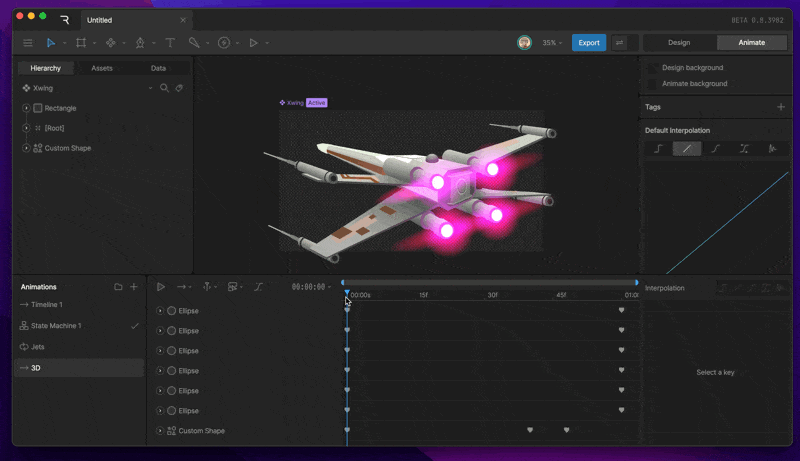 When the timeline is assigned to the X axis of the Joystick, notice that the joystick becomes a slider that only allows you to move the handle in the X direction.
 As we move the joystick up and down, you’ll notice that the ball also moves up and down. Keep in mind that we are scrubbing through the assigned timeline. We can now use this joystick to set keys on a new timeline to create animations.
**Invert Toggle**
After you add a timeline to an axis, you’ll notice a toggle that appears next to it. This allows you to invert the direction that the joystick scrubs through the timeline.
As we move the joystick up and down, you’ll notice that the ball also moves up and down. Keep in mind that we are scrubbing through the assigned timeline. We can now use this joystick to set keys on a new timeline to create animations.
**Invert Toggle**
After you add a timeline to an axis, you’ll notice a toggle that appears next to it. This allows you to invert the direction that the joystick scrubs through the timeline.
 ### Handle Source
The handle source allows you to constrain the position of the handle to another object's position properties. Use the button, then select an object you'd like to use as the handle's position source. This option is helpful when you want the mouse cursor to drive the joystick while the state machine is running.
### Handle Source
The handle source allows you to constrain the position of the handle to another object's position properties. Use the button, then select an object you'd like to use as the handle's position source. This option is helpful when you want the mouse cursor to drive the joystick while the state machine is running.
 ## Joystick considerations
Joysticks are a powerful tool that allows you to create complex deformations, but like with many things in the Rive editor, there are a few things to keep in mind as you set up these controls.
### Conflicting properties
The most important consideration is that when you have multiple animations assigned to the joystick, those timelines will blend. If, for example, both timelines Y property of an object, these joysticks will conflict and prevent that object from moving in the Y direction.
Be sure to separate animated properties to prevent any conflicts. We now actively prevent you from creating keys for properties that are already being used in a timeline assigned to a joystick.
### Creating Complex Deformations
You can add as many keys to a joystick timeline as you’d like. By doing this, we can create incredibly complex deformations, but remember, these deformations will often bloat the size of your file, so use them sparingly.
## Joystick considerations
Joysticks are a powerful tool that allows you to create complex deformations, but like with many things in the Rive editor, there are a few things to keep in mind as you set up these controls.
### Conflicting properties
The most important consideration is that when you have multiple animations assigned to the joystick, those timelines will blend. If, for example, both timelines Y property of an object, these joysticks will conflict and prevent that object from moving in the Y direction.
Be sure to separate animated properties to prevent any conflicts. We now actively prevent you from creating keys for properties that are already being used in a timeline assigned to a joystick.
### Creating Complex Deformations
You can add as many keys to a joystick timeline as you’d like. By doing this, we can create incredibly complex deformations, but remember, these deformations will often bloat the size of your file, so use them sparingly.