> ## Documentation Index
> Fetch the complete documentation index at: https://rive.app/docs/llms.txt
> Use this file to discover all available pages before exploring further.
# Rulers & Guides
> Use rulers, guides, grids, and snapping to align and organize content on your artboards.
export const YouTube = ({id, timestamp}) => {
const videoSrc = timestamp ? `https://www.youtube.com/embed/${id}?start=${timestamp}` : `https://www.youtube.com/embed/${id}`;
return ;
};
export const VideoEmbed = ({src}) => {
return
;
};
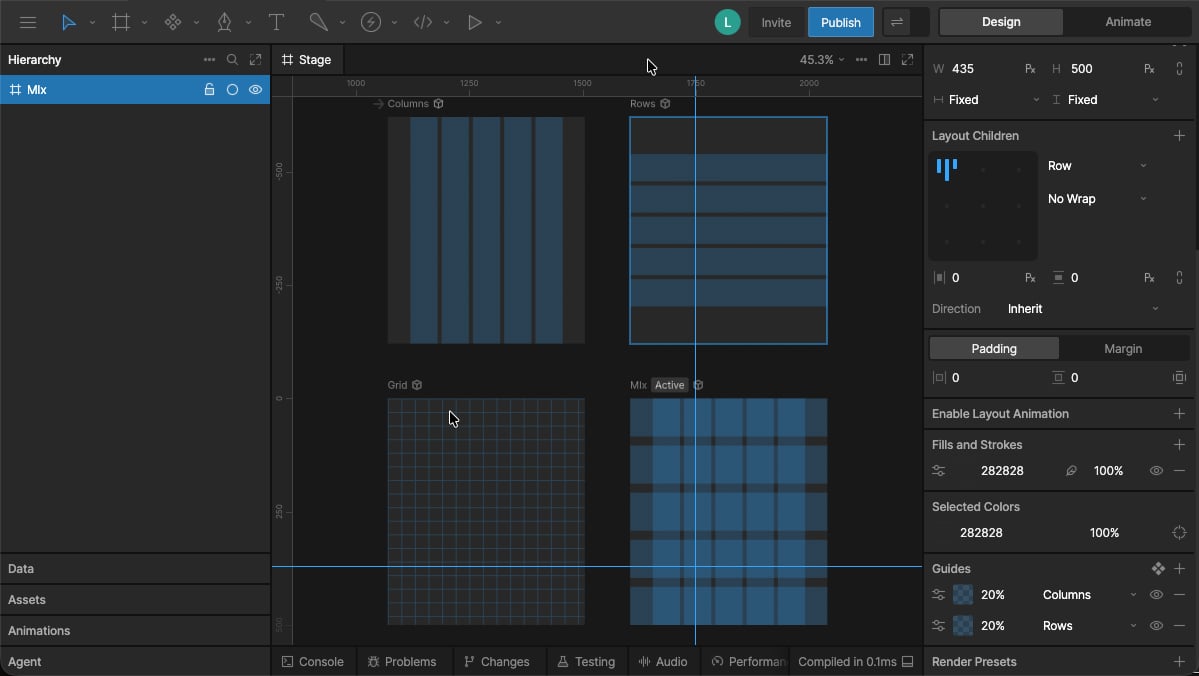
Use ruler guides to place individual horizontal or vertical guides, or use guides to create structured rows, columns, and grids. Guides are specific to the artboard they're created on and are only visible in the editor—they aren't included in the exported `.riv` file.
* **Show or hide:** Click the **eye** icon next to a guide.
* **Remove:** Click the **-** icon to remove the guide.
 ## Toggling Ruler and Guide Visibility
To show or hide rulers and guides, press **;** or select **View Menu > Rulers & Guides**.
## Ruler Guides
Ruler guides are horizontal or vertical guides that you can position anywhere on an artboard. Ruler guides belong to the artboard they're created on, so each artboard can have its own set of guides.
### Creating a Ruler Guide
With rulers visible, click and drag from a ruler into the viewport to create a ruler guide.
### Managing Ruler Guides
* **Move:** Click and drag a ruler guide.
* **Duplicate:** Hold **Alt/Option** while clicking and dragging a ruler guide.
* **Delete:** Select a ruler guide and press **Delete**.
* **Lock:** Press **Option + ;** or select **View Options > Lock Guides** to prevent ruler guides from being moved.
## Guides
Guides let you add rows, columns, or a grid to an artboard. Like ruler guides, they belong to the artboard they're created on.
### Creating a Guide
With an artboard selected, go to the **Guides** panel in the Inspector and click the **+** button. Choose the type of guide you want to add:
* **Rows**
* **Columns**
* **Grid**
## Toggling Ruler and Guide Visibility
To show or hide rulers and guides, press **;** or select **View Menu > Rulers & Guides**.
## Ruler Guides
Ruler guides are horizontal or vertical guides that you can position anywhere on an artboard. Ruler guides belong to the artboard they're created on, so each artboard can have its own set of guides.
### Creating a Ruler Guide
With rulers visible, click and drag from a ruler into the viewport to create a ruler guide.
### Managing Ruler Guides
* **Move:** Click and drag a ruler guide.
* **Duplicate:** Hold **Alt/Option** while clicking and dragging a ruler guide.
* **Delete:** Select a ruler guide and press **Delete**.
* **Lock:** Press **Option + ;** or select **View Options > Lock Guides** to prevent ruler guides from being moved.
## Guides
Guides let you add rows, columns, or a grid to an artboard. Like ruler guides, they belong to the artboard they're created on.
### Creating a Guide
With an artboard selected, go to the **Guides** panel in the Inspector and click the **+** button. Choose the type of guide you want to add:
* **Rows**
* **Columns**
* **Grid**
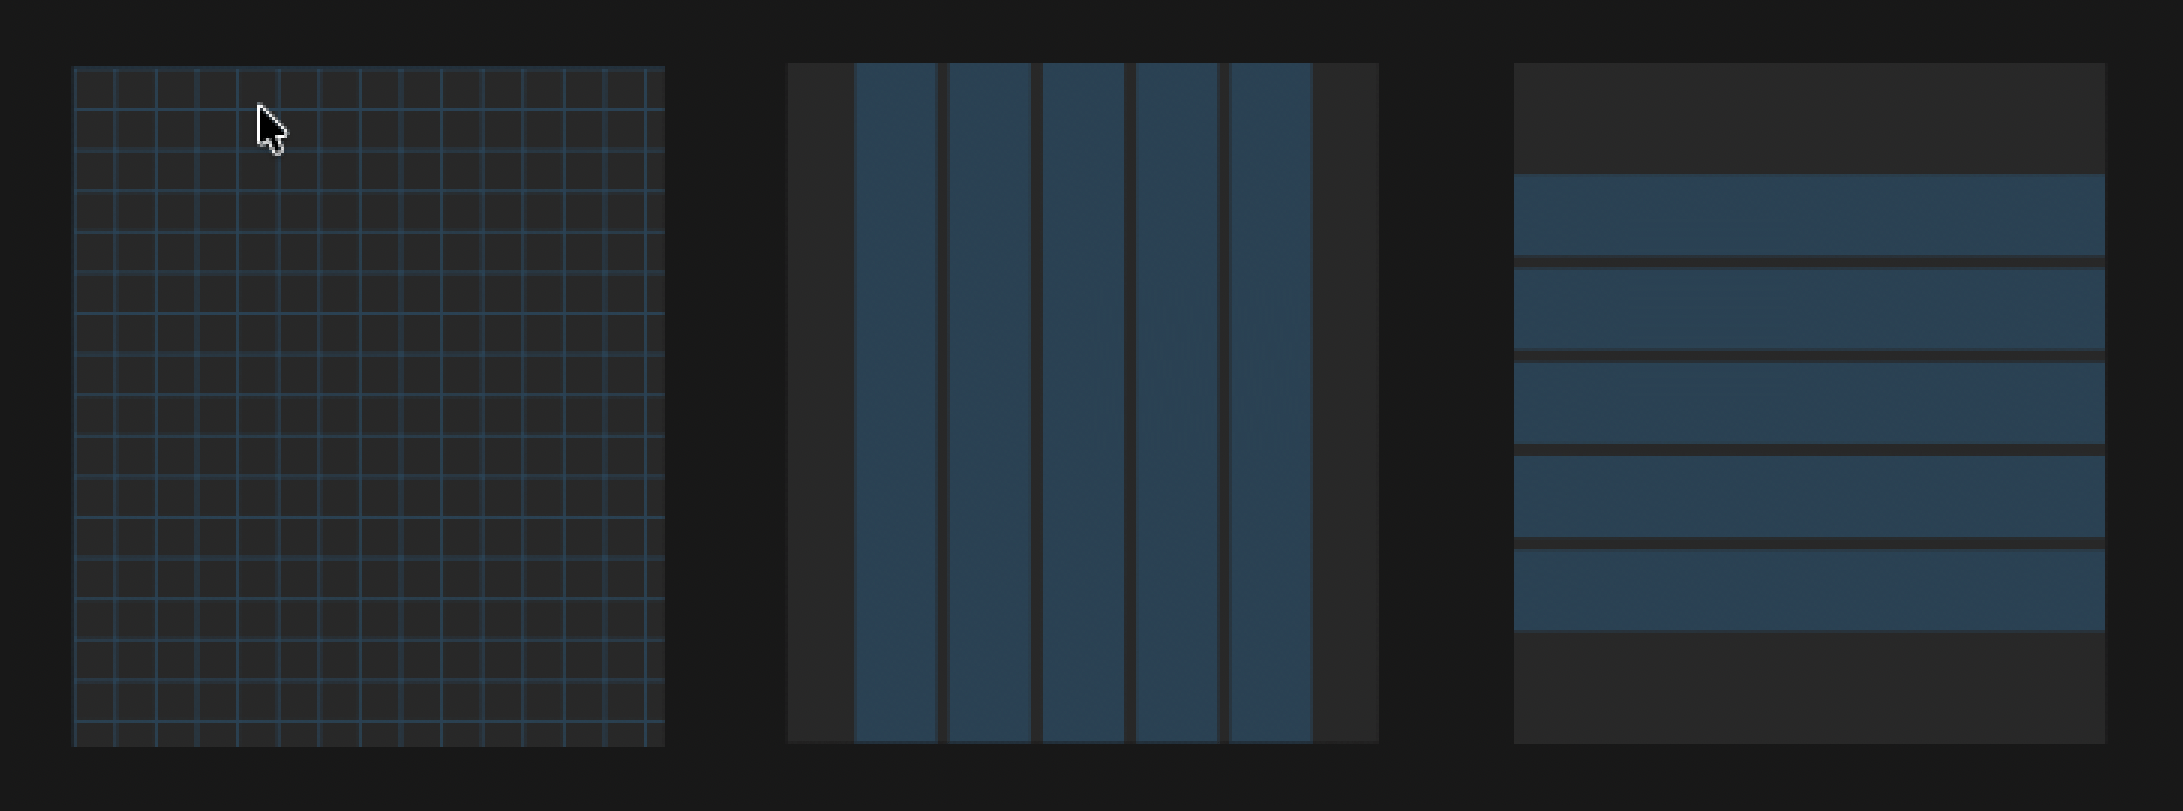 ### Guide Options
The available options depend on the guide type.
**Grid**
* **Color** - Set the color of the grid.
* **Size** - Set the size of the grid.
**Rows and Columns**
* **Color** - Set the color of the guides.
* **Count** - Set the number of rows or columns.
* **Width** - Set the width of each row or column.
* **Type** - Control how the rows or columns are distributed within the artboard: **Left**, **Right**, **Center**, or **Stretch**.
### Managing Guides
You can add multiple guides to the same artboard, allowing you to combine grids, rows, and columns.
### Guide Options
The available options depend on the guide type.
**Grid**
* **Color** - Set the color of the grid.
* **Size** - Set the size of the grid.
**Rows and Columns**
* **Color** - Set the color of the guides.
* **Count** - Set the number of rows or columns.
* **Width** - Set the width of each row or column.
* **Type** - Control how the rows or columns are distributed within the artboard: **Left**, **Right**, **Center**, or **Stretch**.
### Managing Guides
You can add multiple guides to the same artboard, allowing you to combine grids, rows, and columns.
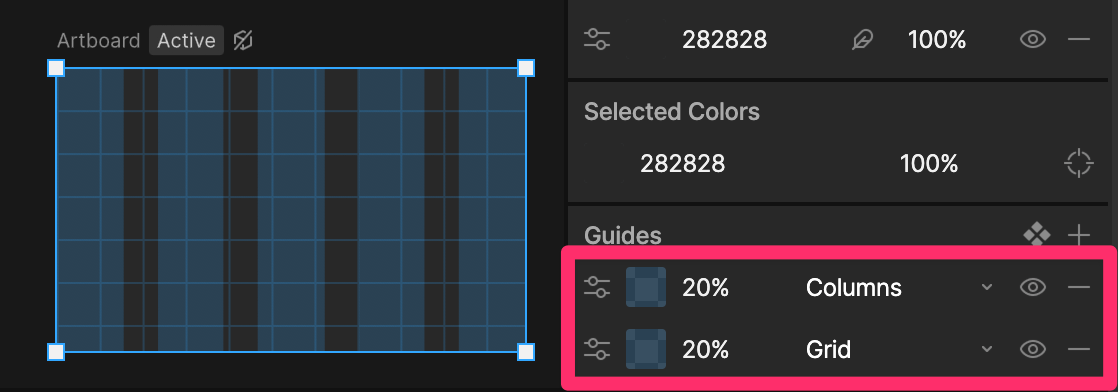 * **Show or hide:** Click the **eye** icon next to a guide.
* **Remove:** Click the **-** icon to remove the guide.
### Guide Components
You can convert the guides on an artboard to a component, allowing you to reuse the same guide configuration across multiple artboards.
In the **Guides** panel of the Inspector, click the **Component** icon. The guides on the artboard are converted to a component and added to the Assets panel.
To edit the guide component, select it in the **Assets** panel. Changes to the component are reflected on every artboard where it's used.
#### Applying a Guide Component
To apply a guide component to an artboard, drag it from the **Assets** panel onto the artboard.
To apply it to every artboard in the file, right-click the component in the **Assets** panel and select **Apply to All Artboards**.
#### Managing a Guide Component
When an artboard uses a guide component, you can manage it from the **Guides** panel in the Inspector.
* **Show or hide:** Click the **eye** icon to toggle the component's visibility.
* **Remove:** Click the **-** icon to remove the component from the current artboard.
* **Detach:** Detach the guides from the component to edit them independently on the current artboard.
## Snapping
Enable snapping to make objects snap to guides and ruler guides as you position them.
Press **Option + ;** or open **View Options** and enable **Snapping**.
* **Show or hide:** Click the **eye** icon next to a guide.
* **Remove:** Click the **-** icon to remove the guide.
### Guide Components
You can convert the guides on an artboard to a component, allowing you to reuse the same guide configuration across multiple artboards.
In the **Guides** panel of the Inspector, click the **Component** icon. The guides on the artboard are converted to a component and added to the Assets panel.
To edit the guide component, select it in the **Assets** panel. Changes to the component are reflected on every artboard where it's used.
#### Applying a Guide Component
To apply a guide component to an artboard, drag it from the **Assets** panel onto the artboard.
To apply it to every artboard in the file, right-click the component in the **Assets** panel and select **Apply to All Artboards**.
#### Managing a Guide Component
When an artboard uses a guide component, you can manage it from the **Guides** panel in the Inspector.
* **Show or hide:** Click the **eye** icon to toggle the component's visibility.
* **Remove:** Click the **-** icon to remove the component from the current artboard.
* **Detach:** Detach the guides from the component to edit them independently on the current artboard.
## Snapping
Enable snapping to make objects snap to guides and ruler guides as you position them.
Press **Option + ;** or open **View Options** and enable **Snapping**.